This week in the Organized Life Series, we will be organizing our music collection. There are various things to consider about this organization plan. How many devices or users do you have? Are you locked into a system? What are your needs? What is your history?
Perspective of this Article
Before we start planning, it’s important to know where I’m coming from.
History
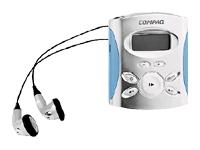
Back around 2001 (I’m guessing, here) I bought my first MP3 player. It was the Compaq iPAQ. It held about as much music as a CD. I was able to make a “mix tape” of sorts to work out because this thing was much smaller and lighter than a CD player.
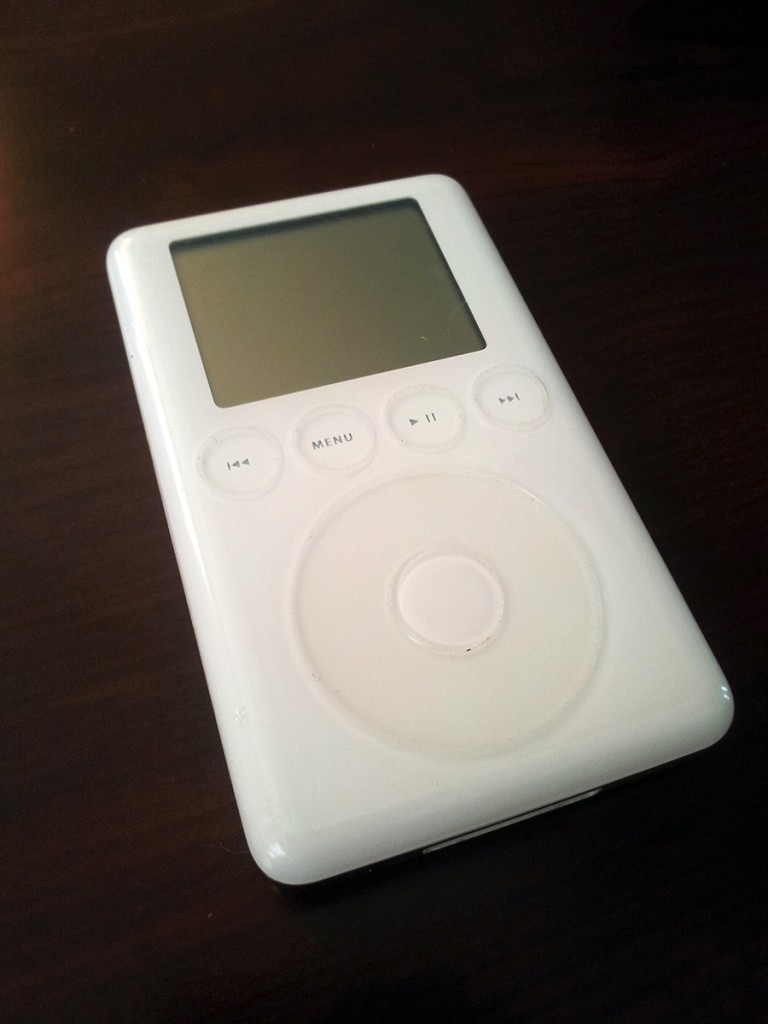
I got my first iPod in 2003 and was an early implementer of iTunes. I began to see the value of buying one song instead of a whole CD. I did continue buying CDs, however. Here’s my iPod Classic (although there wasn’t another type) 3rd Generation:
 Since then my household has owned:
- iPod Mini 1st Gen
- iPod Nano 1st Gen
- iPod Nano 2nd Gen
- iPod Nano 3rd Gen
- iPod Nano 6th Gen
- iPhone 3g (2 of these)
- iPhone 4 (2 of these)
- Samsung Infuse (Android Phone)
- Samsung Galaxy Note (Android Phone)
System
Because of all of the Apple products we own, we have been using and purchasing music through iTunes for many years. Because of that, we’re locked into iTunes. Here’s what we are currently using:
- iPhone 4 – my daughter uses this as her main phone and to listen to music regularly and while in the car.
- iPod Nano – my daughter uses this when exercising or running
- Samsung Galaxy Note – this is my main phone. I rarely listen to music on this. When I’m working, I listen to Pandora on my computer. I do listen to audiobooks on this device, but use the Audible app.
- iPod Nano – I use my 6th gen Nano in my car daily. I keep it connected and rarely use the radio. I also use this if I’m going for a long walk or run outside.
3 out of the 4 devices that we use are Apple and connect to iTunes. I don’t sync music to my Android phone. I tried when I first got it using Spotify, Winamp, and DoubleTwist Airsync but I was extremely unhappy with those solutions. So I just bought a new Nano and got rid of the headache. Right now you can get a refurbished Nano straight from Apple for $99. Well worth it to me.
Users
There are only 2 of us, but we like to share the music, apps, and media that we purchase from iTunes. Because of that, we need a good system to share stuff.
That said, my daughter is going off to college in the fall and taking her laptop with her. She’s going to school less than two hours away and will be home occasionally. That means she doesn’t need her entire library to go with her. She can sync and update her phone at home.
Current Setup
Last year I organized my iTunes to be shared over the network. However, we had to be connected to the network (and the NAS) to use iTunes. Here’s the information on how to Share Your iTunes Library Across The Network and set it up like I did previously.
Organizing
I’ll be keeping this simple. All we’re doing in this article is a little light housekeeping.We will be cleaning up and organizing our music library.
If you need a major overhaul on your system I recommend you check out my article on how to Share Your iTunes Library Across The Network and pay special attention to the Lifehacker link.
#1 – Decide On A Music Player
I’m sticking with iTunes because of all of my Apple devices. I’ve messed around with other players in the past and wasn’t thrilled with them, but make sure you do the same. Have a look at everything from the popular Winamp to the super-customizable foobar2000 and the wonderfully organized MediaMonkey (not to mention Windows Media Player, Zune Player, MusicBee, Clementine, and a whole host of others). Check out all the features, run a demo. Maybe even download one or two and try them.
#2 – Clean Out Your Music
Remember, we’re cleaning house here. Have a look at your library. Is there music in there you will never, ever listen to? Delete it. The easiest way to go through your library is to click first on Album, then on Artist. This will sort your list by artist with all of that artist’s albums in order after that.

Now, dig in! Go through the list and delete anything you don’t want. If you really don’t want to delete it, archive the original file in your computer system and just remove the music from your library. Check that archive in a year. If you haven’t pulled anything out of the file by then, delete the archive.
Right now, don’t do anything but delete unwanted music.
File Duplicates: When I go through my iTunes folder, I find a Music folder in 3 places: iTunes\Music, iTunes\iTunes Music, and iTunes\iTunes Media\Music. iTunes did this crap. When an update to iTunes would force the movement of files, it didn’t clean up the old empty file structure. After digging around I found that the only one I needed was iTunes\Music. Basically, my files were an absolute mess. This called for Extreme Cleanup. If you’re in a similarly bad position, skip down to the Extreme Cleanup section below.
Otherwise, in iTunes, click on File while holding down the shift key. You’ll see Display Exact Duplicates. Click on that.
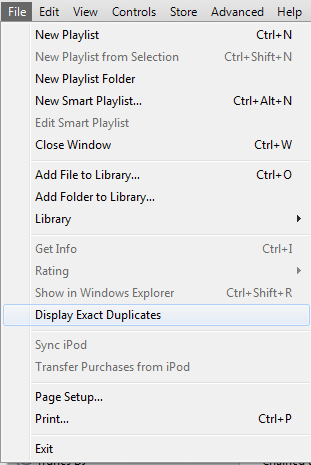
From there, sort by Album then look for duplicates and remove them manually. I had over 1,000 titles showing up in these duplicates. This was cause for Extreme Cleanup. (see below)
#3 – Clean Up Your Metadata
For my use, I really don’t care about the Metadata, but some of you might. Here’s a great article from Lifehacker about Whipping Your Metadata Into Shape.
Extreme Cleanup
When you dig around in your file system, you have music in 3 or 4 places. You have over 5,000 songs. You have thousands of duplicates. It’s a nightmare. Where do you start? In my case, I decided to start over. Maybe it was a mistake, maybe not. But here’s how it was done.
#1 – Remove all media from iTunes
Be aware that this is removing things from the LIBRARY, not from your file system. The first popup from iTunes will ask if you really want to remove the item from iTunes. Say yes. The second will ask if you want to permanently remove the file. NO!!! Do this for all music, movies, TV, books, apps, etc. Don’t remove your playlists.
Update: It seems this emptied my playlists. Alas. I needed to update my playlists anyway.
#2 – Clean up your file system
Close iTunes and go clean up that unholy mess. Choose a location for your files and Merge the other files with it. For example, if you have Music folders in 3 places: iTunes\Music, iTunes\iTunes Music, and iTunes\iTunes Media\Music., you need to pick a final resting place and merge to that location. Let’s say from the previous example that you choose iTunes\Music to be your choice of location. Go to iTunes\iTunes Music and copy all of the contents to iTunes\Music. When you get the option, MERGE the files. Better yet, use a software such as SyncBackSE. Theh point is to have that copy of Elvis Presley’s Blue Suede Shoes in only 1 folder. Merge!
#3 – Add everything back to iTunes
Go into iTunes and add your folder to iTunes. This could take days, a week even. This was a complete nightmare for me. It kept telling me that I had a copy of this or that app and forced me to INDIVIDUALLY answer whether I wanted to keep it. For pete’s sake, why couldn’t Apple make a nice check box for “do this for all files like this” or something. Man, what a pain!
#4 – Manually search for duplicates
I had over 1,000 duplicate files according to iTunes and needed a way to clean that up without doing it one at a time. By looking around a little, I found that there were multiple copies of an item like item.mp3, item 1.mp3, etc. so I did a search for different file types (like .mp3, .m4a, .m4b, .m4p). Here are the searches I ran in Windows Explorer:
- ” 1.mp3″
- ” 2.mp3″
- ” 3.mp3″
- ” 1.m4p”
- ” 2.m4p”
- … and so on…
After going through the search, delete the duplicates. Since you are deleting the actual files, iTunes will still show the duplicates and you won’t know which one to delete from your library. Again, annoying Apple has no way to simply refresh and show the dead links. However, there is a script for that.
#5 – Remove Dead Links from iTunes
- Close iTunes if you have it open.
- Go to the text file download page, right-click on it, and save the page as a file, making sure you change the extension to .js. For example, in Firefox right-click on the page, choose Save page As and change the file name from RemoveDeadTracks.txt to RemoveDeadTracks.js.
- Open Windows Explorer and browse to the file you just saved
- Double-click on the file.
The script will open iTunes, and then start running through removing dead links. You may not realize at first that it is running, but if you look at the bottom of iTunes, you’ll notice that the number of files is decreasing. Mine took around ten minutes and correctly removed nearly two thousand links.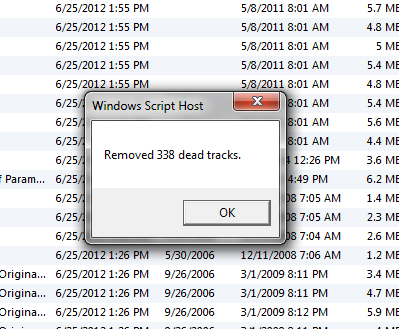
Steps 1-5 should significantly decrease your duplicates. Go through now and manually remove any duplicates that are left. Then go back up to #3 above and Clean Up Your Metadata.

