Blog Backup Tutorial
It is a good idea to backup your blog often, particularly during development and when adding themes and plugins.The following tutorial contains instructions on how to backup your WordPress blog folder and your database on the Godaddy hosting servers.
See the following tutorials for information on those topics:
- [cref blog-basics-tutorial]
- [cref blog-themes-tutorial]
- [cref blog-plugins-tutorial]
Blog Folder Backup
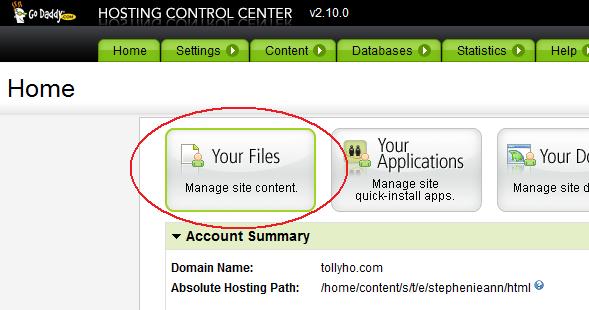
- Log in to your GoDaddy account and go to the Hosting Manager. From the Control Center, click on “Your Files” to get to the online file manager.
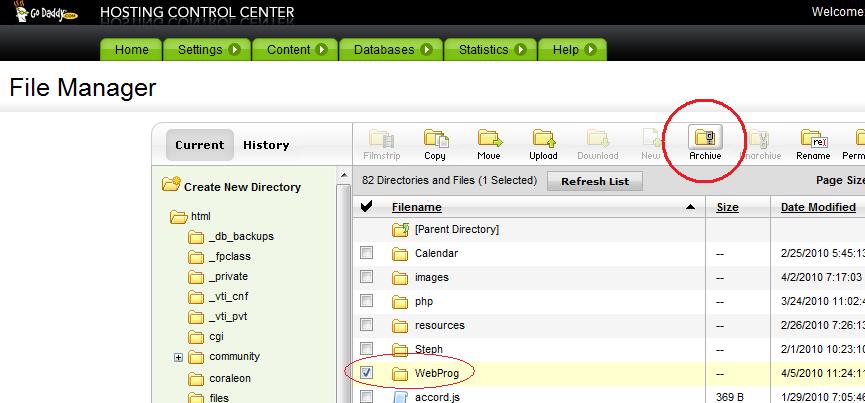
- Navigate to your webpage root folder. In my case, that folder is “lexclab”. Select your Blog folder filename and click on “Archive”.
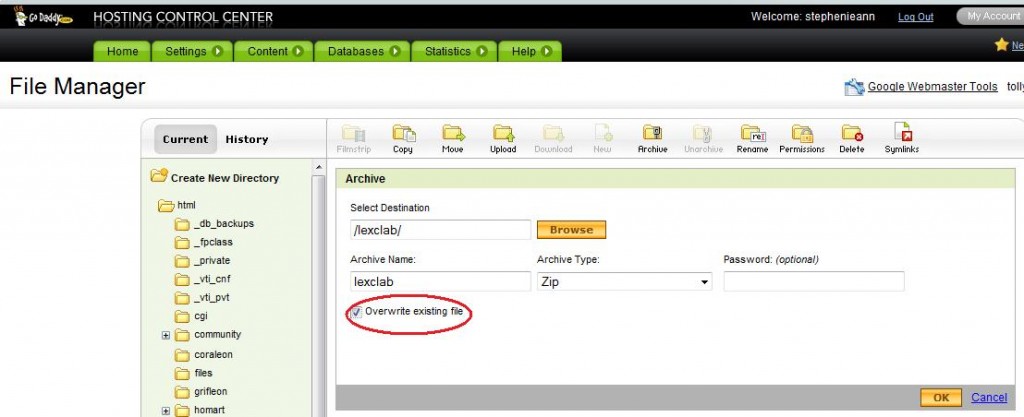
- I recommend that you have the file overwrite. You can keep a running history if you like, but I just want the most recent archive in my history to save space. I have a lot of webpages running off this one hosting account. Then click “OK”
Blog Folder Restore
To restore your blog folder to a previous backup point, you will need to have previously backed it up, obviously. After that, you can restore at any time. To do that:
- Log in to your GoDaddy account and go to the Hosting Manager. From the Control Center, click on “Your Files” to get to the online file manager.
- Click on the “History” tab in the left column. Then navigate down to your web folder. Select your Blog Folder. Click “Restore”.
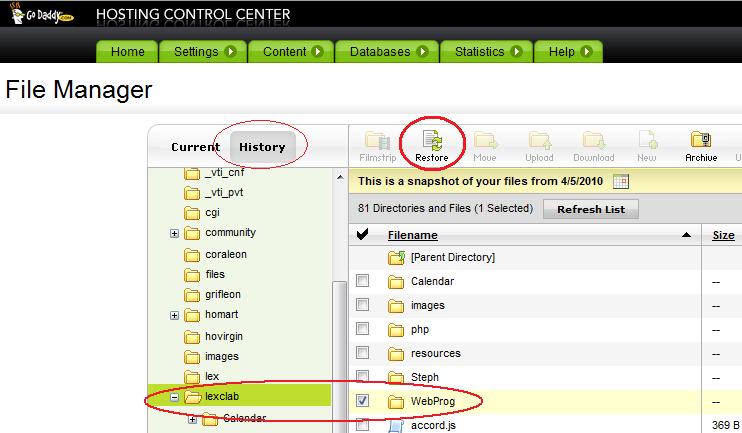
- You will be given a few options. I recommend leaving them blank and overwriting when restoring so that the restore will overwrite the current copy.
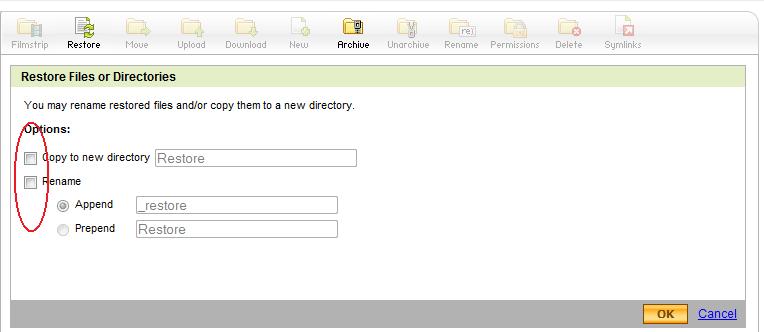
- For some reason, this seems to make the system unhappy, but who really wants a /WebProg folder and a /WebProg_restore folder?? When it gives you the warning that seems like a total fail, continue and click “Yes To All”.

- A little window will pop up telling you your restore is complete.
Database Backup
In addition to the folders on your server that contain your settings and layout, your actual data must be backed up. That data is in your GoDaddy database. Here is how to do that backup.
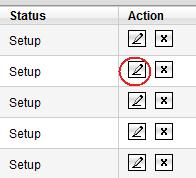
- Log in to your GoDaddy account and go to the Hosting Manager. From the Control Center, click on “Databases > MySQL” to get to the online database manager. On that page, select the Edit Icon next to the database that you want to Backup.
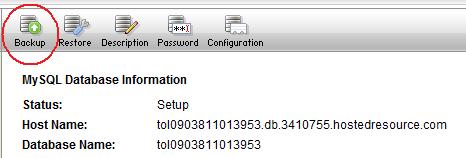
- On that page, you will see information on your database and several options at the top of the page. Click on the “Backup” link.
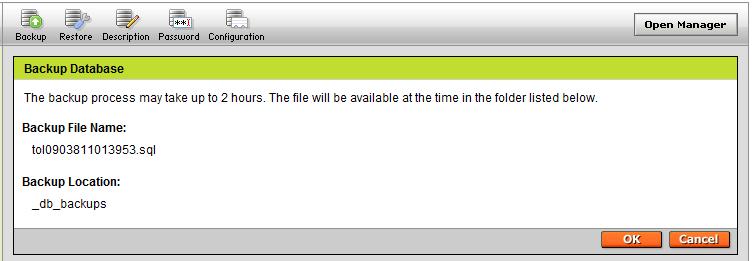
- You will see a warning telling you that it takes a while to backup the database. Click “OK”.
- You can check your status by going to the Control Center and clicking on “Databases > MySQL” . You will see one of the following. In the example below, the first listed database is ready to access, but the second is in the process of a backup. When the status returns to normal, your backup is complete.

Database Restore
Restoring a backup database copy is very similar to doing the backup. Follow these steps.
- Log in to your GoDaddy account and go to the Hosting Manager. From the Control Center, click on “Databases > MySQL” to get to the online database manager. On that page, select the Edit Icon next to the database that you want to Backup.

- On that page, you will see information on your database and several options at the top of the page. Click on the “Restore” link.

- Select the file you would like to restore. If you have more than one backup of the same file, check the dates for the one you want. Then click on “Restore”.

- You will see a warning. Read it and click “OK”.

- You will be taken back to the details page for that database and will see the status is “Pending Restore”. You can check back until the status is “Setup”. That means the restore is complete.

