As a part of Backups: #9 in the Organized Life Series we discussed using SyncBackPro. You have a rough idea of what the software is. The Pro version is a one-time purchase of $54.95 but is necessary if you want to do a SFTP backup.
SFTP, or secure FTP, is a program that uses SSH to transfer files. Unlike standard FTP, it encrypts both commands and data, preventing passwords and sensitive information from being transmitted transparently over a network. Functionally similar to FTP, SFTP uses a different protocol, it is not possible to use a standard FTP client to talk to an SFTP server, nor is it possible to connect to an FTP server with a client that supports only SFTP.
You can use other versions like SyncBackSE to have wonderful control over your local backups, but we need the pro version to do our own “cloud server”.
Online Storage
I’m assuming you have FTP access to online storage such as the Godaddy Ultimate Hosting Plan (Unlimited domains and storage) for $8.49 a month.
Local Backups
Before you do an online backup, it’s smart to get all of your files in one location. Hopefully you’ve been following the Organized Life Series and have all your documents and media in one place. That said, you do still have some working files and probably a Dropbox folder on each of your individual machines.
For the purposes of this tutorial I’m assuming your local backup will be on a mapped network drive or in an attached external hard drive.
Setting Up a Local Backup
- Open SyncBack
- Click on New and name your profile. For example, BackupDropboxToNas. Click on Next.
- Choose whether you want to backup, sync, or mirror. We are doing a backup. Select that and click on Next.
- Choose your source. For this backup we’re only working with local files. Click on Done.
- We’re doing a simple backup, so don’t change any settings. Just choose the source and destination files. In this case, the source is the Dropbox folder and the destination is on the S: drive.
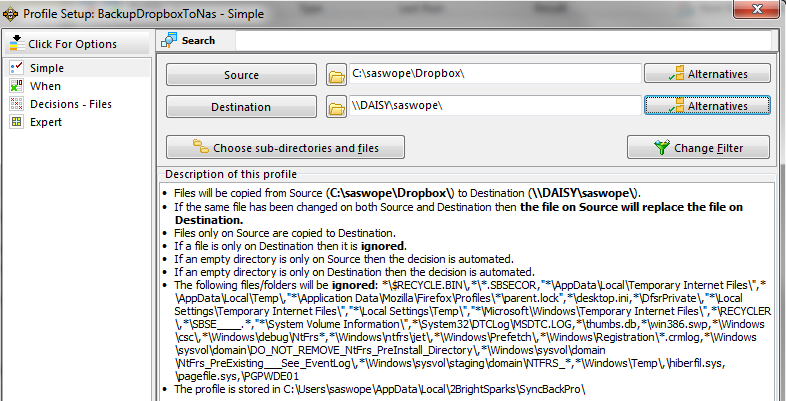
- Click OK then Yes to run a simulation. This will give you an idea of what errors or problems might occur. When it’s done running you’ll see the differences report and have the option to change actions.
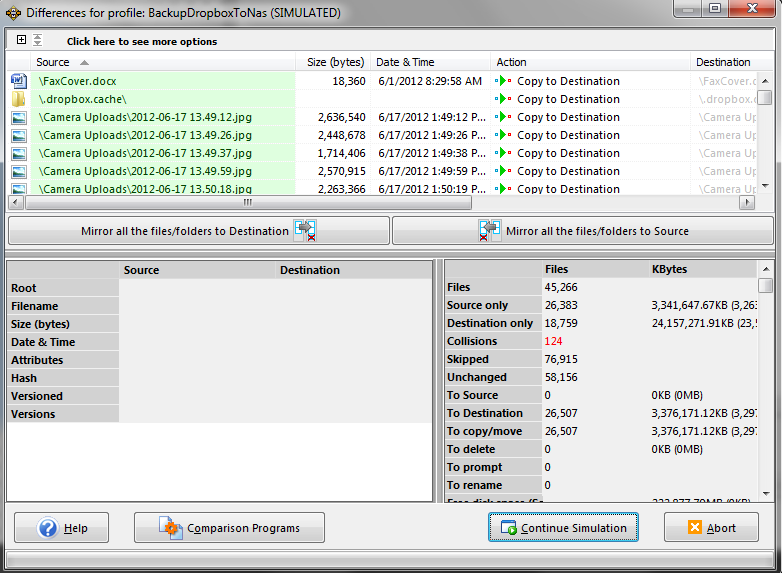
- There should be no major changes for your first backup, so Continue Simulation.
- Set up a schedule. Right Click on your profile and select Schedule.
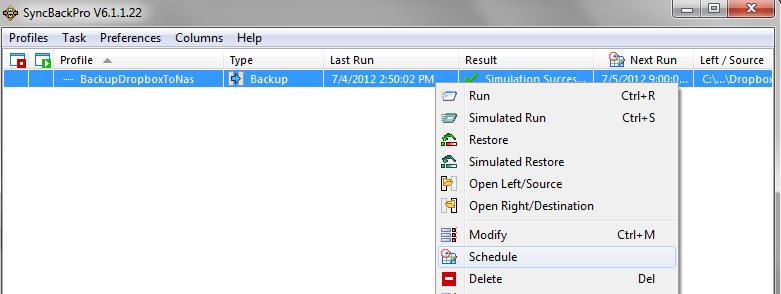
- You may be prompted to enter your Windows User password. This will allow the software to be able to run even if you are not logged in. This is particularly useful if you set the backup to run overnight.
- Set up your schedule as desired. For your documents you may want a daily backup.
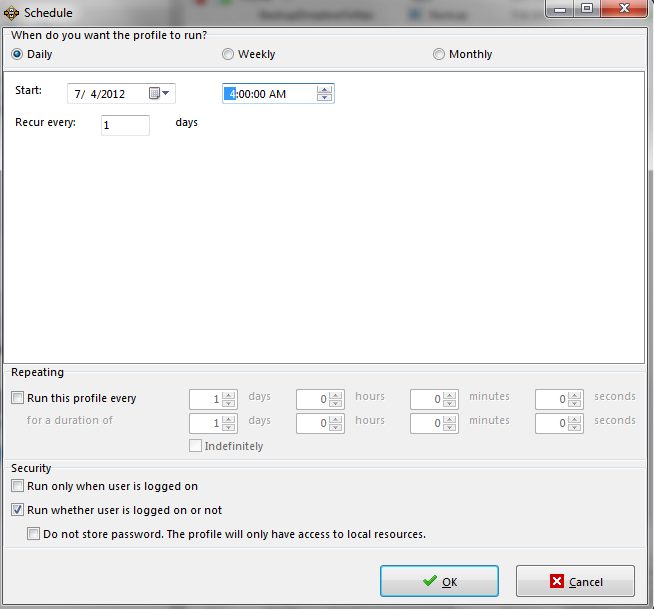
- Click Ok and you’re done!
You will need to set up local backups for other users and machines. You will only need to set up one Dropbox location backup since Dropbox automatically syncs across all locations. However, you will want to backup your kids’ homework, your significant other’s files, desktops, etc.
Online Backups
Now the raison d’être! Let’s backup our entire backup drive to the “cloud”.
- Open SyncBack
- Click on New and name your profile. For example, BackupNasToCloud. Click on Next.
- Choose whether you want to backup, sync, or mirror. We are doing a backup. Select that and click on Next.
- Choose your source. For this backup the source is a local file and the destination is FTP. Click Next.
- Fill in your FTP info as needed. Note: I had to do ftp.domain.com. I also had to go into my Godaddy account and enable SSH.
- Select your source and destination folders. I set my source as the root folder of my NAS. I noticed that the SFTP site was sitting at one level above my standard Godaddy root. You do need to be aware of your “home directory” or “absolute hosting path” assigned by your hosting company. In my case, it’s /home/content/55/3410755/html. So I had to navigate to the html folder then go down to where I wanted to store my files.
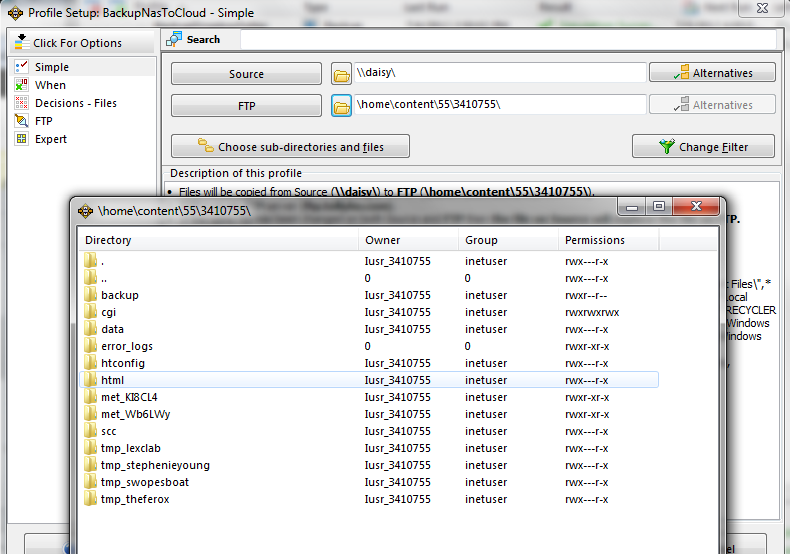
- Once again choose your schedule. Right Click on your profile and select Schedule.
- Set up your schedule as desired. For your huge backup file you may want a monthly or weekly backup.
- Click Ok and you’re done!
Email Backup
Doing an email backup is just as simple. However, before you get started, you need to know what your connections settings are. If you use Gmail, they are located on the Support Page. You should be able to locate something similar for other email clients.
- Open SyncBack
- Click on New and name your profile. For example, BackupGmailToNas. Click on Next.
- Choose whether you want to backup, sync, or mirror. We are doing a backup. Select that and click on Next.
- Choose your source as email and your destination as local files. Click Next
- Fill in the connection settings and test them. Click Done.
- Select your destination folder and click OK.
- Once again choose your schedule. Right Click on your profile and select Schedule.
- Set up your schedule as desired. For your huge backup file you may want a monthly or weekly backup.
- Click Ok and you’re done!
Restore
If you need to restore a backup, select the profile, right-click and select Restore.


