This week in the Organized Life Series you will be organizing your photos. Throughout the years you have probably gathered a collection of old photo prints, Polaroid photos, school pictures, portraits and digital photos. This week’s project could become very large. You’re going to organize your existing digital photos, sync them with a backup system, then begin the process of scanning your prints into the digital system and archiving the photos you want to keep.
#1 – Gather All of Your Photos
To begin the process, you will need to gather all of your photos into one digital and physical location.
If you have old boxes and photo albums of photos, get those to your office. If they’re in an attic, garage, or other area that experiences extreme temperatures, get them out of there immediately! Organize your boxes and albums to neatly take up as little space as possible.
While working on your Document Organization, you should have dropped any photos you found into your My Pictures or some other folder on your computer. Make sure that all of your documents are together.
#2 – Organize your Digital Photos with Picasa
First, a little clarification. Picasa is owned and developed by Google. There are two portions to Picasa: Picasa Software and Picasa Web Albums. The Picasa software is software you download to your computer to organize your photos on your local drives. Picasa Web Albums are online-only albums.
Cost: I got grandfathered into the old Google storage system before they introduced Google Drive. Google Drive is a monthly service plan. 25GB costs $25 a year paid monthly. I’m paying $5 a year for 20GB. What this means to you is that storage on Picasa Webs might be cost prohibitive. However, there is unlimited free storage of photos in Google+. We’ll be addressing both areas as backup plans and photo sharing.
This isn’t meant to be a tutorial on Picasa. There are tons of those out there if that’s what you’re looking for. What we’ll be doing here is examining Picasa as a solution for organizing and backing up our photos.
Picasa #1 – Install Picasa
Go to the Picasa Software website to download and install the software on your computer.
Picasa #2 – Import Your Photos
Point Picasa to the folder where all of your pictures are located and let it go to work indexing your files. If you have a lot of files, this could take a long time. Seriously. Days. I have over 21,000 photos in my folder and that doesn’t include the scans we’re going to do. So while Picasa is going through your files is a good time to skip below and start scanning your physical photos.
Don’t import duplicates!
If you use the Import button to bring photos already on your hard drive into Picasa, you’ll end up with two copies on your hard drive and on display.
To exclude duplicates while importing, select the ‘Exclude Duplicates’ option at the bottom of the import page. Picasa detects duplicate photos by comparing file sizes, names and when necessary a small portion of each image. If a photo in the Import Tray displays a red x, it’s already included in Picasa and won’t be imported. You can also set this as a default preference in Picasa.
Picasa #3 – Decide On Your Photo Structure
While working on your Document Organization, you had to develop a structure. In that article, we discussed organizing according to life function. Photos are different. Your photo albums typically consist of Events. Think backwards when developing your system. If you’re looking for a photo, what are you looking for? You are typically looking for one of 3 things:
- People – you may be looking for pictures of your kids or a grandparent. Often, it would be handy to view photos of a person all together in chronological order.
- Places – Every year for 10 years you took your kids to the beach. Maybe you remember there was a great vacation photo from your hotel but can’t remember when it was. Maybe you want to view all your Walt Disney World Photos.
- Dates/Events – Birthday parties, holidays, vacations, Christmases, school plays… Life is full of events that we photograph. Sometimes you want to see all the photos from a particular event.
This is where Picasa really shines. Organize your folders by events. Tag people, tag places. You will then be able to find people, places, and events easily.
Picasa #4 – WITHIN Picasa, Organize Folders
It’s important that you either work with your files manually or work with your files within Picasa. Going back and forth can cause folders to become lost.
Check your view. Within Picasa, click on the Tree View Button. Then, click on the arrow beside it and set the following settings:
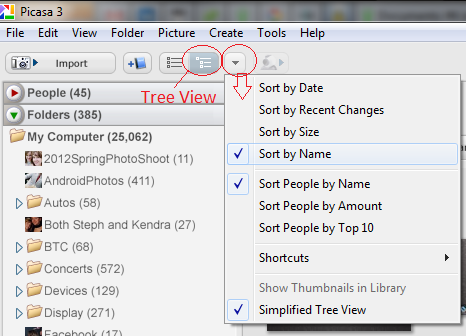
If your version of Picasa doesn’t have these particular buttons, the same settings are available through View > Folder View. I am running version 3.8 because the updates in 3.9 seemed to break the software. Constantly freezing up. I reverted to 3.8.
You can turn on or off the Simplified Tree View. It will show you only your top folders. If you turn it off, you see the entire depth of the tree.
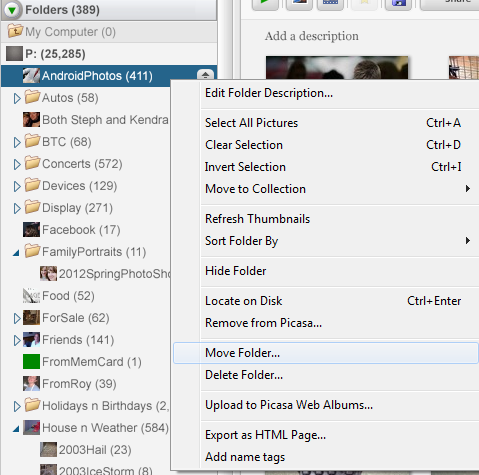
View your folders. You can now view all of your folders in the left pane of the Picasa window. REMEMBER, any changes you make to folders will be reflected in the files on your computer. Don’t delete lightly!
Reorganize your folders. Start at the top of the list and go through your folders. Glance at the images in the folder. If they’re mostly right, move them accordingly. If the folder contains a mixture of different types of photos, move it to a “Mixed” folder or a “TODO” folder.
Moving Folders. You can’t really rename existing folders through Picasa. You can, however, move all of the content to a new folder. You can also move existing folders.
To move an existing folder, right-click on that folder and select Move Folder. You will then see the dialog box:
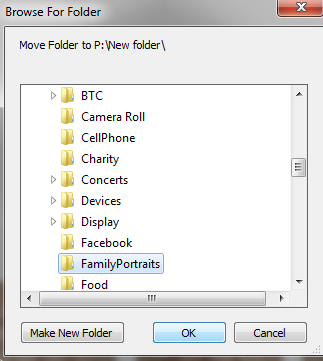 Select the location you would like to move the folder. You can Make a New Folder if necessary.
Deal with Duplicates. Nest duplicates like Holidays > 2004Christmas > 2004Christmas, or put the duplicate in TODO to deal with later.
Work through the TODO folder. Once you have gone through all of your folders, tackle the TODO folder.
 Multi-select images in the TODO folder and drag them to the folder where you would like them to be located. If a copy of that image is already located there, you will see the following warning:
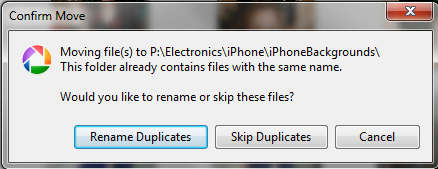 Select Skip Duplicates so that any duplicates will remain in your TODO working folder. Once you have cleaned out the current folder, you can delete the duplicate items along with the folder.
Don’t organize all your photos right now. Don’t go through all of your folders dealing with individual photos right now.
Picasa #5 – Do Facial Recognition
This is a strength of Picasa, so use it to your advantage. There’s no need to make separate folders for separate people in Picasa. You can see all the photos for a particular person with a quick search or click.
Tag a few people. Go into a family/friend event folder and start tagging people. Picasa will prompt you to enter their names and will suggest you import your contacts or manually add people.
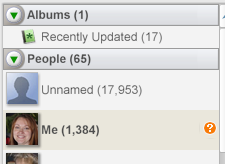
Unnamed People. At the top of the People tab is a section called Unnamed People. There are probably a LOT of faces that Picasa recognized that have not been tagged. You can breeze through that and tag people as well.
Process Suggestions. After you have started tagging people, Picasa will make suggestions of other photos that it thinks contain those same people.
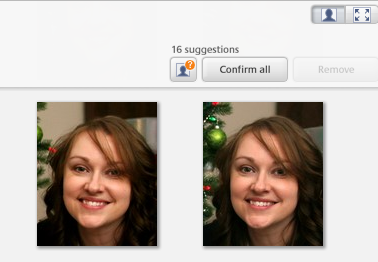 Work through the list and confirm the correct suggestions.
Picasa #6 – Tag Locations
You don’t have to SHARE your locations. You are tagging them to make your life easier when you’re looking for something.
Go to an event folder, like Birthdays. Multi-select (for the unknowing, this is Shift+click or Ctrl+click) all of the photos from the same location.
 Click on the Location marker to open the Places Tab. Type in an address, location, or city name and hit Enter. The popup will prompt you to add the photos to that location. Do so. You’re not adding them to Google Maps, just adding the tag to your photo.
#4 – Scan Your Physical Photos
Grab a box or album of your old photos and make sure you can reach your scanner and computer without moving too far. You will be using both extensively for this part of the project.
Scan #1 – Create a Scan Destination
Create a Folder named ScannedPhotos or Scan on your desktop (or in your “Inbox” folder as discussed in the Document Organization article).
Scan #2 – Organize your Stack
If you can, quickly stack your photos by like size and subject matter. By doing this, you can make the scans go faster.
Scan #3 -Decide If You Can Use the ADF
Ideally, you have a stack of photos that are the same size. If you have a high-quality ADF scanner (like a big laser printer) you may be able to scan the images in by stack. Glossy photos do cause trouble for ADFs, however. If you have a home printer/scanner with an ADF you will still probably have to scan the photos in individually on the flatbed scanner. But do take a moment to figure it out for sure.
Here’s a tip: if the paper guards on your ADF won’t slide in to accomodate a 4×6 or 3×5 photo, don’t even bother trying. The photo won’t be pulled into the feeder properly.
Scan #4 – CLEAN Your Scanner Bed
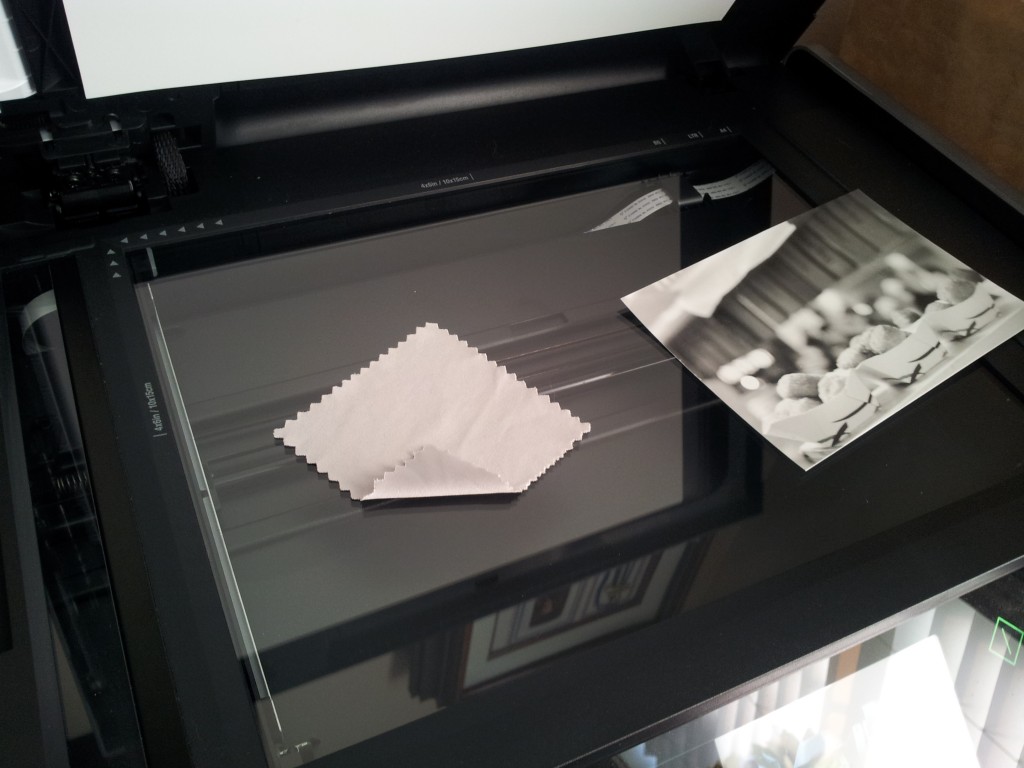
You don’t want to scan your images with pieces of lint on them. Get a lens or screen cleaning cloth. (The ones you get when you buy glasses or screen protectors for your mobile devices.) Gently wipe your scanner bed and be careful not to get fingerprints on it when you pick up and replace the photos.
Scan #4 – Decide If You Need To Measure Your Photos
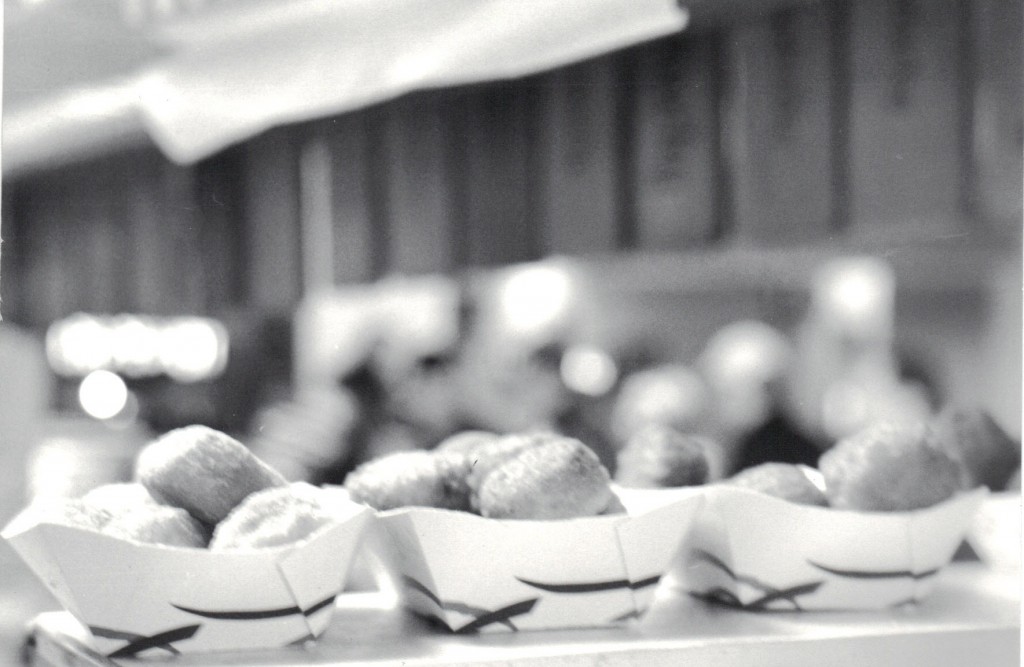
Depending on your scanner software you may need to measure your photos first. Grab a photo and place it on your scanner. Scan it using the default settings. If you see this,
your scanner detects the edges of your photo and you don’t need to measure. If you see this,
you’ll need to measure your photo and manually change the settings.
Measuring your photos as you scan is pretty simple. There are standard sizes of photos. 4×6, 3.5×5, 5×7, 8×10. You can probably figure them out by having a ruler nearby.
Scan #5 – Determine if you can do a multiple scan
Some printer soft wares have the ability to scan in multiple photos and automatically split them for you. Here’s where that command is located in my software:
My printer manufacturer requires 1/4 inch between photos. So if you do this,
You’ll get one image. However, if you add a little more space like this,
You’ll get 3 images like this:
Scan#6 – Know your Resolution
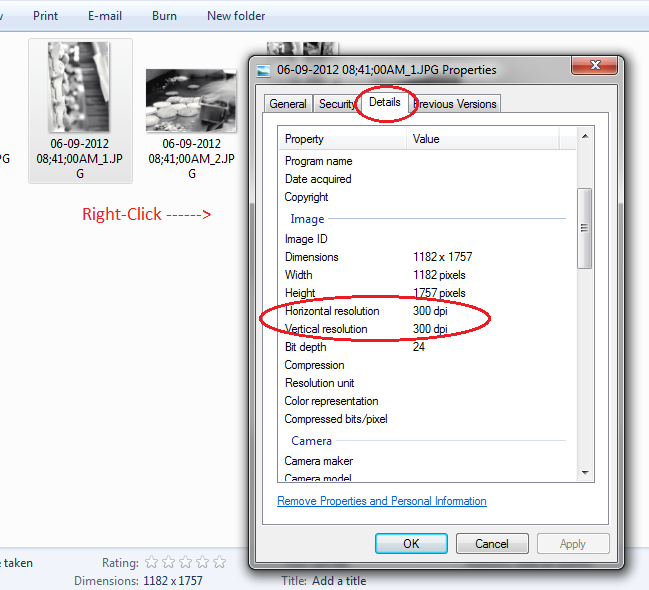
You could go look up the specs for your particular scanner, but the quickest way to find out what the default photo resolution is to scan a photo using the default setting then check the photo. Do that by going to the saved photo file, right-clicking, going to Details and scrolling down until you see the resolution.
My scanner clearly saves photos at 300×300 dpi.
A good rule of thumb for determining your resolution needs is this. To forever keep the image the same size, you need 300 dpi or ppi. DPI is dots per inch. PPI is pixels per inch. If you want to double the image (like turn a 4×6 into an 8×10), you need to double your resolution to 600 dpi.
Scan #7 – Get Busy Scanning
You don’t necessarily need to get all your scanning done this week. It may not even be possible if you’re sitting on decades of old photos. This week, however, get through a pretty good stack just so you’re familiar with the process. Scan the photos to the correct folders. You can import the photos directly through Picasa, but you can’t do the multi-scan described above.
Once you’ve scanned your images into your computer folders, Picasa will automatically pick up the additions and add them to your folders. It will also ask you to tag people. You will have to manually add places.

