Resize a Batch of Photos in Photoshop
Sometimes you have a large number of photos that you want to resize. This can be particularly important when taking large digital photos (like a 12MP camera) and placing them on the web. For my particular use, I wanted to size some photos to fit a particular width in a webpage I’m developing.
Note: these specific instructions apply to Photoshop CS4, but do translate well to other versions.
How to Resize a Batch of Photos in Photoshop
- Move the pictures you want to resize into a single folder. (You can use sub-folders as well. I’ll detail that later.)
- Open Photoshop CS4.
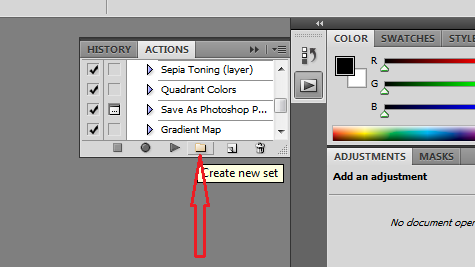
- Click on “Window” at the top menu bar and select “Action” from the drop-down list to open the Action panel. At the bottom of the Action panel, click the icon that looks like a folder to create a new set. Name the set “Resize” and click OK.
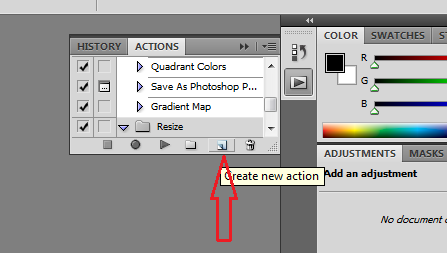
- Create an action in your action set by clicking the “Create New Action” icon. The icon is located between the “Create New Set” icon and the “Delete” icon.
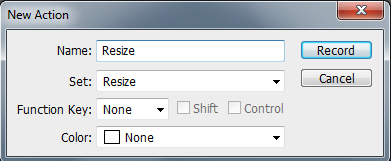
- Name the action “Resize” as well, and click the Record button.
- Open an image from the set you want to process. You can do this by clicking “File” and then “Open,” or by dragging and dropping a picture into Photoshop.
- Click “Image” and then “Image Size” to bring up the resizing dialog box. Next to either Width or Height, click the drop-down menu and select “Percentage.” Type in the percentage of the current size that you want your images resized to. For example, if you want them to be half their current size, then type in “50.” Click OK.
- Save the newly resized image.
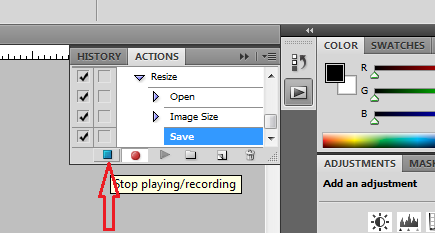
- Click the square button at the bottom of the Actions panel to stop further commands from being recorded to the action set.
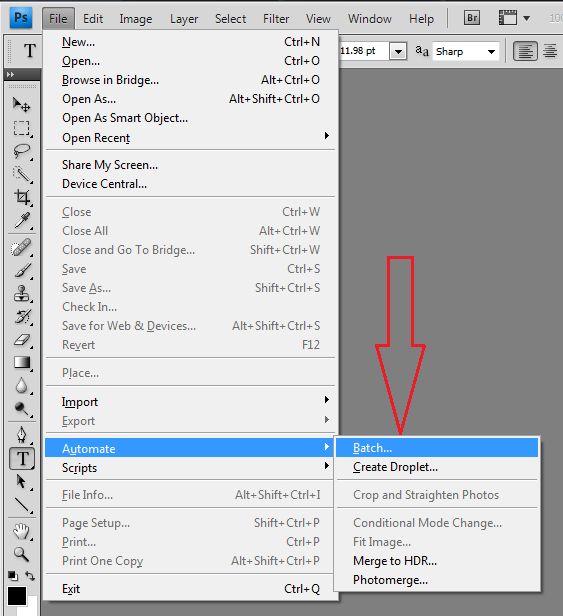
- Open the batch processing menu by clicking on “File,” then “Automate” and then “Batch.”
- At the top of the Batch menu that appears, select the “Resize” action set for “Set”, and the “Resize” action for “Action”. Choose “Folder” from the source menu and choose the folder containing the pictures you want to resize using the “Choose…” button. Check the Suppress File Open Options Dialogs in order to avoid having to click for each image. Select “Folder” from the Destination menu, and choose the folder where you want to save your resized images. The “File Naming” section gives you a number of options for how the resized images will be named. Leave the default setting unless you prefer a different naming choice.
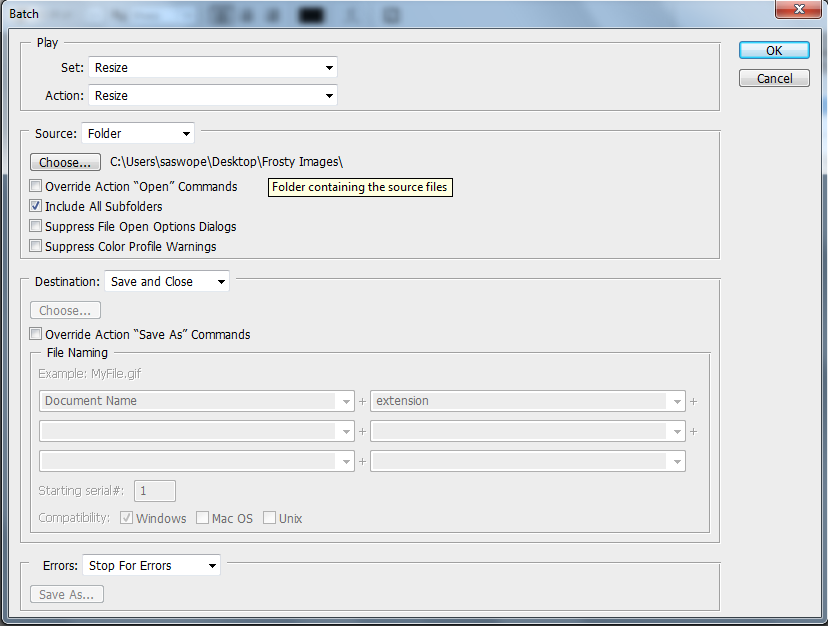
- Click “OK.” Photoshop processes the batch of images. This can take several seconds to an hour or two, depending on the file size, number of pictures and the speed of your computer.

