This week in the WordPress Series, we will be looking at the standard settings and administration menu in the back-end of WordPress. We’re going to look at the settings and how to operate the Administrative panel before we dig in and start doing any work.
Prerequisites
At this point, you should have Planned Your WordPress Site and Installed WordPress in your hosting account. You are also Logged Into Your WordPress Page. Additionally, you have not yet added content or changed anything in WordPress.
Administration Menu
The column on the left is the menu you will use to do everything to your WordPress Page. Let’s briefly cover what each section allows you to accomplish.
Dashboard > Home
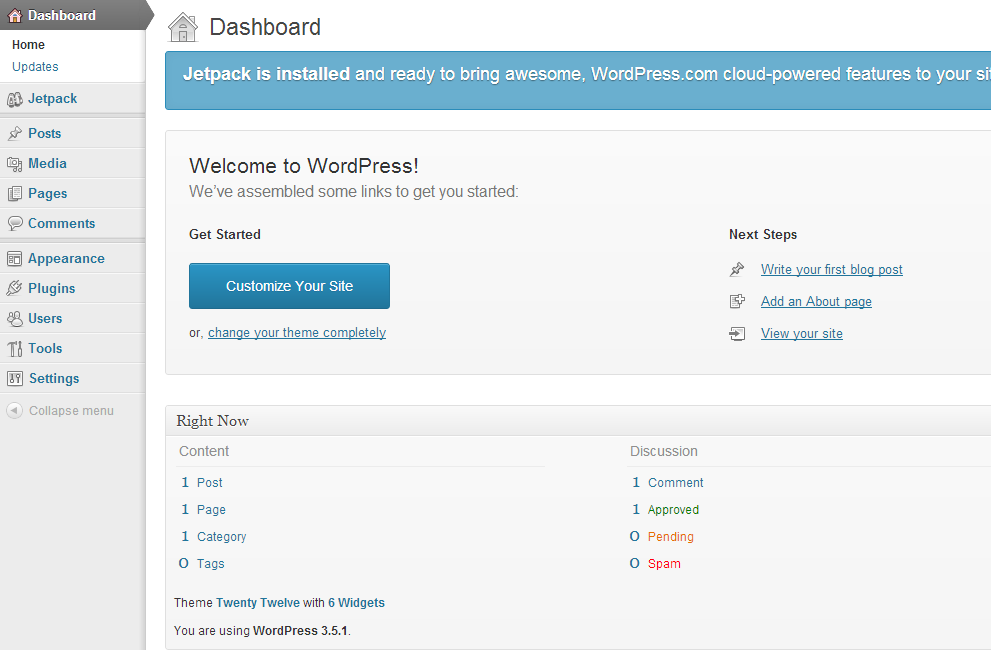
When you first log into your WordPress Page, you are looking at your Dashboard Homepage.
You have the ability to reconfigure this Dashboard view, but for now, let’s look at the standard layout.
Jetpack – At the top of the page is a notification about Jetpack. Jetpack is a pack of plugins that WordPress has put together to get you started.
Welcome – The welcome section has some links you can follow to get started. We won’t be using these.
Right Now – This section of the page gives you a snapshot of what’s going on. You can see how many pages, posts, categories, comments, and more that you have. It shows you what version of WordPress you’re using and what theme is installed.
Other Sections – There are other sections down the page such as Recent Comments, Incoming Links, Plugins, QuickPress, Recent Drafts, WordPress Blog, and Other WordPress News.
As you get used to using WordPress you may find your Dashboard very useful. I find that I never use it.
Dashboard > Updates
This is where you will go to see what needs updating. Here you will find 1-click updates to WordPress, themes, and plugins.
Jetpack
You can have a brief look at Jetpack, but we’ll cover it in more detail when we discuss Plugins later in the WordPress Series.
Posts
We will cover Posts and Pages later in the WordPress Series, but for now, you need to be a little familiar with the menu structure.
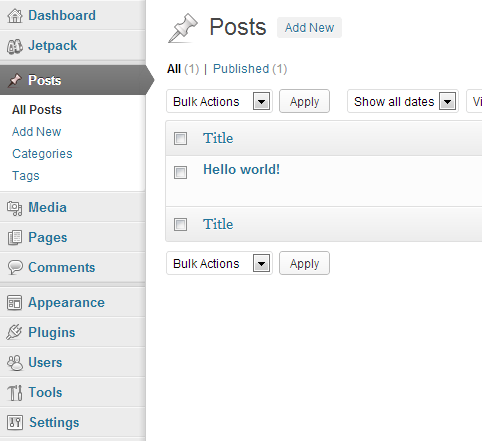
Clicking the Posts menu item takes you to the All Posts page. The sub-pages of Posts are:
All Posts – Here you can view, sort, and edit all of your posts.
Add New – This takes you to the page where you can create a new post. (You can also get there by clicking Add New on the All Posts page.)
Categories – You can view, edit, and create new post categories on this page.
Tags – You can view, edit, and create new post tags on this page.
Media
The Media page is where you manage (and create new) media. Media includes files you’ve uploaded, images, videos, and more. Note: As we’ll learn later, media is in the main library and can be associated with a page/post.)
Pages
We will cover Posts and Pages later in the WordPress Series, but for now, you need to be a little familiar with the menu structure.
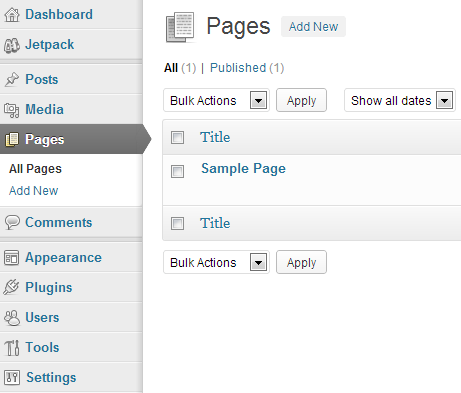
Like in Posts, the Pages menu takes you to the All Pages page. You can view, sort, and edit all of your page, or Add New pages. Unlike Posts, Pages do not have Categories or Tags.
Comments
Comments are pretty straightforward. Again, you are taken to a page where you can view, sort, approve, trash, or do whatever to your comments.
Appearance
This section is where we will have fun later in the WordPress Series.
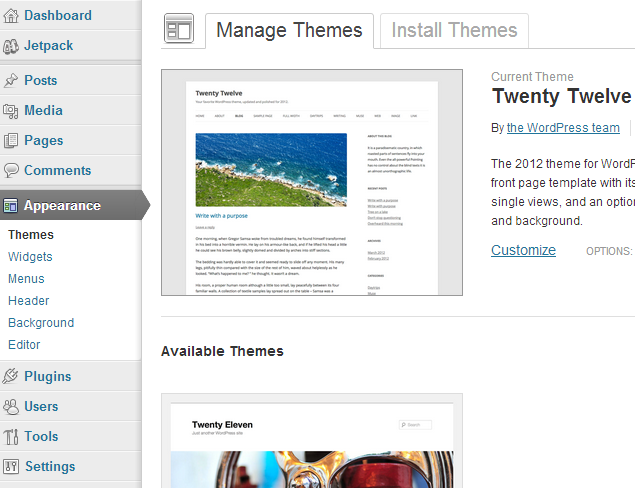
There are multiple sub-pages in this section.
Themes – This is where you go to Manage and Install themes.
Widgets – This is where you go to manage (via drag & drop) your Widgets.
Menus – The Menus page enables you to create custom menus for your website.
Header – Here you can change your header. However, most high-quality themes that I use have that option in the theme settings.
Background – This is where you go to change your background image. Again, most high-quality themes that I use have that option in the theme settings.
Editor – You can go to this page to edit the code for the themes, plugins, and more. I rarely use this option, preferring to edit the code in my computer on a better editor and FTP upload the code to the server. More about that later in the WordPress Series.
Plugins
We will cover Plugins in-depth later in the WordPress Series, but for now, you just need to know where we will be doing that.
In the Plugins pages, you can manage your current Plugins, including enabling, disabling, and deleting them. You can add new plugins by uploading them or searching for them on the WordPress.org website. You can also edit the code in your browser, though again, I prefer to do that locally.
Users
Your WordPress website gives you the capability of having multiple users. The Users page is where you will manage them, including adding users, controlling users, and setting your own profile.
Tools
You have the ability to use tools (like scripts) in your WordPress. The only tool I’ve ever used is the WordPress importer. One of the theme companies that I use has a set of WordPress files that allows you to see the capabilities of your new theme.
Settings
The last section is Settings, and that’s what we’re here to mess around with today. I’m not going to cover all of the settings in detail. If you want to read and understand them more, here is the latest info from WordPress.org including links:
Administrative Settings Descriptions
General
The Settings General Screen is the default Screen in the Settings Administration Screen and controls some of the most basic configuration settings for your site: your site’s title and location, who may register an account at your blog, and how dates and times are calculated and displayed.
Writing
Using the Settings Writing Screen, you can control the interface with which you write new posts. These settings control the size of the ‘post box’ in the Add New Post Screen, the default Category, the default Link Category, the default Post Format, the default image sizes, and the optional Post via e-mail feature.
Reading
The settings in the Settings Reading Screen are few in number, but still important. You can decide if you want posts, or a “static”Page, displayed as your blog’s front (main) page. You can also adjust how many posts are displayed on that main page. In addition, you can adjust syndication feed features to determine how the information from your site is sent to a reader’s web browser or other applications.
Discussion
The Settings Discussion Screen allows you to control settings concerning incoming and outgoing comments, pingbacks and trackbacks. You can also control from this Screen the circumstances under which your blog sends you e-mail notifying you about the goings on at your site, and you can decide if your blog should show Avatars and their ratings.
Media
The Settings Media Screen allows you to determine where images, documents, and other media files will be linked to when inserted into the body of a post and to specify the maximum dimensions in pixels to use when inserting an image into the body of a post.
Privacy
As of 3.5, the Settings Privacy Screen has been removed and the Search Engine Visibility option has been moved to the Settings Reading Screen.
Permalinks
For a nice introduction to Permalinks, check out the Pretty Permalinks section of Introduction to Blogging. But briefly, and to quote the Settings Permalinks Screen itself:
“By default WordPress uses web URLs which have question marks and lots of numbers in them, however WordPress offers you the ability to create a custom URL structure for your permalinks and archives. This can improve the aesthetics, usability, and forward-compatibility of your links.”
The Settings Permalinks Screen controls how that custom URI structure is defined. For a more in depth description of the way this structure is specified, see the Using Permalinks article.
Changing Settings
There are a few settings that you will want to change before you add any content to your site or start changing themes.
General Settings
Review the page and make sure things are spelled correctly. Things you need to change are:
- Tagline – This may or may not be used in your theme, but change it to reflect your site. For example, in this site my tagline is “Stephenie’s Epiphany – ideas & tutorials”, though the theme doesn’t use it.
- Time Zone – Unless you live in Greenwich, England, you will need to change your time zone. You can choose UTC-4 or whatever, but depending on Daylight Savings Time, you may be -4 or -5. The safest bet is to choose a city in your timezone. I’m in the Eastern zone, so I just chose New York.
- Date Format – select what you like best.
- Time Format – how do you want the time to appear on your site?
- Week Starts On – I set this to Sunday.
Save your changes.
Writing
Have a look at the page, but I don’t change anything here.
Reading
The only thing I might change is Search Engine Availability. While a page is in development, I check the box. Make sure you remember to uncheck it when you’re ready to go live.
Discussion
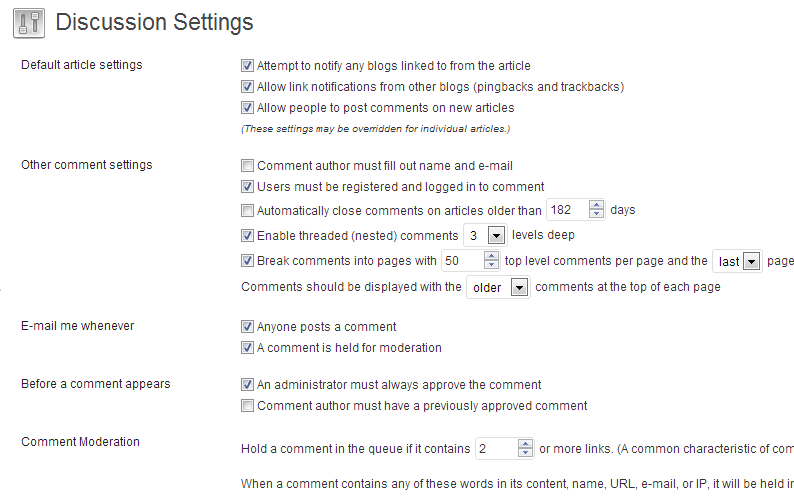
You’ll need to make a decision here. If you are making a blog (like this page), here are the settings I recommend:
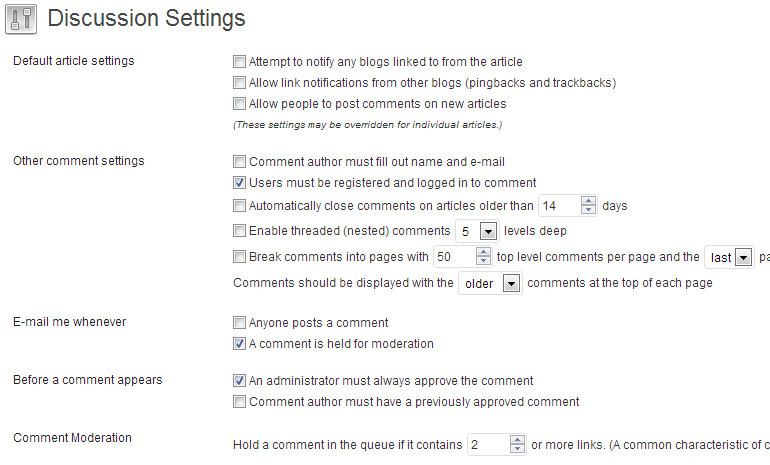
If you’re making a business webpage and don’t want to allow comments, use these settings:
Save your changes.
Media
The only change I make in the Media Settings page is to uncheck the Organize my uploads into month- and year-based folders box. I’d rather everything go into one folder. Save your changes.
Permalinks
If you don’t do anything else on this page, MAKE SURE YOU DO THIS!!
By default, your posts will look like this in the address bar:
[code]http://mydomain.com/wordpress-folder/?p=123[/code]
That’s ugly. Select Custom Structure and enter this:
[code]/%category%/%postname%[/code]
That way your page will look like
[code]http://epiphenie.com/prog/wordpress-prog/settings-6-in-the-wordpress-series[/code].
Save your changes.
That’s it! Your settings are done.
And stick around to see what’s coming next week in the WordPress Series!

