Upgrade Your Jailbroken iPhone
As the next couple of levels of iOS have been released, I have been hesitant to go to the trouble of updating my iPhone.
However, late last night I was listening to an audiobook when my phone lit up and showed me the Apple Logo. I assumed I had run the battery down and plugged it in. It came back on automatically and I restarted the app I was using. The phone crashed again. And again. My Jailbroken iPhone 4 (with iOS 4.1) was stuck in a reboot loop. I tried a hard reboot with the phone plugged in. I tried a hard reboot with the phone unplugged. I put it in Recovery Mode. I let the battery run down for a while before recharging and trying again. I tried everything I could think of. I got online and found that other people have had this problem and the causes people assigned ranged from “you bricked your phone” to “the app you just installed caused it” to “the update you just did caused it” to “it’s a hardware issue”. Since I had only used my phone normally and hadn’t made any changes, my concern was that it was a hardware issue.
Knowing that I couldn’t take my phone in to the Apple Store or the AT&T store because on every reboot you could see my LockInfo screen with stuff you just can’t do unless the phone is jailbroken. This would void my warranty and they wouldn’t give me a replacement. I knew I had to upgrade to the newer firmware and lose my current configurations. This was a major concern for me.
Backups
Fortunately, once I decided to jailbreak my phone the first time, I have been very good about backing it up. There are 3 important components to this.
- Keeping Sequential backups in iTunes. To learn more, see my article on how to Make Multiple Backups in iTunes.
- Being vigilant about backing up your SHSH blobs. To learn more, see the Save SHSH blobs for iOS 4 Firmware section of my article on how to Downgrade an iPhone 4 iOS.
- Using the PkgBackup App on your jailbroken iOS device. Every time I download an app or make a major change on my phone, I do a backup and have it save to my Dropbox account.
Note: if you do not have a Dropbox account, you’ll need to sign up for one. If you use my REFERRAL LINK, we both get a free 250 MB of free storage for your trouble. (Thanks in advance.) Also, I recommend that you check out my article about using Multiple DropBox Instances on Windows 7 (or Vista). Being able to use more than one Dropbox account is very useful. I have one for work and one for business.
Requirements
If you have the same basic configuration as I do, these are the steps that you’ll follow to restore your iPhone. Here are your requirements that are important:
- iPhone 4 with iOS4 (For these exact steps, I am upgrading from iOS 4.1 to iOS 4.3)
- Have your iPhone backed up using PkgBackup app from Cydia (the paid version, backed up through dropbox)
- Use infinifolders (not necessary to use this tutorial, but if you do have it, you MUST follow these steps.)
I’m assuming that you’ve already done a firmware flash and jailbreak before, since you are restoring and have the files that you need and are familiar with the steps. This is just a nice reminder of the exact steps you need to follow.
Update Your Firmware
- Open TinyUmbrella and view your saved SHSH list. You must choose to upgrade to one of the firmwares on the list or the latest firmware from Apple that you can install through iTunes. This can be risky unless the release has been out a long time. Check your apps to see if they support the latest iOS version.

- If you wish to get the latest iOS, do the following:
- connect your device to your computer and open iTunes
- click on your device in the left panel
- Select “Restore” from the Version section in the middle of the page.

- When iTunes tells you that your device is about to reboot, skip down to the section in this article called “Restore your Data from iTunes”.
- If you are using a previous version of the iOS, do the following:
- Download the required old ipsw firmware files. I recommend going to the iClarified website and getting the latest firmware with the Jailbreak. (For myself – here is iOS 4.1 and iOS 4.3.)
- Turn off your phone
- Hold down the home button and connect your phone to the computer
- When iTunes opens and tells you to restore, hit OK.
- In Windows, hold down the Shift key and click on the Restore button in iTunes.
- You will be given the option to browse for the Firmware files you have on your computer. Select your file and continue.
- iTunes will probably throw 1004 or 1015 error at you. This is normal, just click through this error as the firmware has already been successfully installed on the device.

- Close iTunes.
- Open Umbrella, select your connected device, and click on “Exit Recovery”
- Leave your phone connected to the computer
Restore your Data from iTunes
- When your phone reboots, select your backup file in iTunes. You should make sure you’re aware of how to Make Multiple Backups In iTunes.
- Sync your apps, music, and such. This could take up to several hours if you had a lot of apps, music, and movies.
- Once your data is restored, do NOT move your icons around or try to put them in folders. Your jailbroken PkgBackup app will fix them for you.
Jailbreak your iPhone
These directions will vary for different levels of iOS. I recommend that you go to the iClarified website and get the correct directions for jailbreaking the iOS level you have chosen. These are directions for iOS 4.3.3.
Step One: Create a folder on your desktop called Pwnage. Download RedSn0w from iClarified and place it in the Pwnage folder. (If there’s a problem with the download link, go directly to RedSn0w and get version 0.9.6 RC16.) Extract the RedSn0w zip file into the same folder.
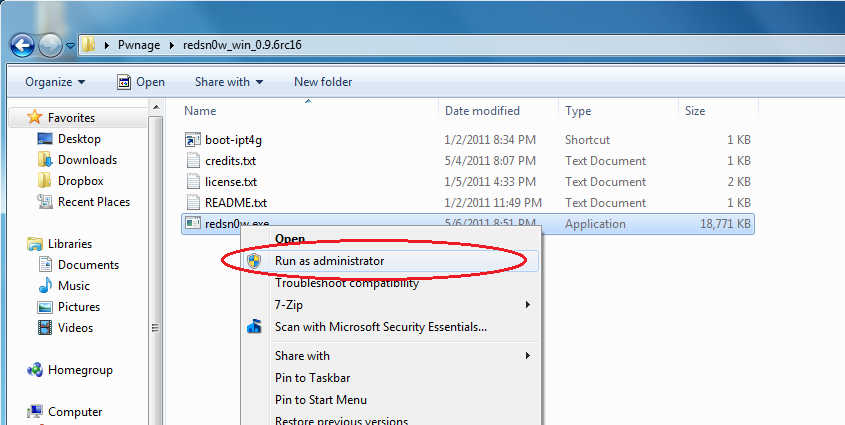
Step Two: Since you have already updated your iPhone to the desired firmware, open the Pwnage folder on your desktop and launch the redsn0w application from the redsn0w folder we extracted earlier.
Note: Windows 7 users may want to try running the redsn0w executable mode as an administrator in Windows Vista compatibility. You can do this by right clicking the executable and selecting Properties from the contextual menu.
Step Three: Once RedSn0w opens click the Browse button
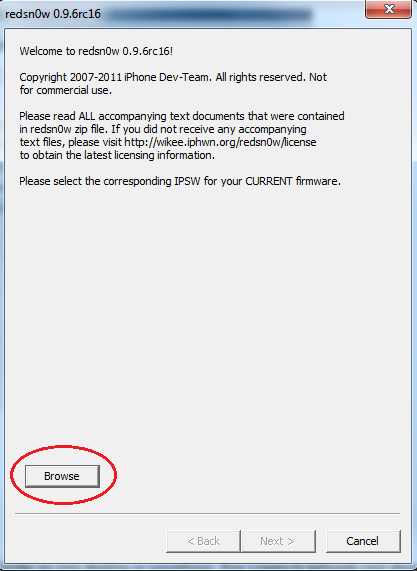
Step Four: Select the 4.3.3 firmware ipsw we used in the steps above then click Open.
Step Five: Once the firmware has been verified click the Next button to continue.
Step Six: RedSn0w will now prepare the jailbreak data

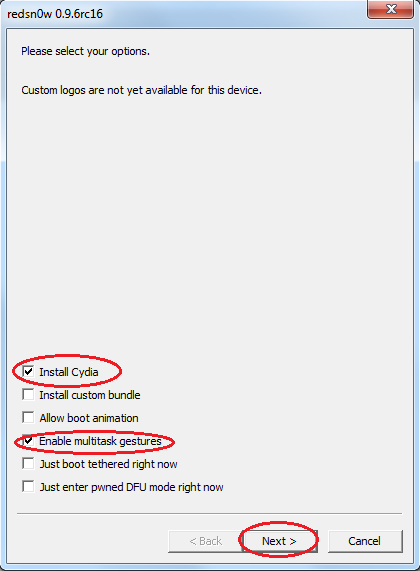
Step Seven: From this window you can select the jailbreak options you would like. Make sure Cydia is selected and click the Next button to continue. (Elect to enable multitask gestures if you like. Read below the image for more info.)
With iOS 4.3, Apple introduced the possibility for developers to activate “multitasking gestures”, a set of multitouch-based four and five-finger gestures that allow you to quickly switch between apps, go back to the homescreen, or invoke the multitasking tray. The gestures didn’t make it into the public version of iOS 4.3 (they were meant for dev test-only since the beginning). You can enable them when updating to iOS 4.3.3 and using redsn0w.
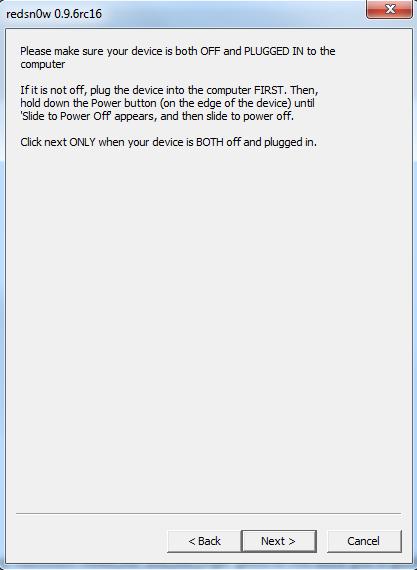
Step Eight: Please plug your iPhone into the computer and make sure its OFF then click the Next button. (Follow the on-screen directions!)
Step Nine: RedSn0w will now guide you through the steps to get into DFU mode. Be ready to start as soon as the window opens, as the timers will count down for you.
- Hold down the Power (corner) button for 3 seconds
- Without releasing the power button, also hold down the Home (bottom center) button for 9 seconds
- Without releasing the Home button, release the Power button BUT KEEP holding the Home button for 15 seconds
At this point, your device screen should be black while it installs the jailbreak.
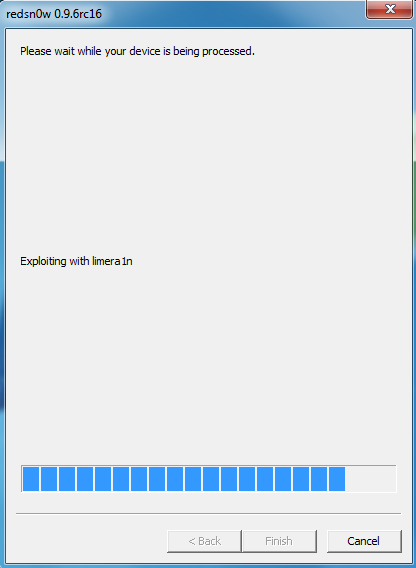
Potential Problem: If you did not get into DFU mode in time, your jailbreak could hang on the screen above. Cancel the process and start over in Step Two. The process will go more quickly this time.
Step Ten: Once this is complete you will be notified that RedSn0w is done. The rest of the process will take place on your device. Click the Finish button.
- You will see a black screen with white text flowing by.
- You will then see the redsn0w pineapple image with a progress bar as the applications are loaded on your device.
- The device will reboot itself.
Step Thirteen
When your iPhone finishes rebooting (5 minutes or so) it will be jailbroken with Cydia on the SpringBoard.
Install the basic Cydia Apps
- Open Cydia on your phone. The quickest way to find the app is to do a search for it.
- Tell Cydia you are a developer.
- Do the updates. Reboot, of course. Leave the phone off at least 5 seconds before turning it back on.
- Download the following software, if you had it on your phone. PkgBackup won’t install it for you. The most important of these are the infinifolders and the Five Icon Dock. This affects the appearance of your icons when you do your PkgBackup Restore.
- PkgBackup
- ActionMenu
- Five Icon Dock
- Five Icon Switcher
- Infinifolders
- MxBackup
- No Icon Shadow
- biteSMS
- Make sure you reboot.
Run PkgBackup
When Version 2.4.5 was released, I saw some problems. First, try to run the current version and see if everything works.
- Open PkgBackup and go to the Settings. Connect to your Dropbox account.
- Select Restore from the bottom of the app.
- At the top, you will see the number of uninstalled apps. To the right of that is a button that allows you to select from multiple package backups if you have them. Select the one you want.
- Select the programs you want to restore
- Go down all of the options and select what you want to restore.
- I’ve been having trouble with the Default Apps causing the backup to freeze at the end. I had to disable all of these.
- Hit the Do Restore Button
Change Your Default Password!
Once you have jailbroken your phone, you should IMMEDIATELY reset the default SSH password.
Once you’ve jailbroken your iOS device and installed the OpenSSH app from Cydia, the first thing you must do to ensure maximum security and minimum risk, is change the default SSH password. Previously you could install MobileTerminal (Cydia app) and change the password directly from your iDevice. Unfortunately MobileTerminal is no longer available and therefore the only way to change your SSH password is to use an SSH client. It’s a relatively simple process, so let’s walk through it together.
BEFORE YOU START: Ensure you’ve installed SBSettings on your iPhone / iPad / iPod touch and that you’ve got the OpenSSH service running.
On PC:
- Download and Install Putty. (Ah, a not-so-fond memory from my college years rears its ugly head!)
- Open Putty and enter the IP address for your device. (You can find your IP address of your iDevice within SBSettings. See my device IP as 192.168.1.102 in the below image)

- Within Putty enter the IP address, ensure you have selected SSH as the communication protocol, and that the Port is set to 22.
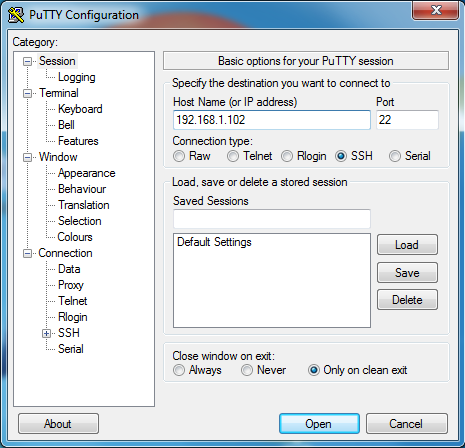
- Click on the Open button
- Login as root
- Enter the password alpine
- Then type in passwd and press enter
- You will then be asked for a New password: and also to Retype new password:
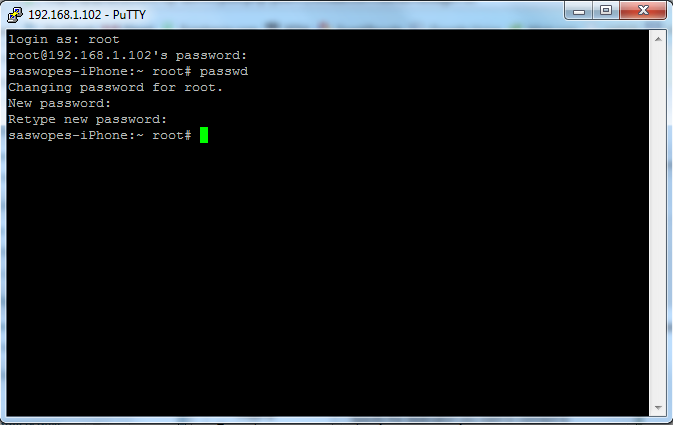
- It’s recommended that you choose a secure password, such as one that contains no dictionary words, a mix of upper and lowercase letters, contains at least one number, and is at least 8 characters long.
- Once complete just type exit and press enter to leave Putty

