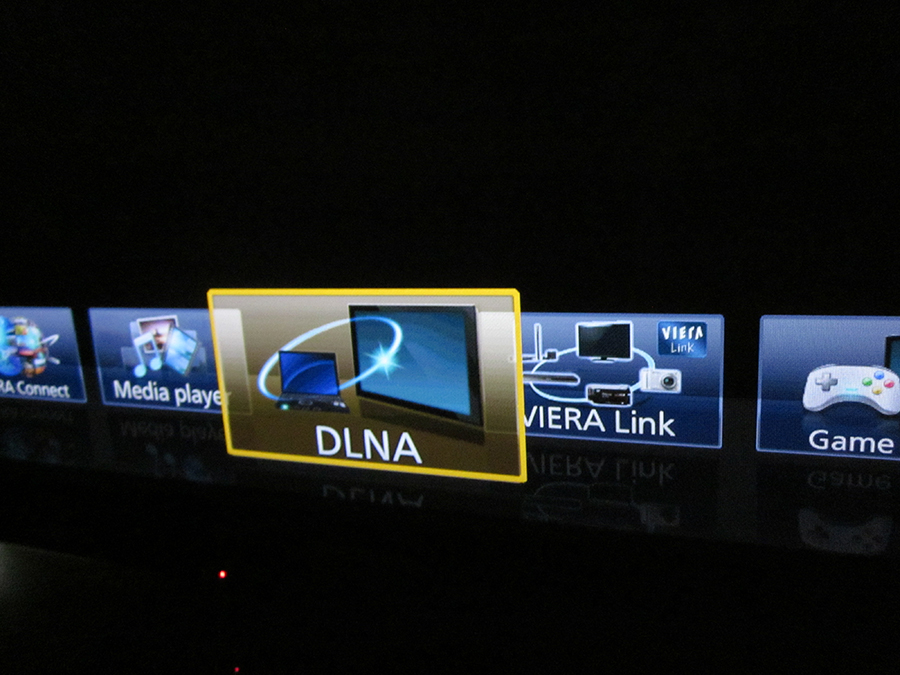
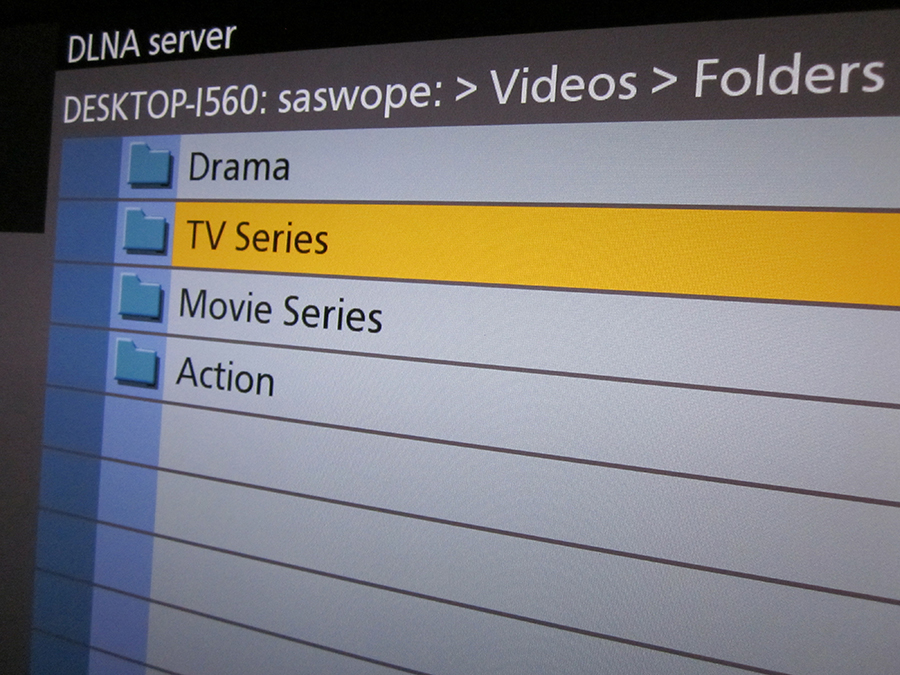
You probably have a video collection in your computer for one reason or another. You could have home videos or clips you’ve uploaded to You Tube. You might have been busy ripping your DVD collection to your computer. Or maybe you’ve been downloading TV shows after cancelling your cable service. (If you have, make sure you’re paying for them!) Either way, you’d like to be able to watch those videos on your big screen TV in your comfortable family room.
What is DLNA?
DLNA stands for Digital Living Network Alliance. This is a group of organizations including consumer electronic manufacturers that has created the standard enabling all DLNA devices to share media over a home network.
To understand how DLNA works, you have to imagine that your computer running Windows 7 is a server that streams a video to your TV or device, which is a client. The TV can be from any manufacturer and can play any type of media file. Additionally, your mobile devices can stream content to your TV.
Hardware Needed
In order to watch your videos on your TV, you will need a DLNA-certified device. You can check to see if your current devices are certified. Devices include TVs, game systems, DVD/Blu-ray players and more. If you need a new device, I strongly recommend the Panasonic DMP-BDT220 Integrated Wi-Fi 3D Blu-ray DVD Player. I actually own two of these. It connects wirelessly to your home network and has apps for Hulu, Netflix, and Amazon streaming. You can also listen to Pandora on it. And of course, it’s DLNA certified.
You can also watch your videos on your phone. On Android, there are DLNA apps, including Skifta. On iOS, apps like Onkyo exist. Feel free to search and dig around. I’m not going to be talking much about mobile apps.
How To Set Up DLNA on Windows 7
Update: I was frustrated with the standard setup in Windows 7 and having Windows Media Player as my DLNA service. I was also annoyed that WMP sorted items by date rather than title. So I switched to Serviio.
To set up your system to stream using Serviio:
- Download and install the software.
- Go to Start > All Programs > Serviio > Servio Console
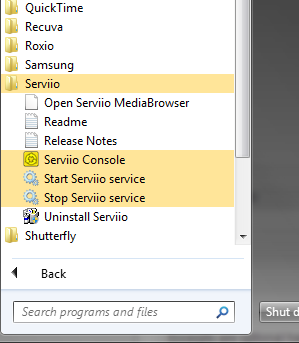
- Go to the Library tab and add your local video libraries.
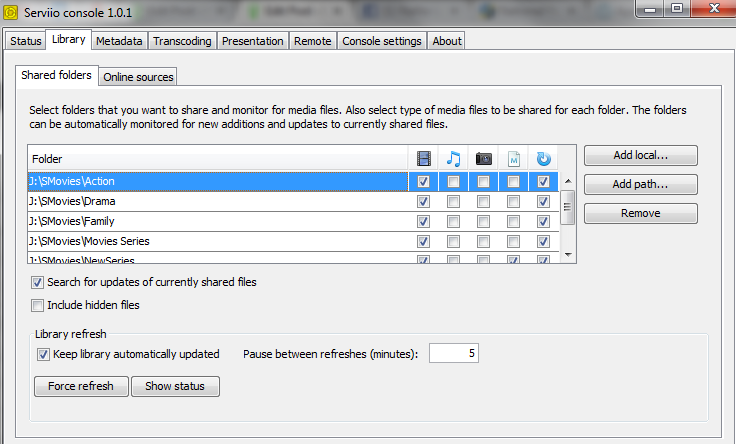
- Save and close.
Previous Method
Let’s assume you ripped your Doctor Who DVD collection to an external hard drive attached to your desktop. You’d like to get your Who binge on over the weekend while sprawled out on your couch. We’re going to set that up now.
- In Windows 7, go to Control Panel > Network and Internet > Network and Sharing Center
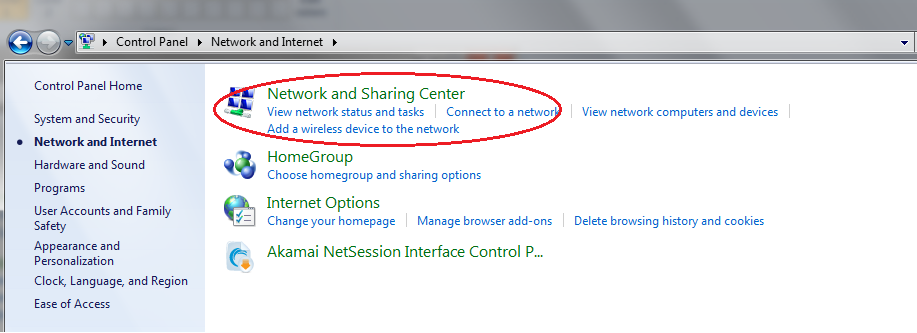
- Select Choose homegroup and sharing options
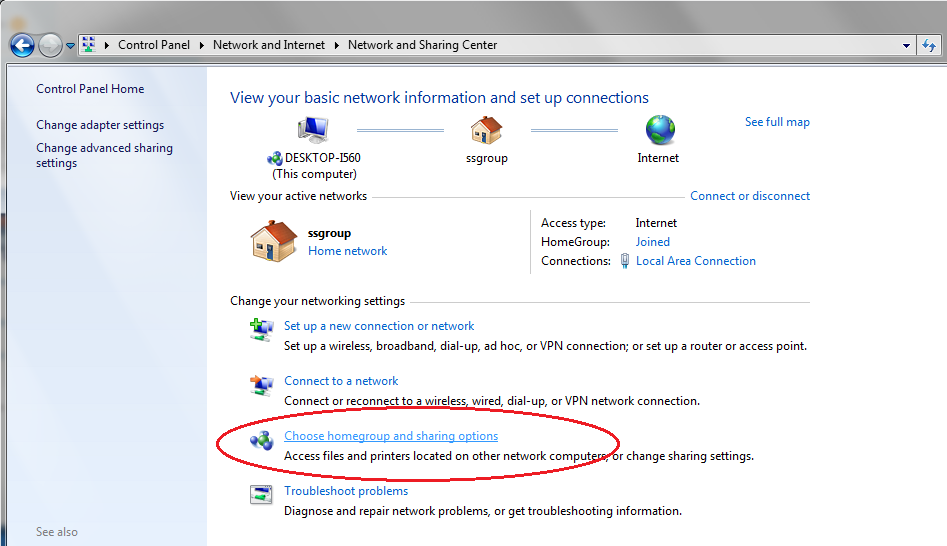
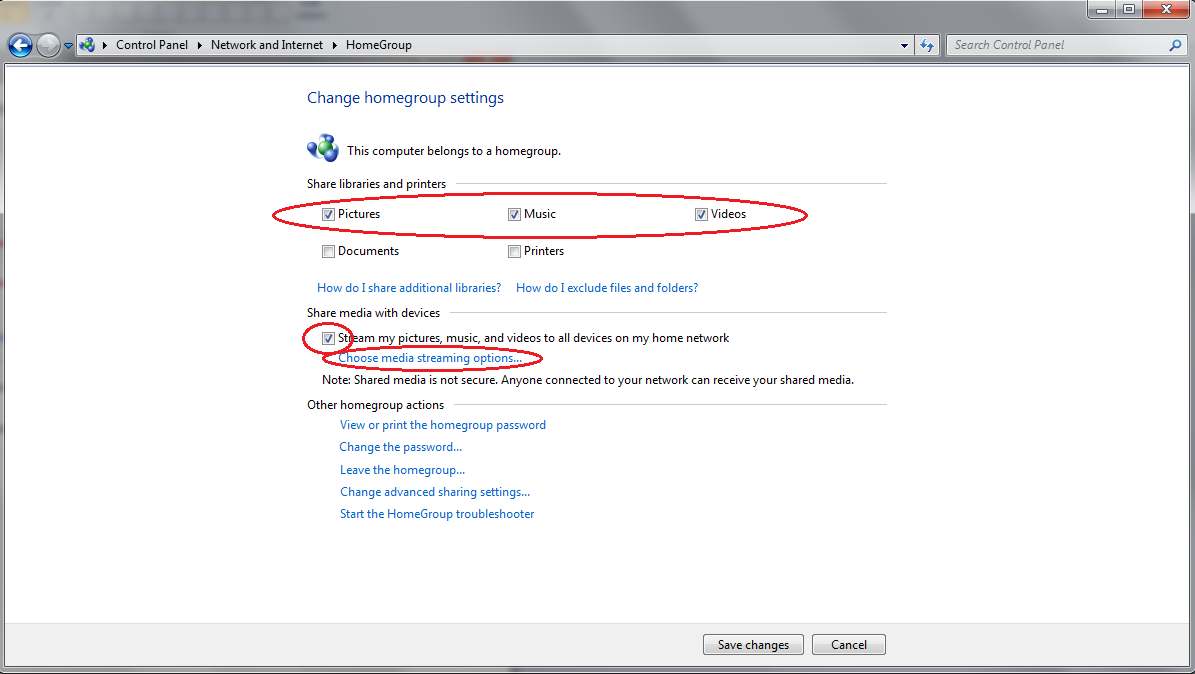
- Select the media you want to share, turn on sharing, and click on Choose media streaming options
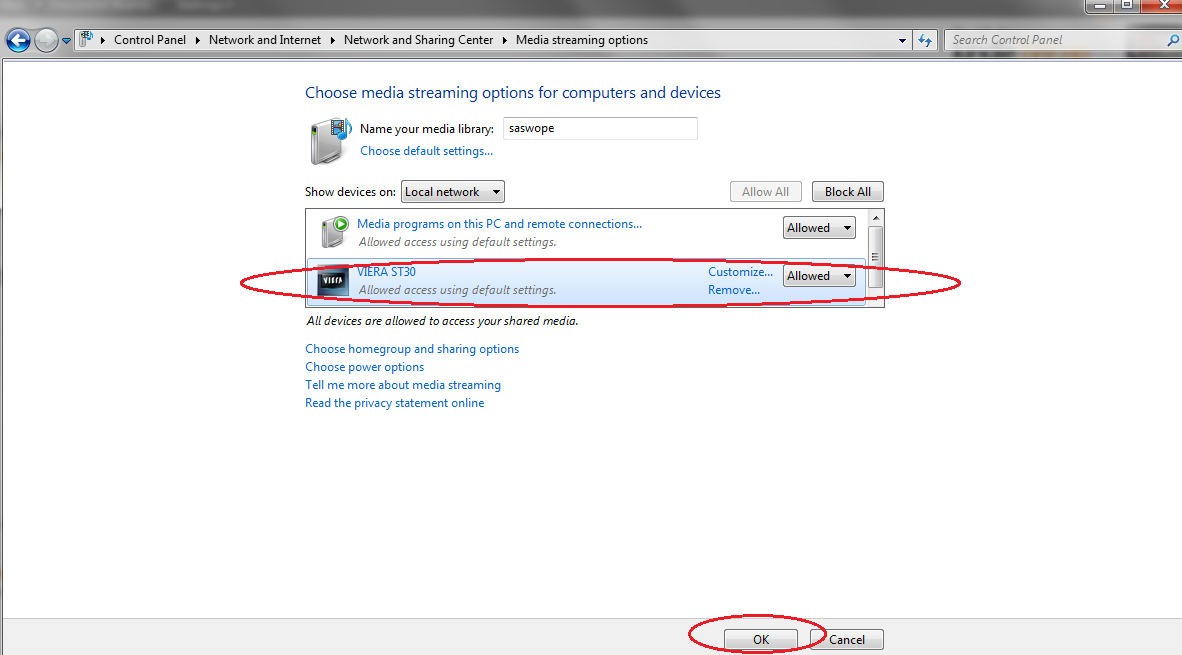
- Make sure that the DLNA compatible devices are on the same local network and are set to Allowed and not Blocked. Select your device and click OK to proceed.
- Configure your audio and video library for streaming by opening Windows Media Player.
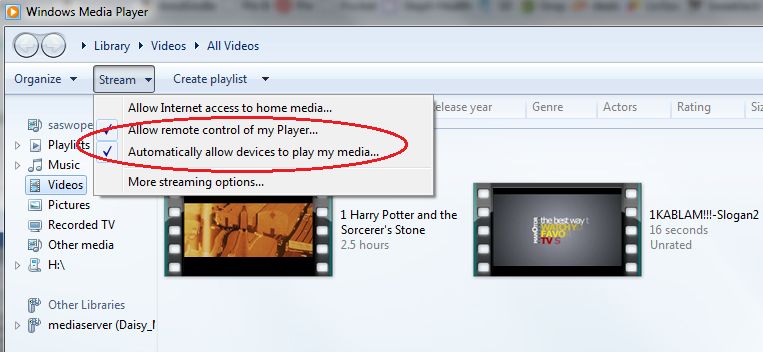
- Click on Stream and make sure that Allow remote control of my Player and Automatically allow devices to play my media are checked.
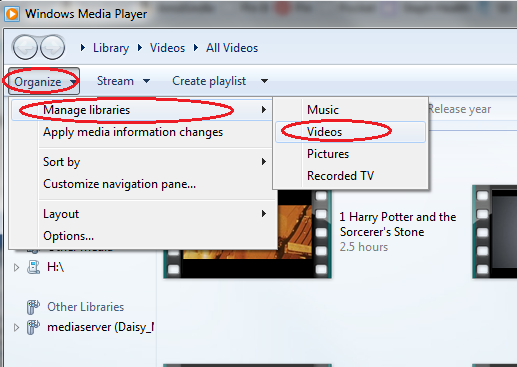
- Click on Organize > Manage libraries > Videos (you can do the same for music later if you like)
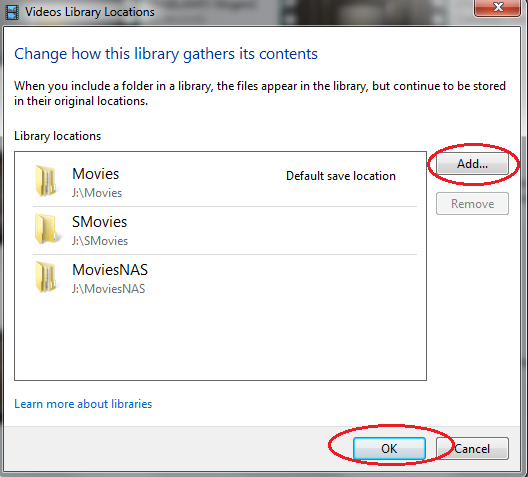
- Add the folder that contains your videos
- Don’t worry about organizing playlists. If your files are organized into folders on your computer you will be able to browse them on your device.
Watch Your Videos
On your device (again, I love my Panasonic DMP-BDT220 Integrated Wi-Fi 3D Blu-ray DVD Player) go to the menu and select DLNA.
Once inside, browse to your content. In my case that was Computer Name > Videos > Folders
And enjoy your videos on your big screen!
WMP Extras
To file under the “Yet another reason I recommend Servio” category, there is a potential issue with Windows Media Player 12. It tries to put MP4 files into the category of “Other” instead of “Video”.
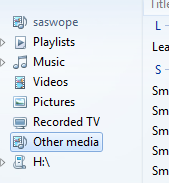
The solution is to select all of the files in “Other”, right-click them and Delete > Delete from library only. Then go into the “Video” types and go to Tools > Advanced > Restore deleted library items
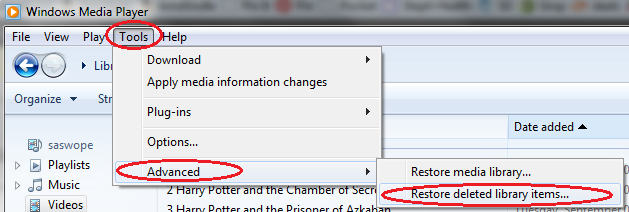
This is the best solution I could find for this problem. The issue is widespread, but unknown in origin.

