If you’ve already flipped through your iPad Manual, you’re probably aware of most of these tips and tricks. However, for those that don’t read manuals cover-to-cover, and for people who just like to learn by playing with the device, this article in the iPad Series includes a list of tips and tricks.
This list will not include things that are essential to using your iPad. If you don’t know how to connect your iPad to iTunes, or how to turn it on and off, you need to read the manual.
As part of the iOS 7 iPad update, this article has been updated, but the screenshots might not be up-to-date.
Below is a list of some of the basic functionality that is built into iPad. These items aren’t obvious and you might not have run across them through general usage.
Content:
Take a Screenshot
Have you every gotten a high score in a game and wanted to take a picture of your accomplishment? You can do it by taking a screenshot. To do this, press the Home button and the sleep/wake button (top right edge) simultaneously to take a screenshot of whatever you see on the device. You’ll hear the click to indicate that you have taken the picture – it’s the same sound that the Camera app makes. Screenshots are saved in the Camera Roll along with your photos. You can email or share the screenshot just like you do any other image.
Multitasking
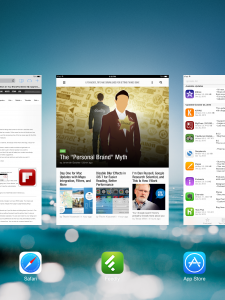
When you’re using an application and click the home key to return to your homepage, the application does not close. It remains open and in its current state. It sometimes continues running in the background. Sometimes you want to close those apps when your device starts running slow. Or, more likely, you need to switch back and forth between apps.
The easiest way to access the Multitasking menu is to double-tap the Home key. A secondary method is to use 4-5 fingers to swipe the screen up if you have that setting enabled in Settings>General>Multitasking Gestures. You will see the Multitasking screen and you can scroll through your open apps and Safari tabs. To close a running app, swipe the thumbnail upwards.
Mute or Lock Rotation
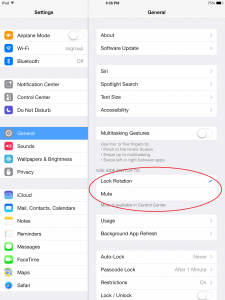
There’s a tiny switch above your iPad volume buttons that can serve one of two purposes. Under Settings > General, you have 2 options. You can set the switch to Lock Rotation or Mute.
We recommend setting it to Lock Rotation. This is handy if you’re reading or watching a movie and move your iPad around. It can be annoying when the screen rotates when you move. If you need to mute your device, you can do that easily by double-tapping the Home key and swiping from left to right across the Multitasking Bar.
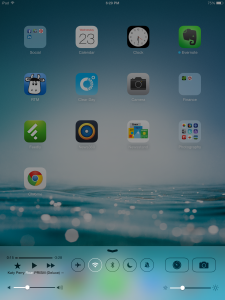
The buttons in the center operate a few most-used settings. The button on the right that looks like a bell with a slash through it will mute your iPad.
Audio Playback
Sometimes you will play your music while doing things around the house, playing a game, or using another app. In this situation, you can access the audio playback controls quickly and easily in the Control Center.
You can access the Control Center by swiping up from the bottom edge of any screen, even the Lock screen.
Directly Access Apps
If you’re like most people, you have your iPhone or iPad set to show some pop-up notifications. They might show up on the home screen when you get a Facebook notification, for instance. Although the phone is locked and the screen is asleep, they’ll still show up. To open these messages immediately, you don’t have to first swipe to unlock your phone and then open the app. As long as your device isn’t locked by a four-digit security code, swipe from left to right on the notification to open the app in which the message appeared. If you do use a code, you’ll be prompted to enter it after swiping the notification.
Notifications Settings
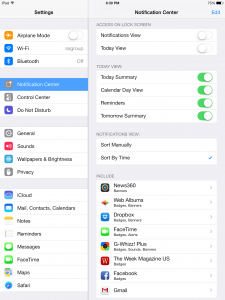
As you installed applications, you probably noticed that those apps asked for permission to notify you. What if you change your mind later, or realize that the stupid pop-ups are annoying? Don’t fret. Just set. (Sorry, I couldn’t resist.) Inside your notifications settings you will find options for each of your apps. Beware; the list can be long.
Look at the Facebook app, for example:
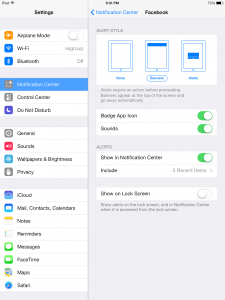
You have several options. I’ll explain what they mean.
Alert Style:
- No Alert (None) – This turns alerts off.
- Banners – This alert will appear on the top of the screen and then go away. It doesn’t affect the app that you’re using.
Here’s what the banner looks like:

- Alerts – This is the pop-up alert. It pauses whatever app you’re using until you click on a button on the alert. These can be annoying.
- Badge App Icon – This is the little red number that shows up on an icon. You have the option of not showing it if you like.
Badge on an Icon:

- Sounds – You can make your alerts have no sound. Alerts with sound will make a noise even if your device is asleep.
- Show in Notification Center – This is a list of the notifications for you to review.
- Include – This is the maximum number of notifications that will be shown in the Notification Center
- View in Lock Screen – You might want to see some alerts when your device is locked, but might not want your texts or Facebook alerts available to anybody near you when your device is locked
Pull-Down Notification Center
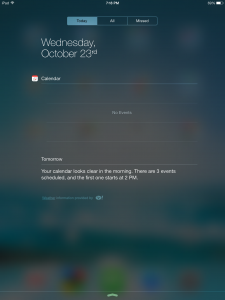
When you read my last tip, you might have thought “What’s a Notification Center?” At the top of your iPad screen, you can see the status bar. It has little icons that you should understand. If you don’t know what they mean, check out the iPad Manual article. There’s an image there so you don’t have to look them up.
When you put your finger on the status bar and drag down, you will see the Notification Center.
You can then click on the notification to go to the appropriate app or drag the bottom back up to make the Notification Center go away.
Tap to Scroll Up
Another great use for that status bar is to scroll up. Once you’ve scrolled your way down a long page, you don’t have to wear out your poor finger scrolling up, up, up the page. Tap once on the status bar—where the time and battery life are displayed— and you’ll jump up to the top. This works for browsers, email, Contacts, and many other apps.
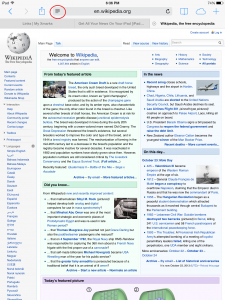
Sometimes you’ll visit web pages that contain a lot of text, like a news article, and the page is busy with ads and clippings. Wouldn’t it be nice to just read the text without all the pinching and tapping and zooming? You can. When there is a lot of text on a page, Safari puts a Reader button in the address bar. (It only shows up after the page has finished loading.)
The Reader button makes the busy Wikipedia page shown above look like this for easy reading:
Tap the Reader button again or hit the back button to escape the Reader mode.
Keyboard Tips
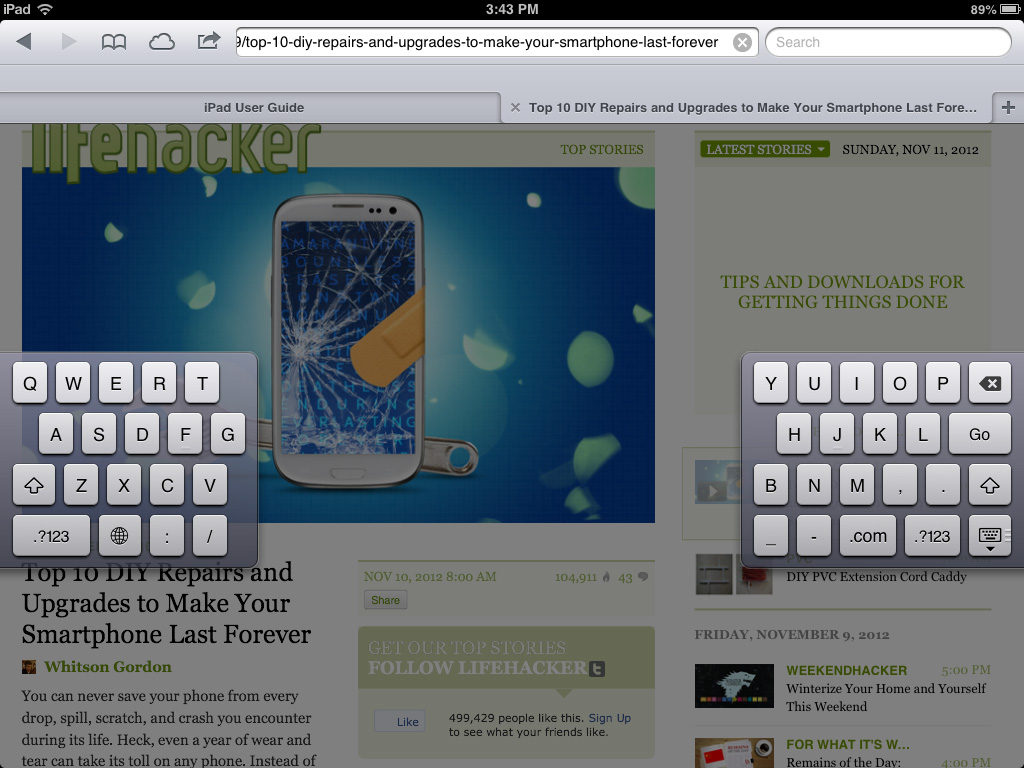
- Split Keyboard – You can split the keyboard for easier 2-thumb typing by going to Settings > General > Keyboard or by pressing and holding the Keyboard icon when the keyboard is in use. The Split keyboard works particularly well in Landscape Mode.
- Double-Tap the Spacebar – To end a sentence (insert a period and a space), do a double-tap on the spacebar. Then just keep typing…
- Adding a Single Number – Rather than switching to the number keyboard and then switching back to the letter keyboard, tap and hold the “123” key, then drag it to a number to select it. When you lift your finger from the number, the letter keyboard will appear again.
- Adding .com – When entering an email address, hold down the period key to see other address endings. When entering a Web address in the browser, hold down the .com key to see alternate URL endings, like .org and .edu.
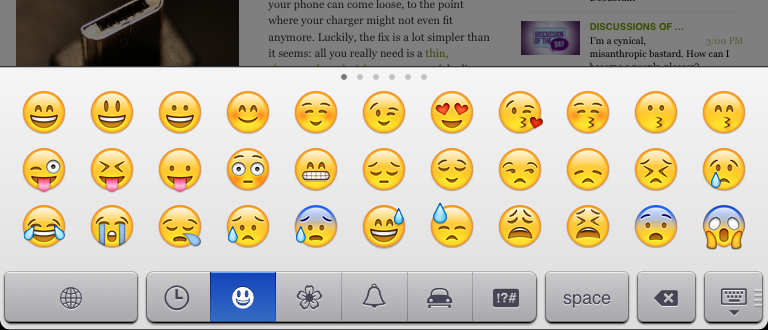
- Adding Emoticons – Add emoticons to your keyboard by choosing: Settings > General > Keyboard > International Keyboards >Add New Keyboard > Emoji. Click on the little World button to use them.
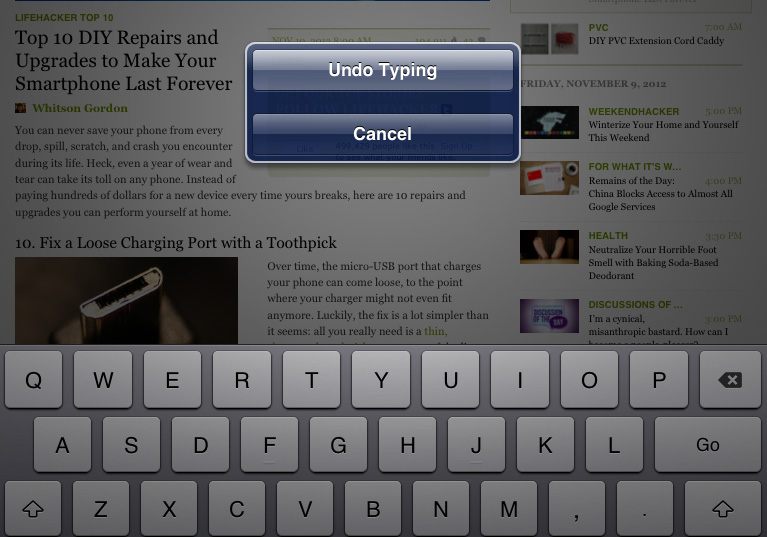
- Undo when typing – To undo the last thing you typed, shake the device then select Undo Typing.
If you’ve ever wished your iPhone or iPad camera had a physical shutter button, look no further. The phone’s volume up (+) button doubles as a shutter button whenever the Camera app is opened. This hard button feels sturdier and more intuitive and can help you take a more steady photo.
Digital Picture Frame
Put your iPad to work as a digital picture frame for a photo slide show. Tap the Picture Frame icon, which appears to the right of the slide-to-unlock bar on the lock screen. If you own an iPad case, flip it into its stand-up position, place the iPad on a table, press the Picture Frame icon and walk away. Guests in your home will have to unlock the iPad to access other apps.
Photos can be pulled from all photos or specific albums, and can include events or images of certain faces. Make these and other slideshow adjustments in Settings >Picture Frame.
You can share your photos, things you read online, and lots of other media items throughout your apps. To do this, tap the Share Button.
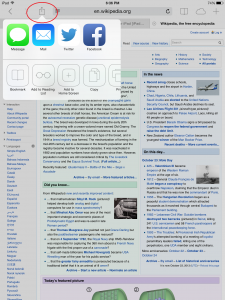
From there, you have the option to email, Post to Facebook, Tweet, and share in other ways depending on the type of media being shared and the apps that you have loaded on your device.
Update Software
You don’t have to connect your device to iTunes to get a software update. Just go to Settings > General > Software Update.
Soft and Hard Reset
It is sometimes necessary to reset your device, whether apps are loading and running slowly or something is freezing up. It is recommended that you occasionally do a soft reset to completely stop and restart all services.
Soft Reset – This is another phrase for a simple reboot. To do this, press and hold down the Sleep/Wake button (at the top right of your device) until the red Slide to Power Off graphic appears. Release the Sleep/Wake button and slide the graphic to turn off the device. Wait a minute or so after the screen goes completely dark. To turn the device back on, press and hold the Sleep/Wake button until you see the Apple Logo. Release the button and the device will finish starting up.
Hard Reset – This method is used to restart the device when a Soft Reset is not possible. This can happen if an app freezes up your device. To do this, press and hold down the Sleep/Wake button (at the top right of your device) until the Apple logo appears on the darkened screen. The device will restart itself.

