This week in the iPad Series we’ll look that the possibility of using the iPad as a navigation device. Before we can do that you must understand the features and limitations of your iPad.
As part of the iOS 7 iPad update, this article has been updated, but the screenshots might not be up-to-date.
Wifi vs. Wifi +3G/4G
If you have a Wifi +3G or Wifi +4G iPad you must pay for a data plan through your cellular or mobile provider to have internet access. As long as your are in your coverage area, you have a data connection. However, as mobile phone users are aware, you can easily bump out of coverage or drop coverage and pick it up on another tower as you are traveling. Ultimately, if you’re taking a road trip there is very little chance that you will have continuous coverage.
If you have a Wifi iPad, you must be connected to a wireless hotspot to have an internet connection. You can tether to your mobile phone, but mobile data service is typically not continuous when you are traveling.
Additionally, the Wifi iPad has no GPS sensor, while the Wifi +3G/4G iPad has what Apple calls “Assisted GPS”. Many users indicated that they could use the GPS feature without a data plan and some said they couldn’t. If you’re really curious, I’d recommend checking out the Assisted GPS page on Wikipedia. The bottom line is that you CAN use the GPS feature on your Wifi +3G iPad without data. However, if you have a weak GPS signal, the “Assistance” from a data plan would use cell towers to assist with your location services.
If you have a Wifi iPad, you can also get an External GPS Receiver to plug into your iPad. But it will set you back about $100. For that much money, you can just buy a navigation system. Or better yet, use your phone.
iPad for Navigation
Why would you want to use an iPad for navigation when you can get an inexpensive GPS unit or just use turn-by-turn navigation on your phone? Most phones these days are making even GPS units obsolete. See the following anecdote:
For my last vacation I flew into Orlando and picked up a rental car from the airport. I had done my research ahead of time and found out that there were many, many toll roads in Orlando. If you’re in a rental car, there’s a Sun Pass that allows you to travel on the toll roads and the fee will be charged to you by the rental company after your trip. My research indicated that if I used a toll road even once during my trip, the rental car company would charge a minimum fee for EVERY DAY I had the car. I desperately wanted to avoid that. Before the trip, I used Google Maps to plot out a path from the airport to our hotel without using toll roads. I printed maps for all of our travel while on vacation and took them with us. Before we left the airport I put my hotel into my phone navigation and was given a path on a toll road. I turned that off and decided to use the printed maps and directions. As we left the airport my trip buddy had trouble directing me and I ended up following the signs to the interstate that I knew we needed to take. The signs from the airport directed me onto the toll road and there was no way to turn around. I later dug around in my phone settings and found out how to set up the navigation to avoid toll roads. But that one small mistake cost me over $15 in fees from the rental company even though I never used a toll road for the rest of the trip.
How would an iPad have helped in this situation? The bigger maps, back-lit screen in the dark, and possibility of saved turn-by-turn directions could have helped my buddy to navigate us.
If You Have GPS
As mentioned earlier, the Wifi iPad has no GPS sensor, while the Wifi +3G/4G iPad does. If you have a GPS-enabled iPad (including if you have added an external sensor), check out the apps below. Do be aware that some of them could require a data connection.
Note: Since I don’t have a 3G (or 4G) iPad, I’m including information from CNET.
 (Credit: TomTom)
TomTom U.S.A.
At $49.99, TomTom U.S.A. for iPhone and iPad has the highest cost of entry of the apps in this roundup, but for your bucks TomTom gives you its tried and true navigation engine powered by its iQ Routes technology and locally stored map data. For an additional $19.99 per year, the TomTom app gains access to the HD Traffic service, which we’ve found to be extremely accurate and invaluable for avoiding (or at least planning for) congestion on both highways and surface streets.
MotionX GPS Drive HD
Some may find MotionX’s interface to be a bit tricky to understand, but fans of this inexpensive GPS navigation app rave about its destination selection wheel and configurable interface. The app is also able to take advantage of connectivity with Pioneer’s AppRadio and certain JVC video receivers for dual-display action. With an entry price of $2.99 and a $9.99 annual subscription fee for Live Voice Guidance (which includes Inrix Traffic data), MotionX also sits at the low end of the premium navigation application price range.
 (Credit: ALK Technologies, Ltd.)
CoPilot Live Premium HD USA
CoPilot Live is a love it or hate it sort of app–personally, I love it. Of the apps in this roundup, it’s easily the most flexible and tweakable, which should appeal to GPS geeks who want to overload on data without alienating users who just want something simple. For $15.99, you get locally stored maps, so you can navigate even when you’re off of the gird. From there, users can add traffic data and a fuel prices feed for $9.99 and $7.99 annually, respectively.
Waze social GPS & traffic
There are more than a few fans of crowd-sourced navigation app Waze around the CNET offices. For the low, low price of free, you get spoken turn-by-turn directions, user-generated traffic and road hazard data, and a fun game that challenges drivers to score points by gobbling virtual treats along their commute. Waze’s interface may not be the most polished one in this roundup and sometimes its user-generated maps aren’t so accurate, but if Google Map’s dominance in the Android market has taught us anything, it’s that it’s hard to beat “free”.
Scout by TeleNav
Scout grabbed our attention at CES 2012, quickly securing a spot as a Best of CES nominee. This free app, powered by TeleNav, works in concert with a Web-based interface to help users to manage their destinations, social networks, and, when on-the-road, provide turn-by-turn directions. Owners of Ford Sync AppLink powered vehicles should take note, because Scout will soon gain compatibility with Ford’s voice-activated interface.
Offline Navigation
Consider the old days before GPS navigation. Can you remember taking a road trip as a kid while your mom sat in the passenger seat with a huge paper map? And who could ever get the thing folded properly? I’m a firm believer that everyone should know how to navigate with nothing but a map and possibly a compass. (Speaking of which, all iPads come with a built-in compass.)
GPS with turn-by-turn navigation is great, but sometimes you’re forced to drive off the grid. I recently went to visit family and even the satellite radio in my car lost service. It happens. Or maybe you only have a dumb phone and a Wifi iPad. Whatever your situation, wouldn’t it be nice to have maps and directions saved on your iPad for offline use?
There are a few apps that claim to have offline navigation and we encourage you to check them out:
- CoPilot GPS – This is a free app, but charges ala carte for maps and navigation. The US map is $9.99 and turn-by-turn voice navigation is up to $24.99. It’s 4-1/2 stars based on over 300 ratings.
- ForeverMap – Maps are provided by OpenStreetMap, the “Wikipedia of maps”. The app is $2.99. 3-1/2 stars and over 300 ratings.
- MotionX HD – You can get the regular version for $0.99 or the HD version for $1.99. Pay an extra $9.99/year in-app to get voice guidance. 4 stars and over 100 ratings.
- NavFree – It’s free, though you can pay $1.99 for an ad-free version and add on traffic and other features through in-app purchasing. 2-1/2 stars and very few ratings.
- Navigon USA – This app is $50. For that kind of money just install a GPS or use your phone. Just sayin’.
Alternate Offline Solution
As a final solution, here’s what we recommend: go to Google Maps on your computer and save a map as a PDF. Send the PDF to your iPad. Open it at your leisure while traveling. (The navigator can do this – NOT the driver!)
Details:
If you’re not sure how to do that, here is an example and some steps to take.
- On your computer, go to maps.google.com.
- In the left column, click Get Directions to change to the directions column view.
- When the column changes, enter your starting location and your destination then press enter or click Get Directions. In the example below, You can go from Tolly-Ho Restaurant to Kings Island.
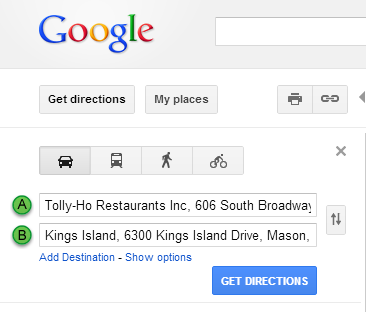
- Look at the directions that Google has given you. Sometimes you can choose from alternate paths, or click Show options to avoid Toll Roads. Make sure you are happy with the route.
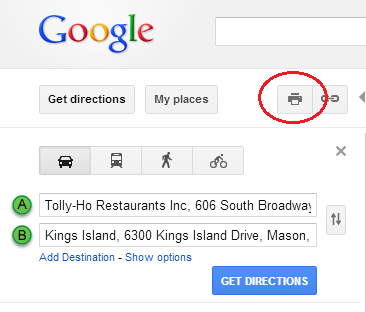
- Select the Print button:
- A new tab or window will open in your browser. Here you have several options. First, we recommend showing the main map. Do this by selecting the check box at the top of the screen next to Include Large Map. The map will then show up on your page.
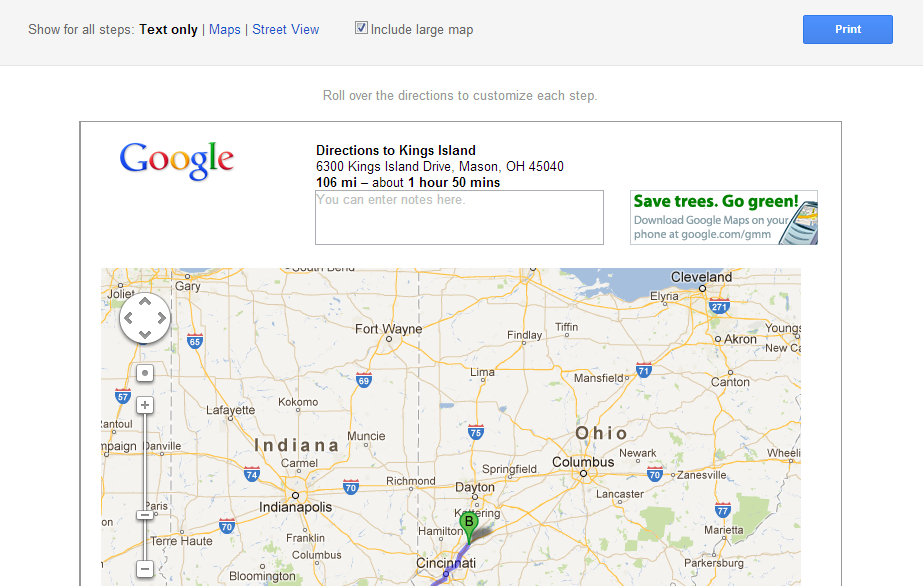
- You also have options at the top of the page to show maps and/or street views for every step of your directions. we don’t recommend that. You should enable the ones that you need individually.
- Look at your directions. Is there a particular step that concerns you about your route? You can show a close-up map or a street view of your turn for a particular step. To do this, scroll down to the list of directions and hover your mouse over any steps that you want to improve. Then click on the links to add a map or a street view.
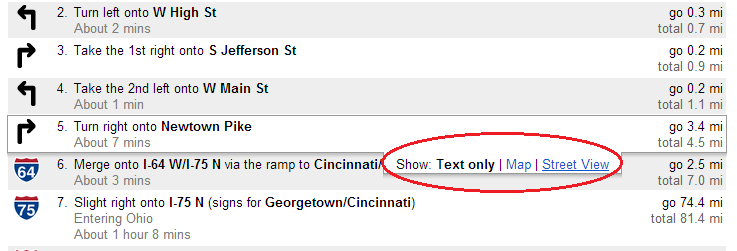
- Add as many maps and street views that you feel are necessary.
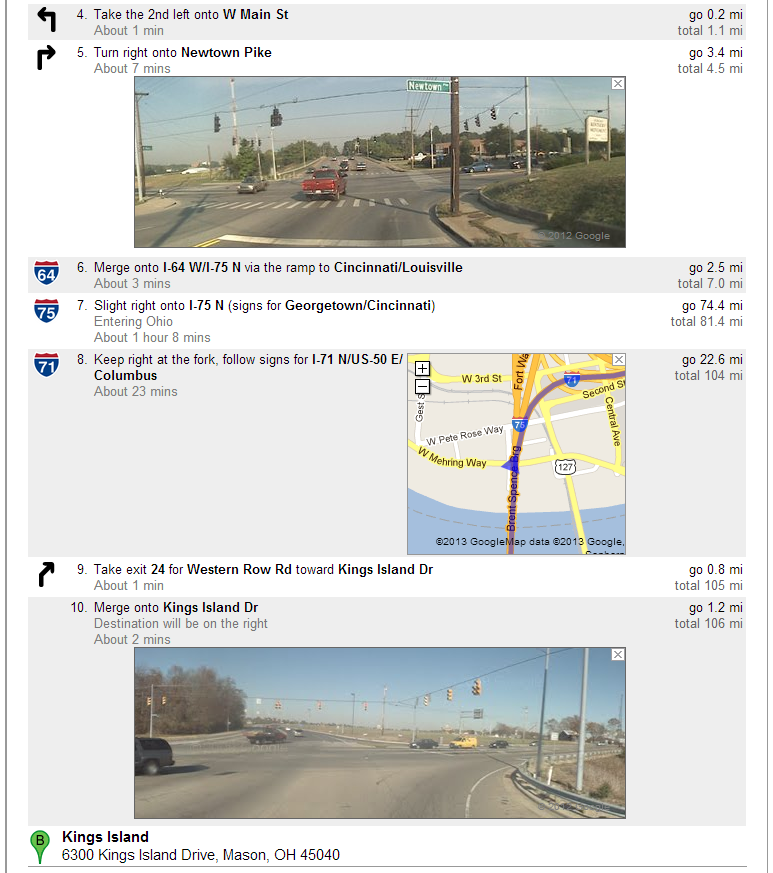
- Print your directions to PDF. To do this, select the Print button at the top of the page. You will be taken to a new Print Preview page where you can preview your directions, change the margins, and more.
- Depending on your printer and software installations, you might have PDF listed as a printer. Make sure that everything looks good and print your document.
TIP: If you don’t have the option to print to PDF, download the free CutePDF Writer. It creates a virtual printer on your computer. When you print a document from any program to the CutePDF “printer”, it will produce a PDF file from that document. - Open the saved PDF file on your computer to make sure you’re happy with the results. If not, go back and change what you’d like.
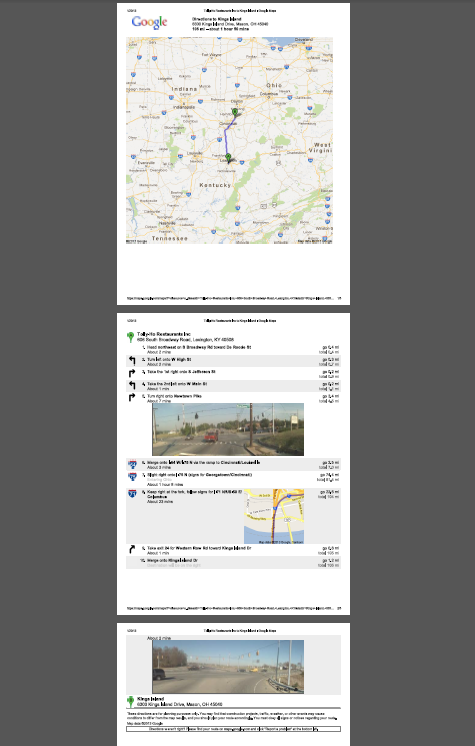
- There are many ways to get files from your computer to your iPad, but we prefer to use Dropbox. If you do this, you must have Dropbox installed on your computer and your iPad. Save the directions in one of the Dropbox folders on your computer and give it enough time to sync with the server. Then open Dropbox on your iPad with an internet connection and let it sync with the server. Find the directions file and download it to your iPad so that you can access it offline.
- When you’re ready to use the file, open it using your favorite PDF reader on your iPad.
Conclusions
Although most people don’t use their iPad for navigation, it is still good to know and understand your iPad’s capabilities and possibilities.

 (Credit: MotionX)
 (Credit: Waze)
 (Credit: TeleNav)


