For general information about organizing your paper, cookbook, and online recipes, see Organize Your Recipes [Organization #12], first published in July 2012. After reviewing the 2012 article, come back to this article for updated and software-specific information. This article is part of both the Organized Life Series and the Getting Healthy Series.
In this article, you will learn how to use Pinterest, Google Drive, and Paprika to organize your new and existing recipes so that you can plan your meals, shopping list, and smoothly cook your recipes. After you have mastered a recipe, you can share your favorite recipes with friends and family or export your recipe collections as HTML to share on your personal website.
Content:
Structuring Your Recipe Workflow
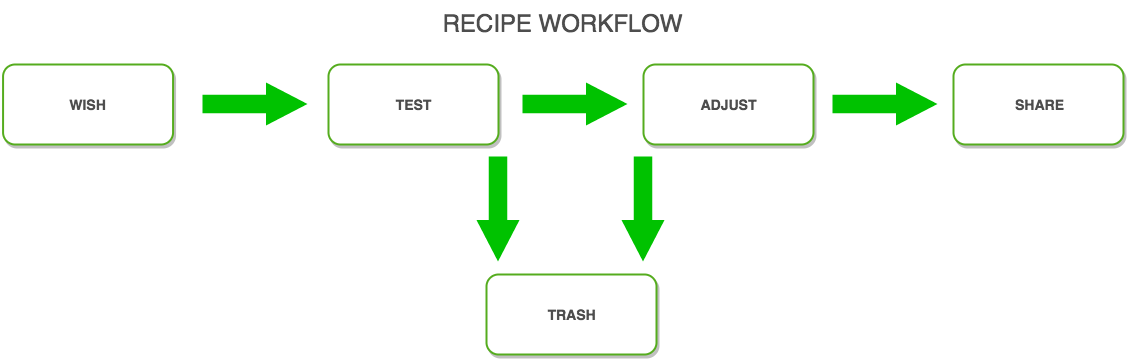
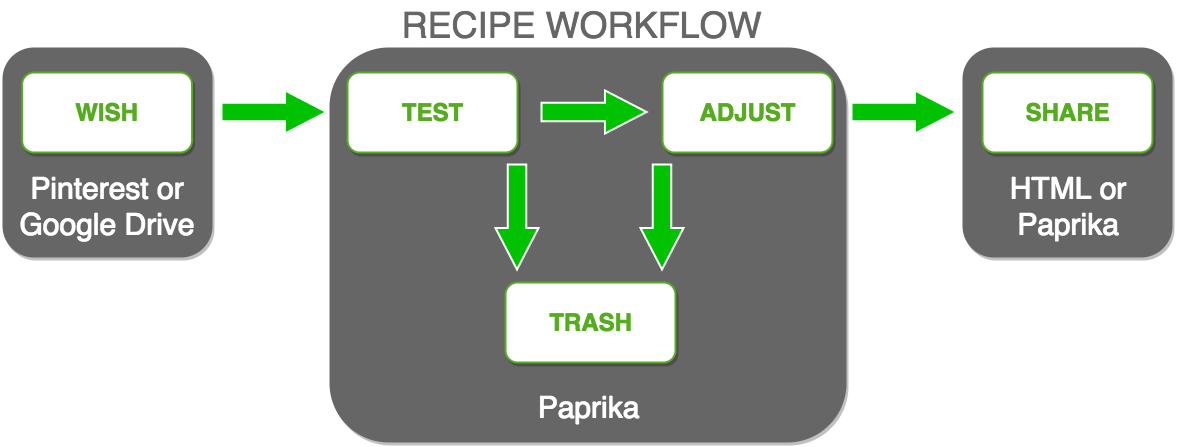
Recipe development includes a natural workflow that is determined by whether a specific recipe is one of your favorite recipes, a new recipe, or a recipe that falls somewhere between:
- WISH – You find these recipes interesting and might someday want to test them
- TEST – Reviewed recipes that you plan to test in the not-so-distant future
- TRASH – Recipes that you have tested and did not like, but want to keep so that you don’t try them again
- ADJUST – Tested recipes that need review and/or adjustment before they are ready to share
- SHARE – Recipes that you love and want to share with friends and family
Gathering Your Recipes
If you have previously organized your recipes, you have gathered your recipes, but you might have old cookbooks and handwritten recipes that still need organized. To gather your printed recipes, use Google Drive. Additionally, as time passes you will find new and exciting recipes online that you might want to test. To gather online recipes, use Pinterest.
Saving Printed Recipes Using Google Drive
You can convert PDF and photo files into text using Google Drive. While this method is not perfect, it is much faster than typing recipes by hand.
To convert GIF, JPEG, PDF, and PNG files into text files using Google Drive, complete the following steps:
- Scan your recipe or take a photo of your recipe using a high-resolution camera in a well-lit environment.
- Save your scan or image to your Google Drive account.
TIP: You can use the Google Drive app on your tablet or smartphone to upload a photo to Google Drive. - On your computer, open Google Drive in your browser, locate the recipe that you want to save, right-click on your recipe and click Open with > Google Docs.
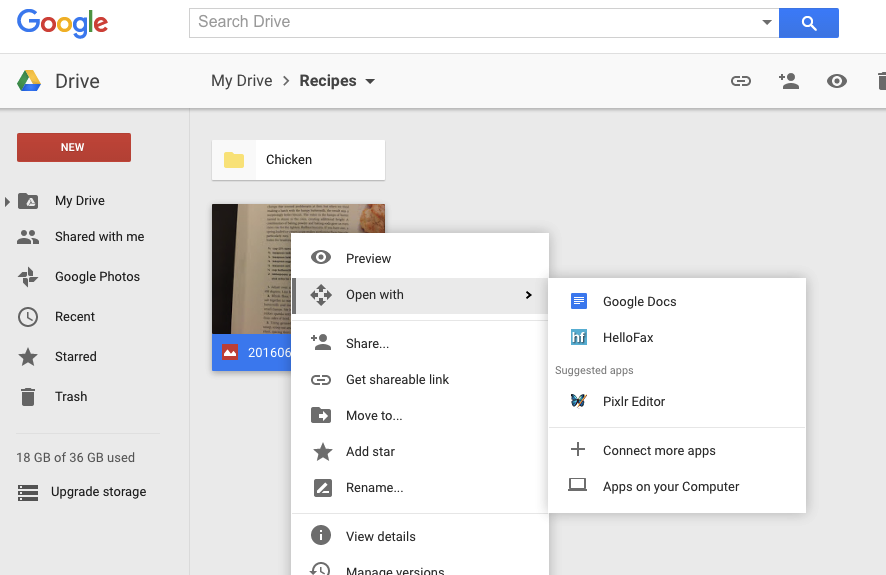
- The Google Doc file opens in the same folder as your recipe image, and includes the recipe image followed by the scanned text. (PDF scans do not include the scanned image.)
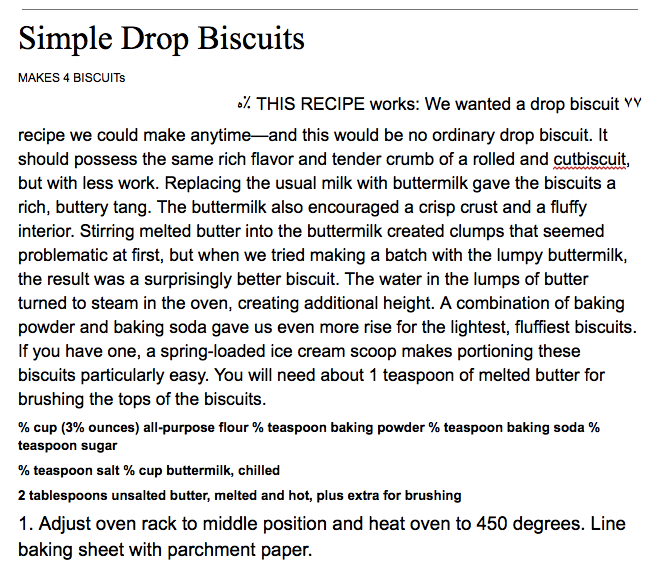
- Use the image as a reference to update any errors in the text. For example, fractions might be converted to a
%character. - Your document is saved automatically by Google Docs and is available online or through the Google Docs app.
Saving Online WISH Recipes Using Pinterest
For online recipes that you want to try, save the recipes using Pinterest. You can create a single recipe board, or create multiple boards for different categories of recipes that you find interesting.
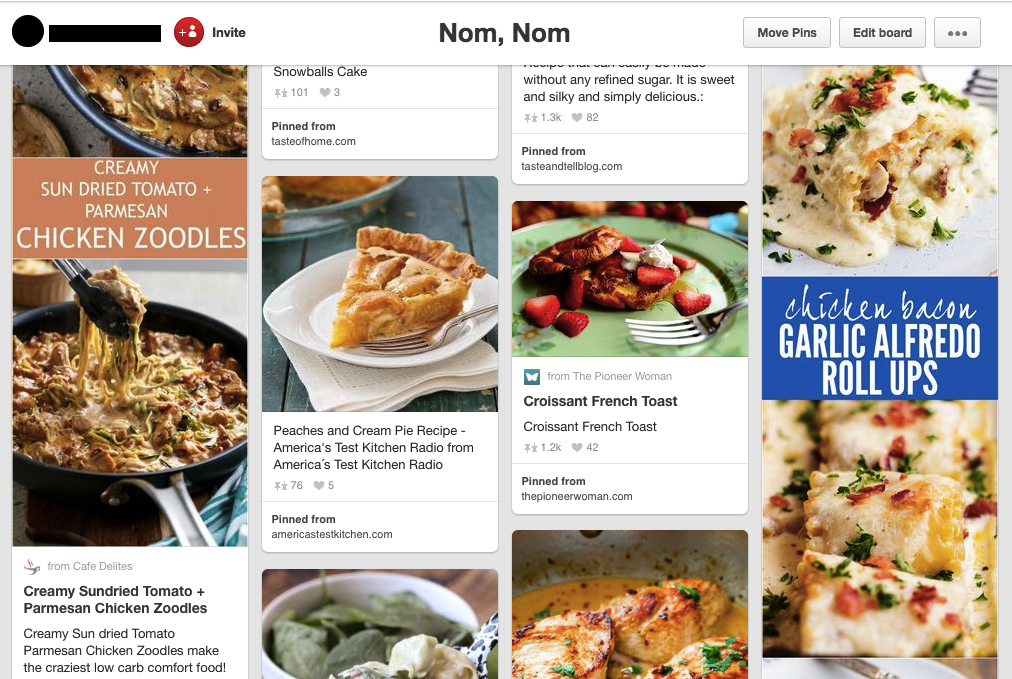
You can even add a Pin It Button to a browser, such as Chrome, that allows you to pin images from any website. Alternately, most recipe websites or blogs include a Pinterest button on the page or image that helps you to pin the recipes that you find online.
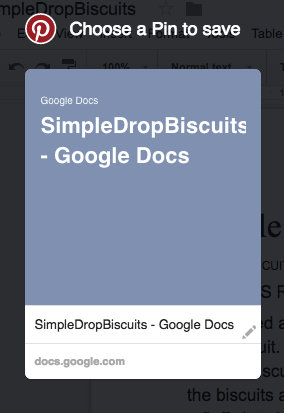
To save your Google Docs recipes to Pinterest, open the document and use the Pin It button in your browser. You can pin a recipe even if there is no image in your file.
Testing Your Recipes
Moving TEST Recipes to Paprika
When you are ready to test a recipe, save it in Paprika.
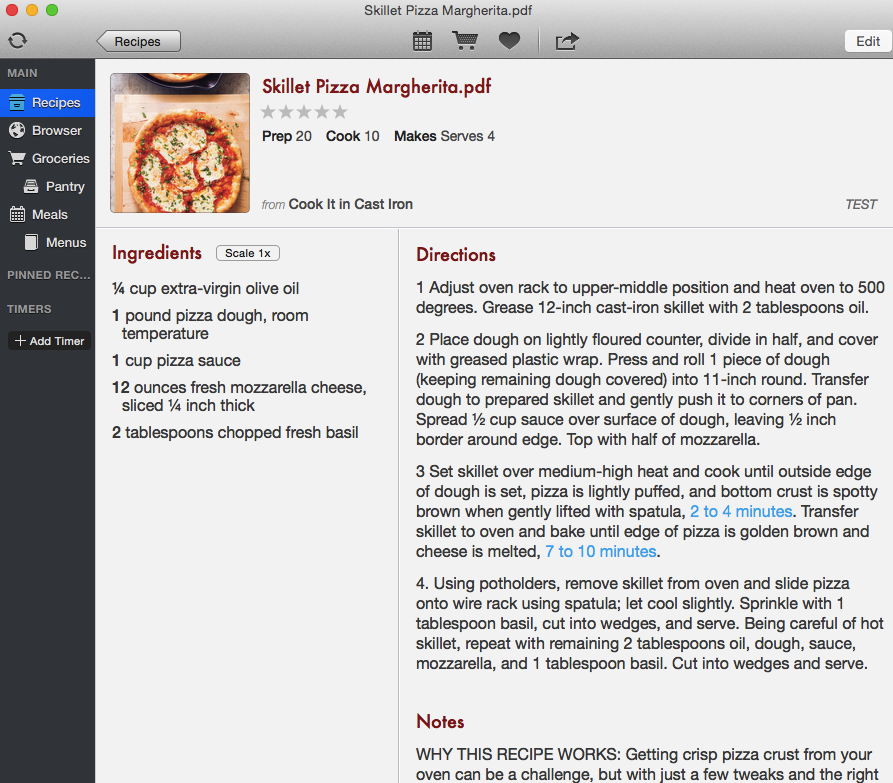
Paprika is a recipe app that you can use on your Windows, Mac, iOS, or Android devices. It syncs automatically across devices and has some great recipe features. For information about using Paprika, see the Paprika knowledge base and user guides.
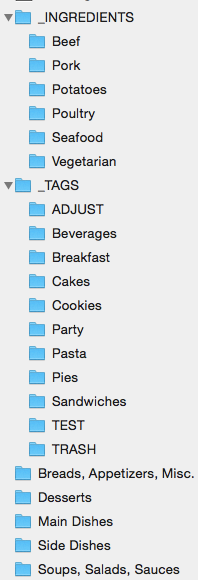
When you begin using Paprika, you need to create categories that you can use to tag your recipes.
For example:
To add a recipe to Paprika, you can copy and paste a link to open an online recipe. You can also import recipes to Paprika. See the documentation for supported file types.
To add a recipe from Google Docs to Paprika, complete the following steps:
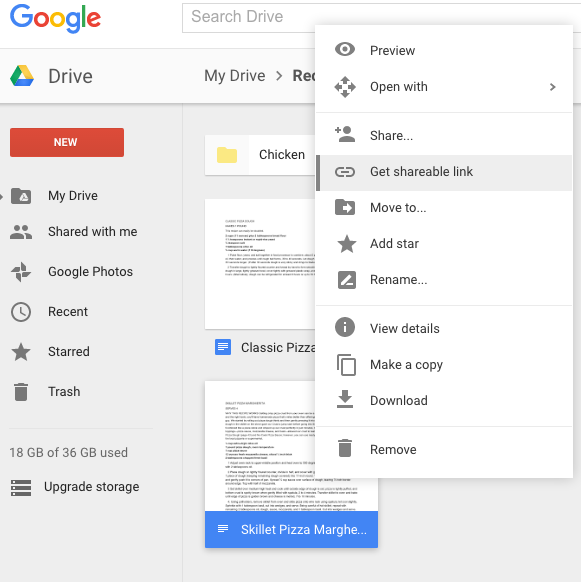
- On your computer, open Google Drive in your browser, locate the recipe that you want to add to Paprika, right-click on the recipe, and click Get shareable link.
- Link sharing is turned on for the document, making it accessible within Paprika without signing in to Google Drive.
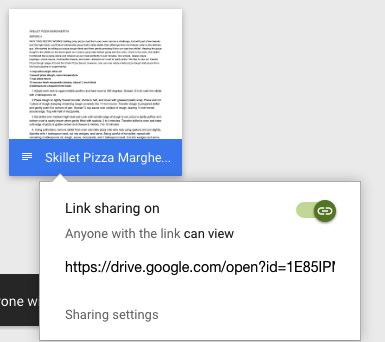
- Copy the link to the document.
- In Paprika, click Browser to open the browser window.
- Paste the Google Docs link to your recipe and press Enter.
- Add your recipe to Paprika.
When you add a recipe to Paprika, you can add tags (for example, _TAGS or _INGREDIENTS tags), and you should add a TEST tag. However, do not add a category, such as Desserts or Main Dishes until you are ready to share your recipe.
Planning Recipes To Test
If you know you want to spend a weekend testing recipes, then a few days before the weekend, plan which recipes you want to test. For example, if you want to make Chicken and Rice on Saturday, you must create a grocery list for the ingredients.
To plan your weekend recipes in Paprika, complete the following steps:
- In Paprika, view your TEST recipes.
- To locate the recipe that you want to add to the meal planner, right-click on the recipe and click Add to Meal Planner.
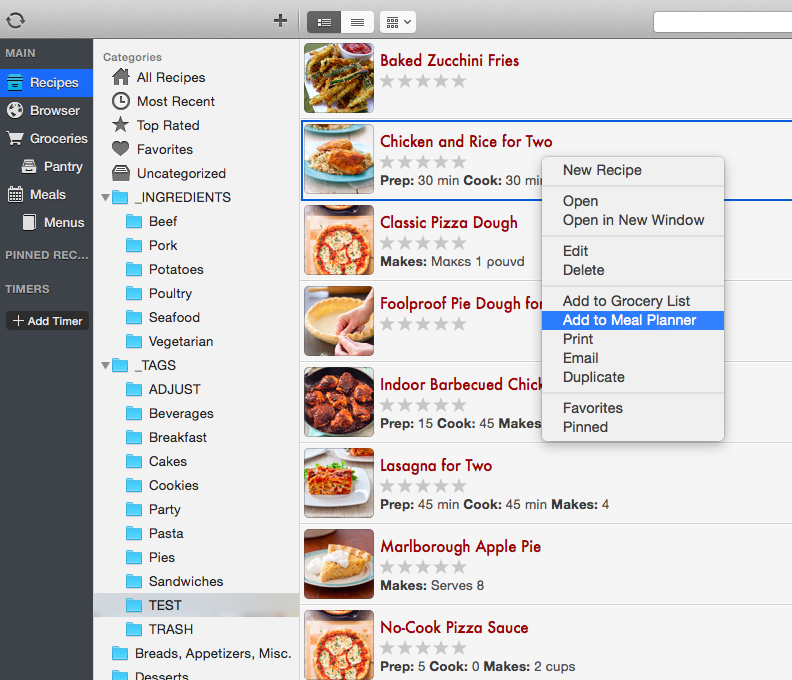
The Add Meal meal planner calendar opens. - Select the meal and the date on which you plan to test your recipe, and click Save.
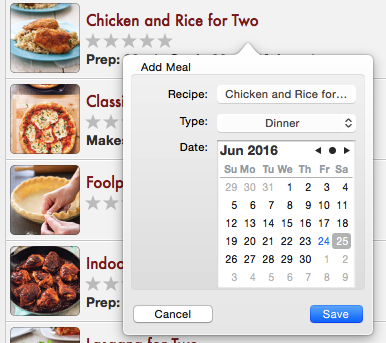
The Add Meal dialog box closes and your meal is added to the meal planner. - Repeat step 2 and step 3 for all of the recipes that you plan to test.
- To locate the recipe that you want to add to the meal planner, right-click on the recipe and click Add to Grocery List.
The Choose Ingredients selection list dialog opens. - To select the ingredients that you need to add to your grocery list, select or clear the check box next to the ingredients, and click Add.
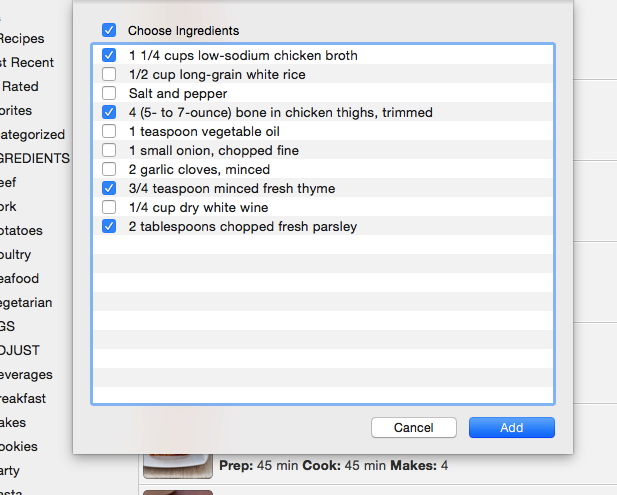 The Choose Ingredients dialog box closes and your ingredients are added to the grocery list.
 - Repeat step 5 and step 6 for all of the recipes that you plan to test.
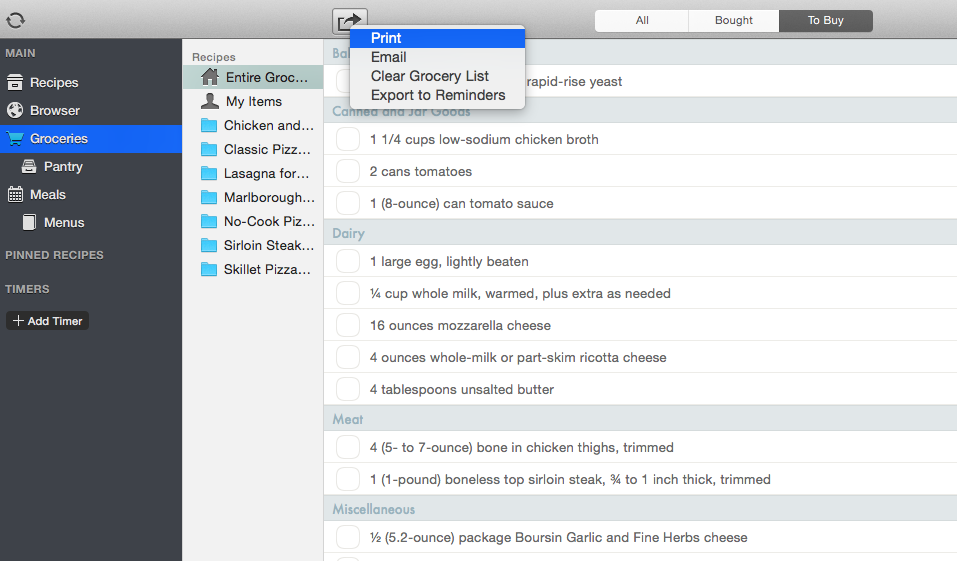
- In Paprika, to view your grocery list, click Groceries > To Buy.
- To print your grocery list click the share button and click Print.
- To finish preparing to test your recipes, purchase your groceries.
Testing Recipes
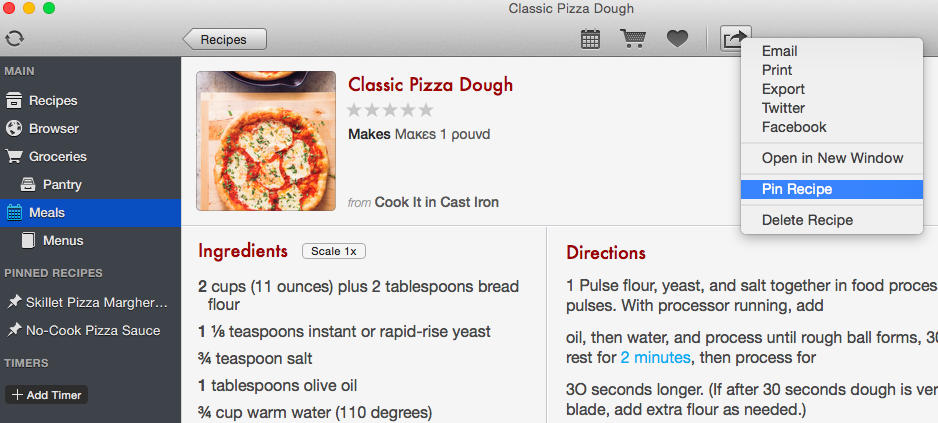
When you test recipes (or later if you host a dinner party), you might cook more than one recipe at the same time and need to jump between recipes. Paprika provides you with the ability to pin active recipes so that you can easily switch between recipes while you are cooking.
You can also set timers and scale the recipe for smaller or larger batches. For more information about using Paprika, see the Paprika knowledge base and user guides.
Categorizing Recipes After Testing
After you have cooked and tasted your recipe, you should move the recipe through the workflow to either ADJUST or TRASH. If you don’t like the recipe, and don’t want to make changes and try it again, change the recipe category in Paprika from TEST to TRASH. If you do like the recipe, change the recipe category in Paprika from TEST to ADJUST. Even if you love the recipe, you should at least try the recipe again before sharing it. Alternately, if you like the recipe but want to try some changes to the recipe (such as using other seasonings or using lower-fat or lower-calorie substitutions), keep the recipe in the ADJUST stage of the workflow until you are ready to trash it or share it.
After you have tested and adjusted your recipes, you can share your recipes with your friends and family using Paprika. After hosting a dinner party or taking a potluck item to a gathering, your friends and family will be lining up to ask for the amazing recipe that you used.
When you are ready to share a recipe, you should move the recipe through the workflow to from ADJUST to SHARE. Change the recipe category in Paprika from ADJUST to a category, such as Desserts or Main Dishes.
To use Paprika to share your recipes, use one or more of the following methods:
- Email – Share a
.paprikarecipefile as an email attachment so that the email recipient can import the recipe using Paprika. - Print – Share a printed copy of the recipe with people that you see in person.
- Twitter – Share a recipe (name and photo) on Twitter.
- Facebook – Share a recipe (name and photo) on Facebook.
- Export – Export one or more recipes to
.paprikarecipefile format or.htmlfile format.
Exporting Your Recipes to Your Website
You can export your recipe collections to HTML files and share them on your personal website. Keep in mind that depending on your website setup and FTP client, you might need to alter the steps provided in this article.
To export your recipe collections to HTML files, complete the following steps:
- In Paprika, click File > Export… .
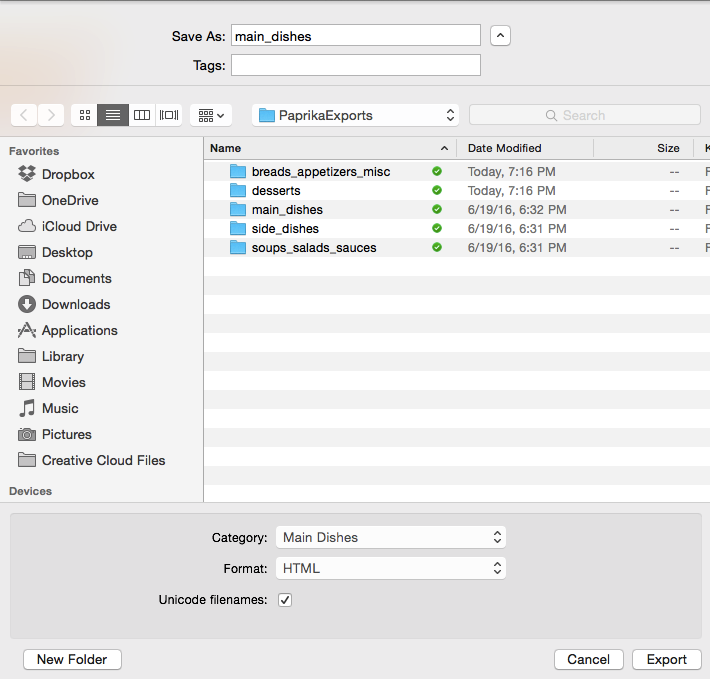
The export dialog box opens. - In the export dialog box, complete the following fields and click Export:
- Save As: – Enter a file name (without spaces) for the new HTML recipe collection.
- Category: – Choose the Paprika category tag for the recipe collection that you want to export.
- Format: – Select
HTMLto export the recipe collection in HTML format.
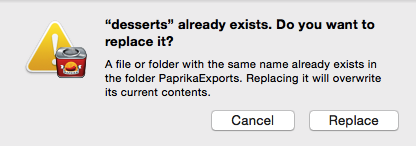
- If the recipe collection file already exists, Paprika prompts you to confirm that you want to replace the file. To replace the file, click Replace.
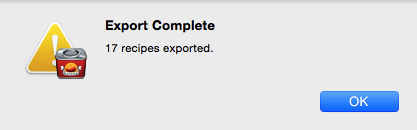
- A dialog box appears to confirm that your recipes were exported.
- Repeat step 1 through step 4 for all of the recipe collections that you want to export.
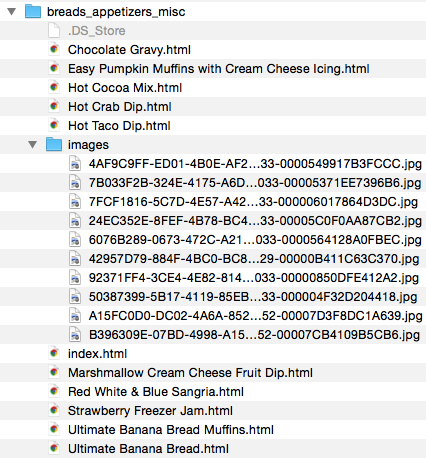
- Review the structure of the files that Paprika creates so that you are familiar with the files and their structure.
To save your exported collections to your website, complete the following steps:
- Open an FTP client, such as FileZilla and connect to your web server.
- In the FTP client, open the local folder that contains the exported Paprika files and open the remote folder where you want to store the new recipe collections.
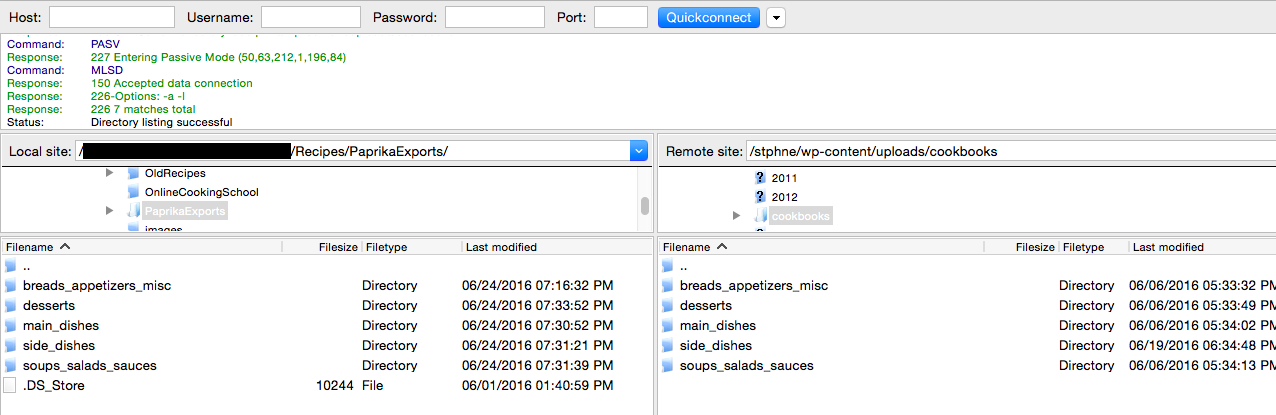
- Copy the updated files from your local machine to the remote server, and replace any existing files if you are updating your website collections.
- Within your website, link to the
index.htmlfile in the folder for each collection.


