The iPad is a media device and we’d be remiss if we didn’t consider its possibilities as a photo and video storage, editing, and display device. This week in the iPad Series, we’ll be looking at photos and video.
As part of the iOS 7 iPad update, this article has been updated, but the screenshots might not be up-to-date.
Photos
Your iPad is a pretty big camera to lug around and chances are that most of your photos don’t originate on your iPad. The first thing that we need to consider is how to get photos to your iPad for editing.
Photo Syncing
How you sync your photos depends on how you generally take and store them. Most likely, you have two photo sources: your camera and your cell phone. To get your photos off of your camera you can pop the memory card out and into your computer where you store, edit and upload them.
The first thing that you need to consider is how you organize your photos. In that article, we recommend pulling all of your photos into one location and organizing them using Picasa on your computer. In another article, we recommend keeping a backup of your photos online. The article covers backing up all of your files, but there are some places to just keep your photos. We recommend using Picasa Web Albums because it syncs nicely with the desktop version, but storage does cost money. You only get 1 GB of free storage and there are paid plans and workarounds. But if you’re looking for a completely free solution, go with Shutterfly. It will take a lot of work, manually uploading, and there is no syncing.
Here are my recommendations for getting your photos from your computer to your iPad.
Picasa Web Albums
Picasa Web Albums syncs photos with your computer, photos are automatically imported into the photo stream of your Android phone, and photos are easy to access from anywhere in a browser window. In order to get the photos stored on your iPad and not “in the cloud” you will need to manually download them.
However, there are a couple of problems with Picasa. You can’t download an album from the web, and must instead download individual photos. Additionally, the web page is not optimized for touch. With the move to Windows 8 and with so many tablets being used, you would expect that the future of web design is touch optimization. But that’s an article for another day.
Web Albums HD ($3.99)
That brings us to a photo viewing tool called Web Albums HD. You can log in to your Picasa account to view your web albums in Picasa. You can also log into your Facebook account to see the photos that you have uploaded there. After you’ve set up your accounts, you can check out the manual by tapping Getting Started. Make sure you enable the location services. You must do this to be able to upload video and multiple pictures at once. See the Web Albums FAQ for more information.
Actions that take place in the app (like deleting) do affect your Picasa albums online, so be careful. If you think this might be a problem, you can go into the settings and disable the delete option. Another option that you should look at is the Disable auto-lock option. If your iPad goes to sleep, all uploads and downloads will stop. This stops it from going to sleep while you have the Web Albums HD app open.
The best feature of Web Albums HD is that it allows caching for offline viewing. That means you can cache at home on your wifi, then show people photos in the airport without paying for wifi. However, if you want your photos to show up in your Photo Stream of your iPad, you will have to download photos individually.
 Dropbox (Free)
Dropbox is another option, but you don’t want to use Dropbox for your main photo storage. That could get expensive. However, the Dropbox app for iOS and Android has a feature called Camera Upload. The first time you run the app. it will ask you if you want to use the feature and will set it up for you. It uploads images from your photo stream to a folder in your Dropbox account.
In Android, it uploads automatically without the user having to do anything. In the iOS version, you have to go trigger it because Apple likes to lock down everything and make things inconvenient for users. The best use for this feature is that screenshots that you take go to your computer where you can edit them in the full version of Photoshop or pop them into an article.
That means you can take a photo on your phone (Android or iOS) and then view or download the image on your iPad. Also, if you pop the memory card into your computer you can set up Camera Upload the same way. If you take a lot of pictures with your device, you should disable this feature.
 iCloud
If you’re an all-Apple user or you connect your iPad to your computer and iTunes often, you might want to use iCloud to sync your photos.
Like Dropbox, you can also use your iCloud for other storage and it can be accessed from the web. Except you can’t access your PHOTOS on the web. Your photos will only sync between Apple devices like your iPad, iPhone, and Mac.
For most people using multiple devices or platforms, iCloud is not an option.
Another option for moving files is just to email photos to yourself. There’s no syncing involved, just move it and upload to wherever you want when you’re done.
SD Card
You can easily import images from an SD card to your iPad with a card reader, but you can’t save images back to the card. However, if you’re willing to jailbreak your iPad, your file systems are accessible and you can move files wherever you like.
Photo Editing
Before you choose from different photo editing apps, you must define your needs. Most people edit photos for one of two reasons. The first is editing personal photos to upload to social media sites. The second is editing screenshots or putting together graphics for a blog.
When editing a photo, there are some common things that you might need to fix:
- Teeth whitening
- Red-eye fix
- Exposure adjustment
- Temperature change
- Brightness/hue/saturation
- Cropping
- Resizing
- Liquify
To create or edit images such as those for this website, you need the following features:
- Layers – Layers are necessary to be able to stack images together.
- Remove background – When you take a photo of something, you might want to remove items from the background.
- Select color – To remove a section based on color, or change the color of an item, you need the ability to select sections by color.
- Transparency – Transparency is often necessary for PNG and GIF images and layers.
- Text – You often need to be able to add text to an image.
- Brushes – Brushes are great for covering email addresses and creating simple graphics.
For heavy-duty editing, you will likely use software on your computer. But for some quick edits, we’re going to consider editing on the iPad.
Our sample image was taken on a camera phone at a dark shooting range. The targets behind the subject were well-lit. The cell phone camera used to take the image didn’t work well in the lighting. The image is grainy and not well-focused. (FYI – the subject is 18 years old and this is the first time that she fired a weapon.)
In the example below, the image was edited the full version of Photoshop (Creative Suite 6):
As we evaluate the iPad photo editing apps we will consider what can we accomplish with each app and how difficult is it. In the example above, we lightened the subject in the foreground and darkened the background subtly. Her face has been sharpened without losing the smoothness of the skin. We whitened her teeth a little and removed some blemishes. Look at the larger image by clicking on the image above. If you saw the image on the right you wouldn’t even think it had been photoshopped. That’s the other goal.
Now let’s consider the apps.
 iPhoto ($4.99)
This is an obvious place to start because this app was created by Apple and photographers and graphic artists everywhere swear by editing on a Mac rather than a Windows machine.
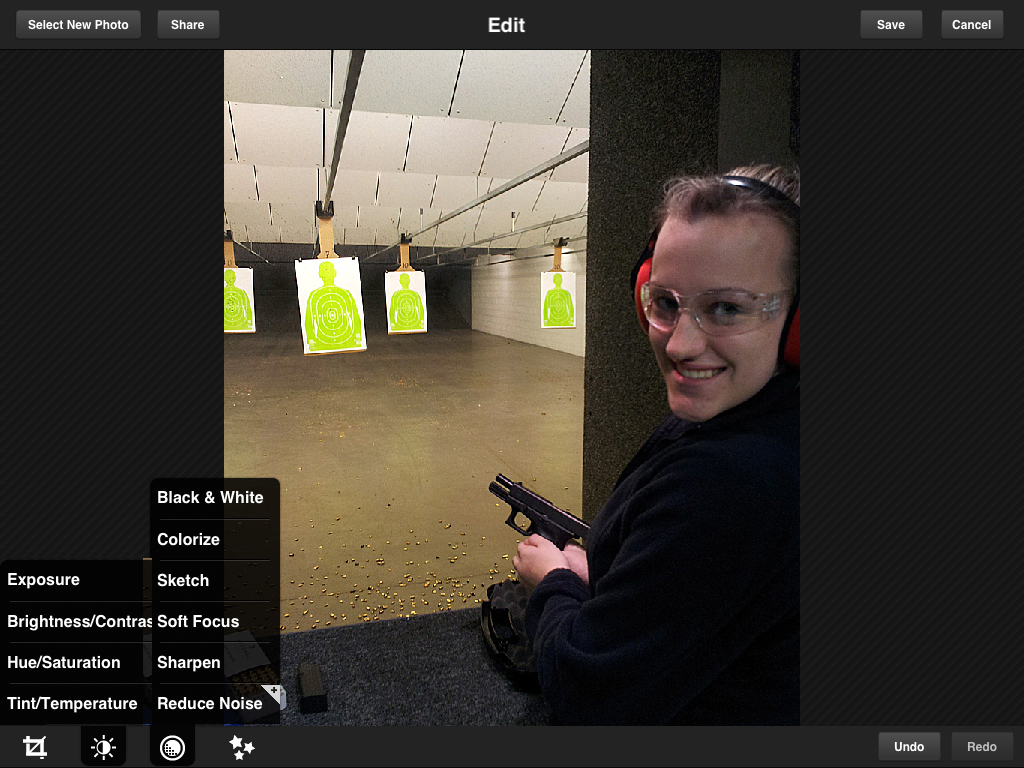
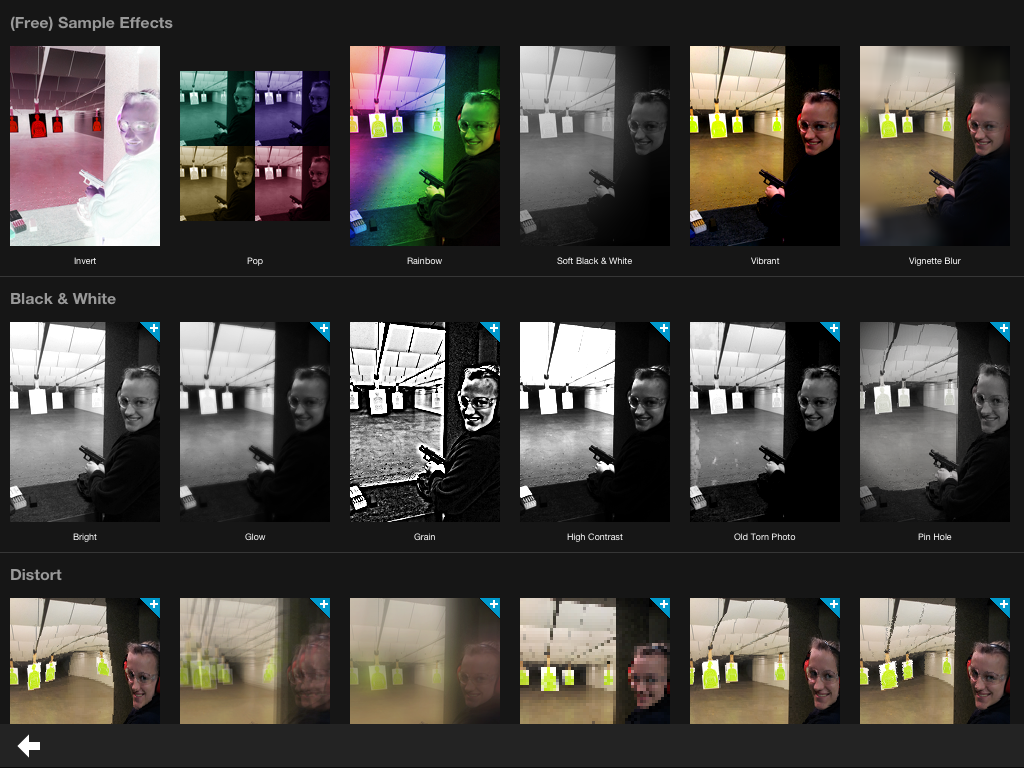
One great iPhoto app feature is that by tapping the ? button, you can see an overlay of labels for each of the buttons and effects.
Here’s the image after editing on the iPad.
The image had looked better on the iPad than it does now. Anyway, the few snags that we ran into were that you must do things to the whole photo before the effects are applied on top. That is, if you do it the other way around, your effects are turned off while editing the whole image. This is odd, but after you got used to it, it could work.
There are no explicit layers on iPhoto, but you can apply effects such as desaturation, sharpen, blur, and more with a brush. The downside? Skin and things like floors can look splotchy since it’s hard to apply effects evenly with a brush.
Overall, it’s a solid photo editing app and you can do what you need to.
 Photogene ($2.99)
When you open Photogene, there’s a decent tutorial. Once again, the location services must be enabled.
You can lighten shadows, zoom, sharpen the whole image, heal, blur, dodge, and burn to accomplish this:
The image didn’t sharpen up as nice as with Photoshop or iPhoto. It was very grainy before we softened the skin. Additionally, the healing brush was a little complicated. It was basically a clone stamp and you have to choose the source. The spots also start big and have to be made smaller and moved accordingly. It worked, but was difficult to operate. Saving, however, is very nice and you can title your images.
Overall, Photogene has a nice interface, but falls short on the actual results of the edits. If you’re going to spend money on an editing software, spend it more wisely.
 Snapseed ($4.99)
Snapseed had a nice walkthrough at startup.
During editing, we used a selective adjust to heal, turned the brightness up, and sharpened the image:
In order to selectively change part of the image, you have to first set the circle. It’s difficult to move and set and is, well, a circle. This doesn’t work nearly as well as using a brush in iPhoto or Photogene. There’s not an option to save a changed version, either.
 Photoshop Touch ($9.99)
Yes, you read that right. PS Touch is $9.99 unless you can catch it on sale, which I’m doubting. This app was created by the Adobe people and is not just Photoshop for iPad. It was clearly designed from the ground up to be a touch-enabled version of Photoshop.
First, there is an AMAZING set of tutorials that you absolutely must do. These are full-on tutorials that walk you through some pretty complex editing. If you’re a novice, you’ll learn technique. If you’re an experienced Photoshop user, you will learn how to use this app to do things you do differently in Photoshop.
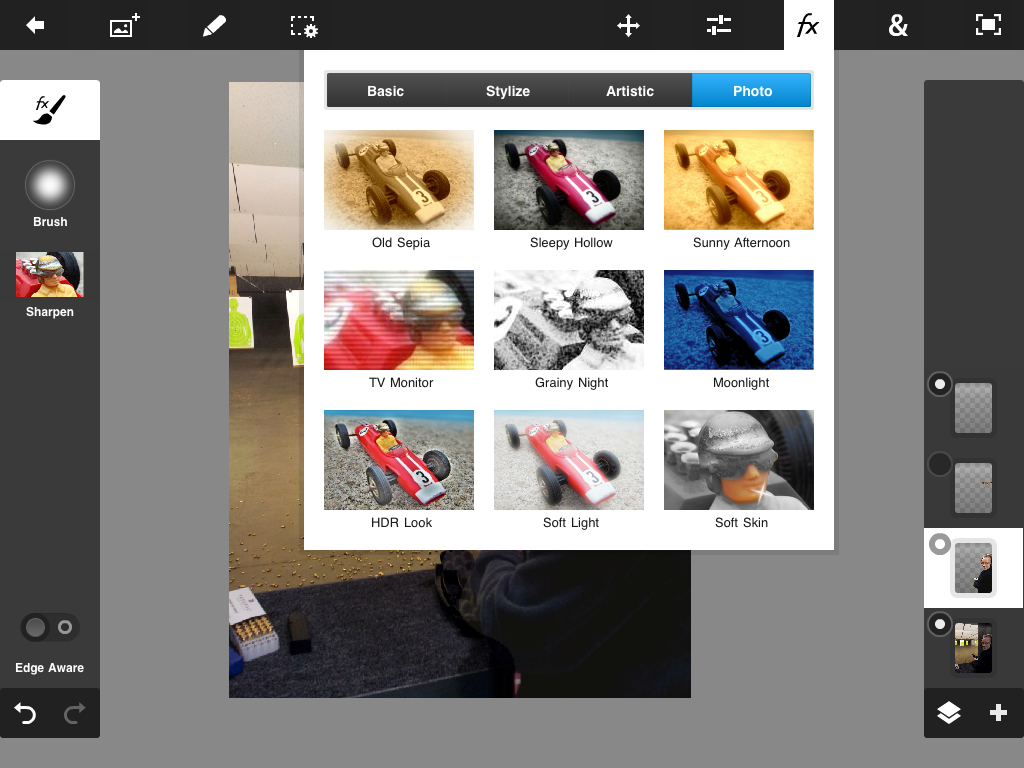
In the sample image, we used the scribble select tool around the body to create a new layer. We lightened that layer, darkened the back layer, and created other layers for the eyes and teeth. We sharpened the eyes, desaturated the teeth, and softened the skin.
There are a lot of useful and fun effects as well.
The bottom line is that like Photoshop, using this is more complicated than the other editing apps and it’s more expensive. But that’s because there are a lot more features and it will work better. It’s worth $10 just for the layering ability. This app is not going to replace your desktop app, but it’s the best option for editing on your iPad.
 PS Express (Free)
We wanted to consider a free photo editor, and because Photoshop made the best paid app, we’ll consider Photoshop’s free version – PS Express.
Right off the bat there is no tutorial but they try to sell you Effects and Border packs.
And this thing app offers only the basics.
They also have some fun effects that you can add.
But this app is not for the serious editor. It’s just simple and fun stuff.
Video
Your iPad is a decent photo editor, though as with photo editing, it is more difficult to do precise work on an iPad than on a computer using a mouse.
One thing you will need to consider before attempting to edit videos on your iPad is the source of those videos. Transferring video files to the iPad is not trivial. Learn how to transfer video taken on other devices to your iPad from CNET.
 iMovie ($4.99)
iMovie is the Apple-created movie editor made just for iOS devices. The download is huge, so make sure you’re on wifi.
iMovie has some fun themes and the ability to make your own movie trailer. It’s worth checking out. And since iMovie was made by Apple, you can be sure that there is a lot of multitouch functionality. Additionally you can create 1080p videos and output them to online services such as YouTube.
The problem that more advanced users will have with iMovie is that there isn’t a great tutorial and some of the functionality is lacking and unintuitive. Even if there is a feature that you need, you might not know how to do it. You also can’t share video in iCloud and can’t do much with any video that you didn’t capture. Texts are limited, as are themes and functionality.
Overall, iMovie is a good, solid editor that will give you high quality output, but it’s not the best app out there.
Avid Studio ($4.99)
Avid Studio is no longer available on iTunes. Corel bought out the consumer line of Avid editing tools in Q3 of 2012. If you still have the old Avid Studio app, there will be no further support and Corel urges you to buy their Pinnacle app.
Pinnacle Studio ($12.99)
Pinnacle Studio is a Corel app. Most of the reviews and articles that I read said the app was free, but they were written in late August to early September. Since the app is now $12.99 and I don’t do much video editing, I wasn’t willing to spend the money on it just to review it.
If you’re interested in hearing about Pinnacle Studio, read the following reviews:
You can also review this tutorial about how to use Pinnacle Studio.
Just by checking out the reviews, it seems that Pinnacle Studio has more features and functions and is easier to use. It’s not as stable as iMovie and doesn’t output 1080p video at this time. If you edit a lot of videos and want nice transitions, it’s worth the investment in Pinnacle Studio.
Update: We recently tried both iMovie and Pinnacle Studio while on vacation and prefer Pinnacle Studio.
The Bottom Line
If you’re looking for high-quality apps with great functionality, your photo editor should be Photoshop Touch and your video editor should be Pinnacle Studio.


