Whether you’re a new scuba diver that’s just discovering a new passion, or an experienced diver that is preparing for a dive trip, divers that travel have slightly different equipment needs than local divers.
You should consider yourself a traveling diver if you regularly fly to your scuba diving destination. Even if you dive locally every week, and only fly once a year, you might want to consider smaller gear to make traveling easier.
Content:
Flying to Dive
When you fly to your dive destination, you are subject to the limitations of airlines and the TSA. Airlines limit the size, weight, and number of bags that you can pack, or at least charge additional fees for additional or overweight bags. As a diver, you should pack bags to be underweight to leave a margin for the additional weight of wet gear on the return journey. You need to know that it is not uncommon for gear to be stolen or damaged in checked bags. Additionally, the TSA limits the liquids and tools that you can carry onto a plane. For example, you cannot pack a traditional dive knife or a large bottle of wetsuit shampoo.
When you fly to dive, you want to have the lightest, smallest gear that works for you. Additionally, you can choose to rent gear when you travel, and you most certainly will not travel with weights or tanks.
Protecting Your Gear
Any time that your gear is not in your possession, there is a chance that it will be stolen or damaged.
Before your dive trip, get insurance, such as DAN or DiveAssure to cover your trip. Insurance can cover dive-related medical issues, travel delays, lost and stolen gear, and even trip cancellation. Dive insurance companies offer policies for annual travel or trip-specific travel. Dive insurance websites provide lots of information, but if you need additional help deciding on a specific plan, contact the companies directly.

Buying Your Own Gear
As a new diver, you will likely rent gear during your certification dives, and for a few subsequent dives until you decide whether you want to invest thousands of dollars by purchasing your own gear. There are a few questions that you need to answer before you can decide what gear you need to buy:
- Do you prefer warm water diving or cooler climates? If you develop a love for cave diving or wreck diving, you might need a thicker wetsuit. Tropical divers might only need a dive skin. Alternately, for very cold diving, you might consider diving with a dry suit.
- Do you want to purchase your gear over time, or all at once? If you purchase a limited amount of gear every year, you can spread out the cost of your equipment. You can rent some gear, or buy inexpensive/used gear and then upgrade later. This will cost more over time. If you choose to purchase all of your gear up front, you can save on your total purchase price.
- Do you want to purchase new or used gear? You can save money on gear by purchasing used gear, but should consider maintenance issues. BCDs, computers, and regulators have important internal parts that might need repair or replacement.
- Do you have access to an authorized and reputable repair shop? Your gear is life support equipment. You are more likely to keep your equipment maintained and in safe working order if it is convenient. By purchasing gear from a local dive shop, you not only support the local economy, you know that you are buying equipment that the shop is familiar with and authorized to maintain.
- Do you bring lots of small equipment on most dives? If you always carry a backup computer, a flashlight, and other small gear that you keep stowed until you need it, a BCD with pockets might be important to you.
- Do you plan to do technical diving? You need specialized technical gear to dive doubles (two-tank system) or side mount tanks (good for diving in overhead environments). If you think you might enjoy cave diving, wreck diving, or decompression diving, you can initially buy gear that is adaptable for multiple configurations, or you will have to purchase additional sets of gear for the other situations.
In the following sections, we provide some guidance on how to choose the most important dive equipment and the author’s choice for the gear.
Open Water Set
When you take your Open Water Certification course, you will need to purchase boots, fins, a mask, and a snorkel.
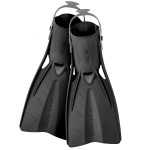
Boots and Fins – Choose low-top boots with thick soles that fit properly. Good boots aren’t that expensive and are useful for hiking in waterfalls, wading into the ocean or lakes, or other vacations even if you never dive again. Choose open-heel fins that fit with your new boots. Do some research if you can. If you believe you’re going to travel a lot, choose a sturdy and short travel fin that doesn’t weigh a lot.
Boots are best chosen in a shop where you can feel them and see what is comfortable for you walking around. My boot of choice is the Deep See 3/5 mm Men’s Aqua Purge Slipper.
I don’t know any long-term divers that use full-foot fins. Fins are difficult to choose because you really need to try them in the water. I have purchased 6 different fins (for two of us) ranging in price from $50-$150 and done dives with them all. My favorite fin is the Oceanic Accel Open Heel Fin. This fin was originally designed by Aeris, which was purchased by Oceanic. The sizes run a little large. I wear a women’s size US-8 and use an S fin. My daughter wears size US-8.5 and wears a S/M fin. I have now purchased 5 pairs of these fins (2 pairs each, plus a replacement pair when she lost a fin) and have three friends that purchased these fins after borrowing my spare pair on a dive trip. I cannot recommend them highly enough.
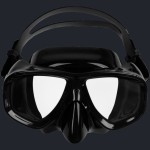
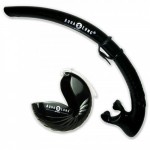
Mask and Snorkel – Get a high-quality mask and snorkel. Again, even if you never dive again, your love of the water means that you are likely to snorkel. Get a mask that will stay on your face in the shop without using the strap. Breathe and look around. If you wear glasses regularly (and have any trouble with contacts), choose a mask that can later be fitted with prescription lenses. Choose a low-profile mask so there is less air in your mask to clear and fog up. Add a neoprene mask strap. Those rubber straps pull and tangle your hair. If you snorkel a lot, get a really good snorkel. If you don’t like to snorkel, get an inexpensive snorkel. You will not use it for diving after your certifications. A pocket snorkel is basic, but it does the job if you’re stuck on the surface with no air in rough conditions.
Most divers that I know that have purchased a mask after diving for years prefer a mask with a black skirt. Also choose a black snorkel. Clear and light-colored neoprene gets gross after several dives. Also, nobody that I know dives with a regular snorkel. It gets in the way. I own two of the Halcyon Low-Profile Dual Lens Mask (purchased locally). The black skirt is very soft and comfortable. The dual lenses make it easy to add prescriptions with different prescriptions for each lens. The strap attachment is plastic and broke after around 75 dives. I shopped around and couldn’t find anything as comfortable as this mask. I bought another mask with prescription lenses from my local dive shop and the shop replaced the broken piece on my original mask.
TIP: New masks have a chemical film on them that can cause major fogging when you dive. Before your first dive, scrub the inside of your lenses with gritty toothpaste. If that does not stop fogging even with the use of defog, talk to your dive instructor. He or she will likely know how to burn the inside of the mask with the lighter to fix the problem.
I do snorkel occasionally and the Cressi Supernova Dry Snorkel is a high quality dry snorkel that isn’t too intrusive and is affordable for $20. My Aqua Lung Sport Nautilus Roll Up Snorkel fits nicely in my BCD pocket. I’ve never had to use it, but I’m glad to have it available.
Dive Computer
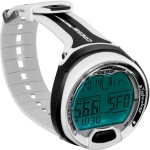
Dive computers vary wildly in size, features and price. However, when you first learn to dive, you really need a simple computer. You have enough to worry about while keeping track of your depth, your air levels, your buoyancy, your dive buddy, and your surroundings. A simple dive computer requires only that you jump in for it to start logging your dive. It beeps when you ascend too quickly. It beeps if you go too deep. You might have to manually time your safety stop. When you come to the surface, it stops the dive automatically. It has a replaceable battery. It tells you how long you have been on the surface. Having only one button simplifies your interaction with the computer. Additionally, by buying a less expensive computer, you save money up front and when you upgrade later, you can use your old computer as a backup; storing it in your BCD.
As you become a more experienced diver, you might want to dive Nitrox or Trimix. You might want to connect to your tank for air integration, meaning that you can watch your air consumption on your dive computer and get low-air alerts. You might want to have an electronic compass. You should consider whether you want a watch-style wrist mount computer or a console mounted computer. If you go with a console computer, you should pack a backup air pressure gauge to use in the event of a computer failure.
I started with the inexpensive Cressi Leonardo and know lots of divers that still use this computer. I removed the watch strap and keep the puck in my BCD. After around 80 dives, I had to replace the battery and purchased the battery at my local drug store. My biggest complaint was that it was hard to read in low-light environments.
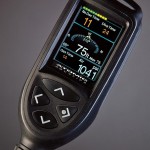
When I was ready to upgrade my computer, I knew that I wanted a console computer. I wanted it to be hose-mounted air-integrated. In other words, I did not want a wireless receiver on my tank. The first person that I knew that bought one of those bumped it and broke it while using it. I wanted lots of information and a large, color, easy-to-read screen. I wanted my buddy to be able to read my computer without me sticking it up their nose. I did a lot of research and decided to buy the Atomic Cobalt 2. Based on reviews, I was worried about the reliability of the computer, so I bought it at an authorized dealer located within 100 miles of my home. I bought two of them and a dive friend bought a third one at the same time. On the second dive trip (within 25 dives) one of the three computers completely failed on a dive. After around 30 dives, the down button stopped working on the second computer. The third (and least cared for) computer has no issues. All three were unhooked and capped immediately after dives (while still on the boat). All three were rinsed in fresh water after every dive. All three have been back in the shop and serviced, and are now working. I love this computer. The usability can’t be beat. But there are more reliable computers out there and this thing costs $1200. The bottom line is that I would try to find a more reliable computer with similar usability, but now that I own it, I make sure to carry a backup computer on every dive.
Regulator Set
Your regulator set is the single most important piece of equipment that you can own. This is your life support equipment. Prices range from a few hundred dollars to thousands of dollars for a regulator set. Do not buy the cheapest set that you can find. While even the most inexpensive regulator sets will get the job done, better sets are less likely to leak over time, given the sealed chambers. Better sets are lighter, meaning that you don’t have to clench your jaw as much. Higher-end regulator sets feature swivel mounts, breathing adjustment knobs for different airflows at depth, smoother breathing in all depths, and better purge valves.
Do research on sites that don’t sell regulators and read articles such as The Best Scuba Regulators Under & Over $500 Tested By ScubaLab, and if possible, talk to your local dive shop about testing a couple of regulator sets on the list.
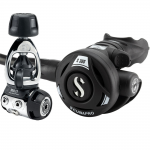
I purchased my reg set based on the recommendation of my local dive shop. I asked for a mid-range priced set. My full set included a SCUBAPRO MK11/S360 Regulator with a Sherwood Octopus and cost over $500, though not significantly. My experience with this set is that it is reliable and I have had it serviced once per year for about $150 and have had zero problems. However, it’s a little heavy, the hose is a bit inflexible and a better hose and swivel would make it easier to move around. It’s difficult to breathe upside down (a move I do often to get a great photo or check on my dive buddy). The breathing adjustment doesn’t seem to make a difference.
If I were purchasing a reg set now, or when I eventually upgrade, I would get a better set. I’m happy with the quality of my SCUBAPRO set and the brand gets high reviews. I would probably purchase the SCUBAPRO MK25 EVO/A700 Regulator.
Wetsuit
Wetsuits vary in thickness from a dive skin that is no thicker than a swimsuit up to around 7mm. The thinner the suit, the easier it is to put on, and the less warmth it will provide. I once dove in a skin in 85 degree (F) water while some other divers used a 5mm wetsuit. It’s really a case of personal preference. Check it and see (if you’re hot-blooded) and purchase a suit of appropriate thickness. It’s a good idea to rent a few suits to determine the thickness that is best for you. Also, learn at what temperature you start feeling chilled.
You also need to consider how your wetsuit fits. Depending on your body shape, different brands fit differently. A well-fitted wetsuit needs to fit properly and a little snug in order to trap a thin layer of water next to your skin to keep it warm. It must seal nicely around the neck, ankles, and wrists so that warm water cannot escape and cold water cannot get inside. It must also be comfortable so that you don’t have restricted movement underwater or the distraction of adjusting your suit while you dive.
If there is a dive shop in your area that keeps dive suits of your desired thickness in stock, start there. It’s quicker and easier to try on different brands, and you can support your local economy. If you can’t find the right fit in the store, there are reputable websites that have great return policies. You can purchase several brands, styles, and sizes and return the items that don’t fit.
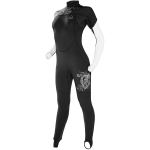
I do most of my dive travel to warm climates and use the Sub Gear Sun and Fun 0.5mm dive skin with SPF 50:
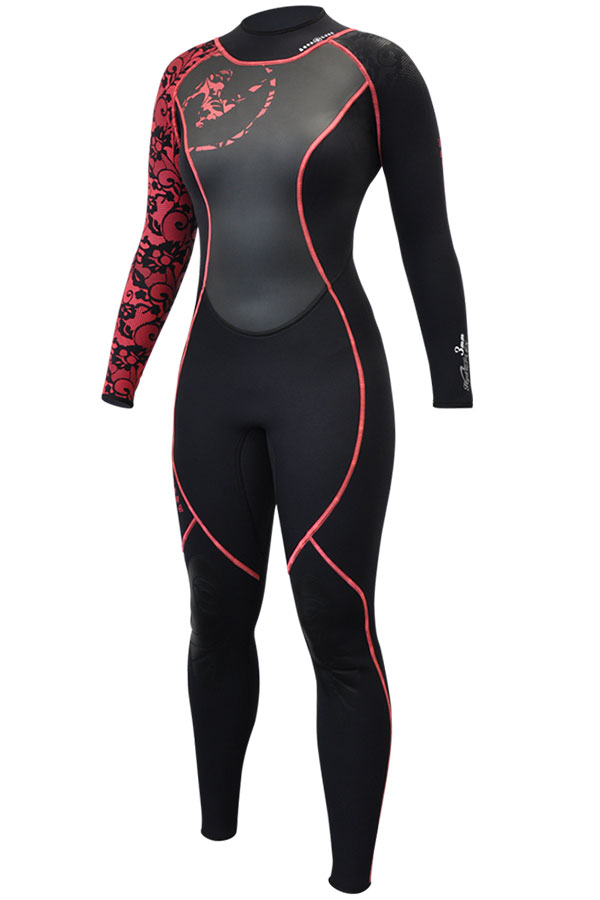
For trips with water temperatures below 80 degrees (F), I use the Aqua Lung HyrdoFlex 3mm wetsuit (purchased locally):
Buoyancy Compensation Device (BCD)
Ideally, you should rent different types of BCD and determine what features are important to you. For example, depending on your body type and your associated buoyancy issues, you might prefer a back-inflate BCD. Your preference for weight distribution is also a factor, depending if you want integrated weights with pockets on the back or you prefer a weight belt. If you like big pockets, you might prefer a vest style BCD. If you don’t like feeling constricted, you should try a technical BCD. Technical BCDs also give you the flexibility of interchangeable parts so that you can dive single tanks or side mounts. If you plan to travel a lot with your BCD, you are going to want the lightest BCD that you can get that will take up the least amount of room in your suitcase.
It’s hard to know what type of BCD that you like until you’ve tried BCDs with different features and have experienced diving. Additionally, many online dealers will not accept returns for gear that has been used. It’s difficult to tell how well you like a BCD until you have dived with it. Renting is the best option.
My first BCD was the Oceanic Hera that I purchased locally, and before I was certified. I tried on all of the rental BCDs in the dive shop where I got my certification, and all of them were unisex BCDs that did not fit properly. BCDs designed for women have a higher chest strap and can better fit an hourglass figure.
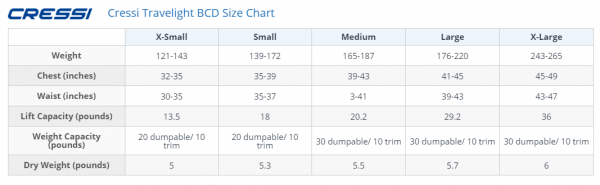
After 25+ dives, a couple of trips, and exactly ONE international flight, I decided try on and purchase a travel BCD. I have taken the Cressi Travelight Women’s BCD on over a dozen international dive trips. I purchased another one for my Rescue Diver daughter, and she has loved it for a half dozen trips:
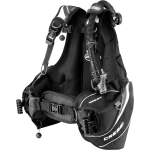
I like it because it has large pockets on the front for keeping my flashlight and spare dive computer. I have muscular legs that naturally drop and interfere with my buoyancy, so I can distribute about half of my weight to the weight pockets on the back of the BCD. I also like that the back dump release is on the front of the vest so that I don’t have to feel around my butt to dump from my bottom valve. The extra top dump valve is nice so that you don’t have to try to drop air from the auto inflator hose, which can trap air. I also like all of the D clips that are easily accessible to clip on/off items while diving. The fit is great and I always clip my console between the cumberband and the waist clip to keep my profile trim and make the console gauges easy to view by looking down.
Fit/Size – For men, this BCD fits as expected. Women, look more closely. Women, go down one or two (or even 3!) sizes. The reason for this is that when you buy clothes, you must accommodate your bust and hips. This BCD clips above your bust and around your waist. It also adjusts from waist to shoulder along the outside of your bust. My body is short-waisted with an hourglass figure. I bought this BCD when I was 5’5″ weighing around 185lb. The medium was too large for me and I had to purchase a Small (S). Since then, I’ve lost weight, though I’m still considered overweight. My measurements are currently: above the bust 35″, bust 41″, waist 33″, and waist-to-shoulder (outside the bust) 15″. My Small (S) no longer fits. I have to wear the shoulder straps as tight as they go, and the waist straps as tight as they go. And it was still slipping around me. Because of this I had to purchase an XS. So, women, when you view the size chart, ignore the weight row, measure your chest ABOVE your bust, and use that measurement and your waist measurement to determine what size to purchase.
Gear Bag
There are several types of bags that you can use to carry your dive gear. We do NOT recommend getting an expensive rolling gear bag because thieves in International Customs target expensive bags. However, you do need to have a bag for hauling your gear from your room to the dive shop and sometimes from dive shop lockers to the boat. Choose a mesh bag so that you can easily dunk your gear and the gear will still drain. You can get a backpack-style that is easier to carry, but drips down your back when you carry it. Or, you can get a duffle-style bag with a large zipper opening. These bags fold down to a small size when dry and take up little space in your carry-on. You can also get a hybrid roller bag. When I travel, I take a heavier mesh roller bag inside my checked bag, and a lightweight mesh bag in my carry-on (in case my checked bag gets lost).
We’ve used the Tusa Roller Mesh Bag on two dive trips. It worked well for us and seems to be holding up well. The sturdy top handle and wheels meant that carrying the bag down the dock required little effort. The weight of the gear is balanced in the non-mesh V over the wheels, making the weight easy for one person to balance. The wide plastic mesh made it easy to dip the entire bag into a rinse tub and then hang it in at the end of each day to drip dry. When we had to carry our gear up a flight of stairs or across sand, the additional canvas handle on the other end of the bag made it easier for two people to carry. There is also a top handle and a detachable shoulder strap if one person needs to carry the bag. The wide u-shaped opening in the bag made it easy to lay fins and BCDs in the bag. We could probably fit gear for 3 people in this bag. After 2 trips, there are no rips or tears in the mesh, and the zipper is holding up well and not rusting. The wheels are a little scratched, but no big deal. This bag does fold down a bit, but is still pretty large at roughly a 12″ x 12″ x 14″ rectangle.
Two of us share this great Tusa Roller Mesh Bag
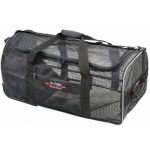
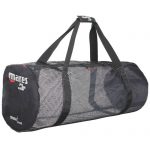
My backup bag that goes in my carry-on is the Mares Cruise Mesh Duffle Bag:
Flashlight
Flashlights are useful not only for night diving, but for diving in caverns, wrecks, and even looking under ledges on regular dives. You can always pick up an inexpensive dive light and later use it as a backup when you upgrade. Do some research and learn about the features of flashlights before you make your purchase. LEDs tend to use less energy than halogen lights, which means a smaller battery. Flashlights that run on AAA batteries fit better in a carryon. But how many extra batteries will you need to pack? You have to remember to recharge a lithium battery. Spot lights are nice, but blow out images on cameras. Some flashlights offer both wide and narrow beam lights at the same time. Consider the materials – metal lights last longer than plastic, and the quality of the seal matters.
We started with very inexpensive lights ($5) and later moved up to the Dive Rite BX-1, a solid metal AAA-battery light that isn’t amazing, but works well in all situations. However, I’ve since learned that I don’t like twist -on and -off flashlights. Many times I nearly untwisted the top because I tried turning it on the wrong way. Finally I did and flooded a flashlight. Before my last trip, I tried the Big Blue AL1100WP. This wide-beam flashlight worked VERY well for looking into a dark wreck or on a night dive, but was nearly useless for looking under ledges. For my next trip, I’ve purchased the Big Blue AL1100NP for that purpose. I also picked up some extra batteries to charge and take with me. I expect that I’ll take the narrow beam with me all of the time for looking under ledges and into holes, but use the wide beam primarily for night dives and cavern diving. These flashlights are small enough to pack in a carry-on and store in a BCD pocket, but sturdy enough to take a beating.
Underwater Camera
There are a large range of underwater cameras available to dive photographers. You can choose from a simple point-and-shoot camera that takes solid photos, to a GoPro that takes amazing video. You can buy an underwater housing for your DSLR, or purchase professional underwater photography equipment. And don’t forget about lighting – the key to a quality photograph. If you’re looking for higher-end equipment, do your research and even take an underwater photography class.
We recommend that you keep it simple. GoPro cameras are relatively inexpensive, small to pack, take excellent video, and have inexpensive dive housings. You can put a camera on a pole to get close shots of coral and wildlife, or get great wide-angle shots of the underwater vista. We recommend that you learn to hold the camera steady, take only video, and you’ll never miss a shot. It’s easy to turn video into photos, as well. For additional information, see Taking your iPad on Vacation or Taking Your MacBook Air on Vacation. A lot of the information applies if you are using an Android device or a Windows laptop.
We own the GoPro Hero5 Black purchased in 2016, and the GoPro HERO4 Silver Edition purchased in 2014.
Camera Accessories
I’ve tried many different poles and and have found out what DOESN’T work. The poles with the thick, foamy handle get squishy, heavy and take forever to dry after a dive. Telescoping poles are great because they’re small in your bag or on the boat, but can get your camera into a position for some really great shots. However, I have tried poles from $4 to $70 and all of them have issues. Good luck getting all of the salt water out of a metal pole after every dive. They WILL rust or collect salt and sand quickly. You will extend and retract the pole a LOT underwater. The poles that require twisting knobs to extend stop working over time. The interlocking models with the plastic balls that lock the telescope in place, like this $33 GoPole Reach 14-40″ Extension Pole are nearly impossible to use underwater. Simple interlocking telescopes like this $4 Gopromate are lightweight, but flimsy and can bend and often don’t work for an entire trip. The Floureon lasted about two trips for $13. The mount will get a little loose and flop around and you COULD lose your camera. This almost happened to me once. The last telescoping design is the traditional lever lock extenders used on this $18 Arespark, but poles like this are big in your suitcase, large, heavy, and take too long to extend. The $69 SeaLife was a little lighter than the Arespark, but had the same problems, plus the tiny metal loop holding the wrist strap broke on the first dive. This $30 GoPole Floating Extension Pole was terrible. It was hard to extend and retract and constantly filled with water during that process, defeating the purpose of a floating pole.
You should also consider purchasing Anti-Fog Inserts, 8 32GB and 64GB Micro SD cards in a Memory Card Holder, and Wasabi backup batteries with dual charger for your GoPro.
When To Buy Gear
You can purchase a few things at a time, or everything at once. Depending on the type of diving that you enjoy and how often you dive, there are certain checkpoints that you should pass BEFORE you buy gear. I know someone that almost passed out after their confined water class that didn’t go on to get the open water cert. I know someone that got nosebleeds on every dive AFTER they got their certification, and has not dived since. I know someone that developed a pulmonary embolism (blood clot in the lungs) after their first international dive trip. I know hundreds of people that have dived for years with no problems. Until you have at least 25 dives in your log book and have taken at least one international trip, do not purchase more than the basics. Rent your gear.
Open Water Certification
Most quality dive training operations provide you with rental gear as part of your certification. They will likely have a shop that sells a wide array of gear. Do NOT purchase more than you have to until after you get your certification. If the rental gear is uncomfortable when you try it on, keep in mind that you are paying a lot of money for your certification and it is in the best interest of your dive shop to make sure that you like it. Or at least that you don’t hate it. They will likely work with you and let you do your cert dives (for a small fee or even for free) with a BCD or wetsuit that they sell. Most people that pass their certs dive more and buy gear. You should only need the following gear to get your open water certification:
| Item | Use | Recommendation | Cost |
|---|---|---|---|
| Boots | For walking to dive sites and to protect feet from fins | Deep See 3/5 mm Men’s Aqua Purge Slipper | $30 |
| Fins | Buy small and sturdy fins for travel and dependability | Oceanic Accel Open Heel Fin | $100 |
| Mask | Close to your face with a black skirt for the best view | Halcyon Low-Profile Dual Lens Mask | $75 |
| Mask strap | To protect your hair from being pulled or tangled | Neoprene Mask Strap | $11 |
| Snorkel | To breathe smoothly when you snorkel in rough water | Cressi Supernova Dry Snorkel | $25 |
| Travel Snorkel | To store in your pocket for emergencies when you dive | Aqua Lung Sport Nautilus Roll Up Snorkel | $30 |
| Total: | $271 |
First Dive Trip
If you can, do some local diving to test rental and borrowed gear and to work on your buoyancy. However, the real test for whether you’re going to keep diving and should invest in serious dive gear is your first dive trip. We recommend a few small things to make your trip more comfortable, but don’t invest serious money. If you’re traveling to a high-quality dive resort (like a PADI 5-Star resort), it will likely have good gear for you to rent. Make sure that you have access to a dive computer. You might consider purchasing a used computer and then reselling it if you don’t continue diving. You can contact the dive shop before your trip and ask what models and sizes of equipment that they carry. This is particularly important if you need a very small or very large size, or have an unusual body shape that is hard to fit. You can always rent local gear and pack it with you on your trip. The following list includes items to make your first dive trip more comfortable, in order of most important to least important:
| Item | Use | Recommendation | Cost |
|---|---|---|---|
| Passport | To travel internationally, apply for a passport at least 6 weeks before your first trip | U.S. Dept of State | $135 |
| Hat or Headband | Keep your hair from tangling or flying around when you dive, and keep sun off your head between dives | Adjustable UV 50+ Swimband
OR CoCo Big Oh! |
$18
OR $27 |
| Bun restraints | Keep your hair in a tight bun when you dive | Goody Simple Styles Spin Pin (3 pair) | $13 |
| Scuba socks | To prevent blisters and slide into a wetsuit more easily | Lycra Sport Sock | $9 |
| Bonine | To prevent seasickness, take 1-2 every morning beginning the day before your trip | Bonine Tablets-Raspberry | $7 |
| Lip balm | To prevent and treat chapped lips | NIVEA Kiss of Smoothness | $2 |
| Microfiber towel | To dry you or your gear at the dive site; this towel dries quickly so you can use it everyday | Microfiber Towel with Hanging Loop | $10 |
| Mask defogger | To keep your mask from fogging during dives; get a travel size bottle | 500 PSI Mask Defog | $9 |
| Ear drops | To treat swimmer’s ear | Mack’s Dry n Clear | $3 |
| Vented earplugs | If you are prone to swimmer’s ear, consider vented earplugs | Doc’s ProPlugs | $17 |
| Cold diving hood & gloves | To keep your head and hands warm when diving in cooler waters | Neosport 2.5mm Sport Beanie | $14 |
| Shoe bags | To separate clothes and wet gear in your suitcase | Waterproof Nylon Travel Shoe Bags (4) | $13 |
| Zipties | To secure gear; especially useful for rental gear | Releasable/Reusable Zip Ties | $9 |
| Total: | $268 |
25+ Dives
After you have taken your first dive trip and have logged at least 25 dives, you should have an idea of the type of diving that you prefer, the features that you want in your gear, and how much money that you are willing to spend. The following list is ordered from the most important to least important to own. In other words, if you only buy one piece of equipment, and rent everything else that you need, buy the one at the top first.
| Item | Use | Recommendation | Cost |
|---|---|---|---|
| Dive computer | To avoid DCS and conveniently track your dive profile; many dive operations now require that you use a computer | Cressi Leonardo | $200 |
| Regulator set | To control the quality of your breathing underwater, purchase and maintain your own life-saving gear | SCUBAPRO MK25 EVO/A700 Regulator | $885 |
| Octopus | To provide spare air to a dive buddy in distress | Sherwood Octopus | $125 |
| Mouthpiece | To keep a secure, but comfortable grip on your regulator while diving | Aqua Small Soft Bite Silicone Mouthpiece | $6 |
| Octi clip | To keep your octopus clipped to your BCD, but still pull away easily when needed | ScubaPro Octopus Retainer and Plug with Clip | $7 |
| BCD | To comfortably control your buoyancy underwater (Note: The recommended BCD is on closeout for $330.) | Cressi Travelight Women’s BCD | $440 |
| Dive Skin | To protect your skin from sand, sun, and critters during warm water dives | Sub Gear Sun and Fun | $89 |
| Wetsuit | To keep you warm in slightly cooler water, and to protect your skin | Aqua Lung HyrdoFlex | $195 |
| Gear bag | To carry your gear on dive trips; mesh bags are lightweight and make it easy to rinse gear between dives | Mares Cruise Mesh Duffle Bag | $30 |
| Dry bag | To keep phones, camera batteries, and clothes dry while on a boat or in the rain | 10ml and 20ml Dry Bag Set | $20 |
| Paint pen | For marking your gear, such as your weight pockets, and for making your fins easier to see | Testors Enamel Paint Marker | $8 |
| Personalized stickers | Attach waterproof stickers to non-porous dive gear | Personalized Waterproof 3M Sticker Labels | $25 |
| Flashlight | For looking into holes, under ledges, and when diving in low-light environments | Dive Rite BX-1 | $75 |
| Wetsuit shampoo | For getting the stink out of your gear when you get home (Use Woolite packs on your trip, as needed) | Odoban Odor Eliminator | $10 |
| Underwater camera | To capture video and/or photos of your dive adventures | GoPro HERO4 Silver | $330 |
| Camera batteries | To keep the camera running all day | Wasabi Batteries & Charger | $20 |
| Camera memory cards | To use one card for each day of diving ($23 each), purchase at least 6 cards and a Memory Card Holder ($10) | Sandisk 64GB Class10 Micro SD Card | $150 |
| Camera defog strips | To keep the inside of your camera housing from fogging up while underwater | Anti-Fog Inserts | $11 |
| Camera pole | To get close-up video of critters without scaring them off; or to take a selfie | Arespark Monopod, Extends to 50 Inches | $18 |
| Clips and carabiners | To quickly access gear by clipping it on and off your BCD | Double Ended Snaps | $3 |
| Emergency surface whistle | To signal for help on the surface; keep it in or on your BCD | Whistle | $6 |
| LED light stick | For night dives so that your buddy can spot you (buy two) because some protected reefs do not allow chemical sticks | Trident LED Light Stick | $24 |
| Line cutter | To free a tangled diver or critter because you can’t take a knife on a plane | Dive Rite Line Cutter | $19 |
| Surface marker buoy | To signal for a boat on the surface; purchase one that can be inflated by your octi | Surface Marker Buoy | $25 |
| Travel clothesline | To add extra hanging space for your wet gear | Travel Clothes Line | $6 |
| Gear box | To store your gear in a closet at home and to lug it to local dive sites | Wheeled Storage Box | $60 |
| Total: | $2787 |
Long-Term Gear Purchases
Soon, you’ll have a LOT of gear:
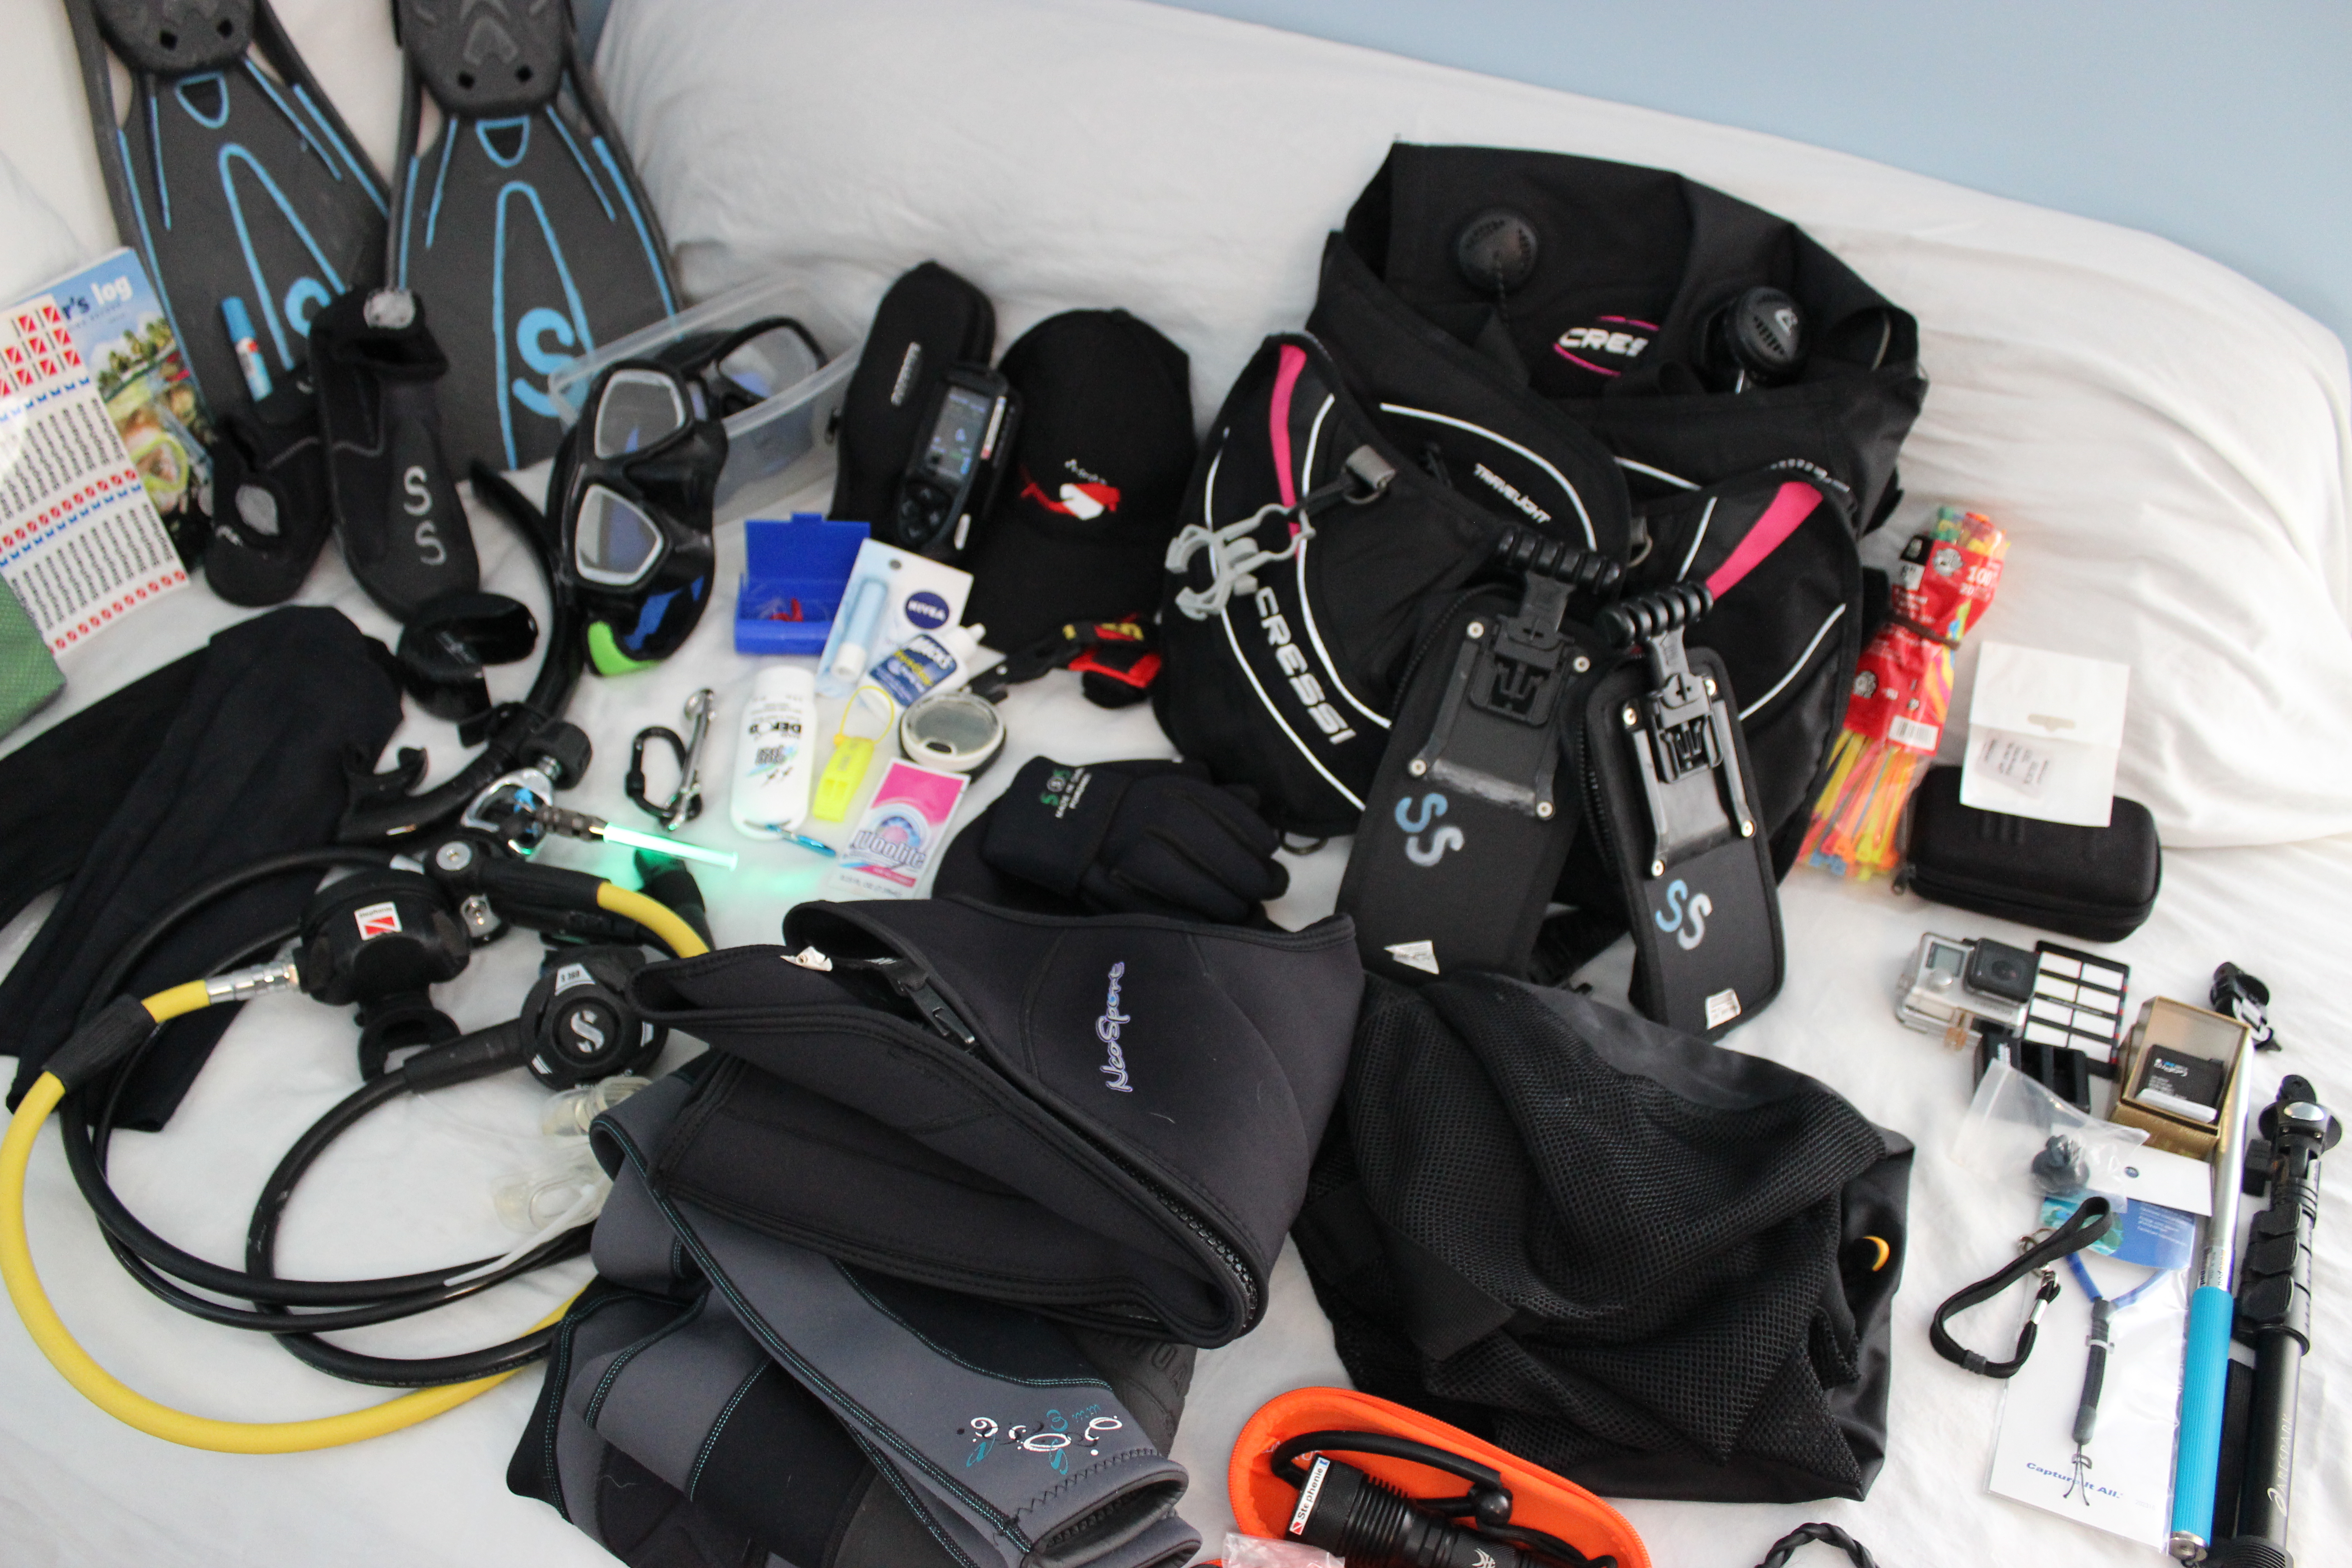
Over time, you will need to replace and repair your gear. Consider learning to service your your regulator set, for example. You might want to upgrade to better equipment. You can keep your old gear as backups, give it to a new diver, or even sell your used equipment.


